Introduction
The Organizational Account, as well as all admin-role accounts, have access to the Recurring Events section. This functionality will help you create and manage long-term course schedules since it will automatically create recurring events for every specific day of the week for as long as you require, instead of creating every event manually one by one – which is a great time-saver. This article will show you all the steps and tips on how to create a Recurring Event in the LMS.
First, let us find out where we can create such a Recurring Event. The button that will allow you to create or start an event is located on the Dashboard, and in the upper left corner of the screen. As stated, this functionality is available for Organizational Account and admin-role accounts only. Teachers and students do not have access to it, so it won’t be visible for any of them.
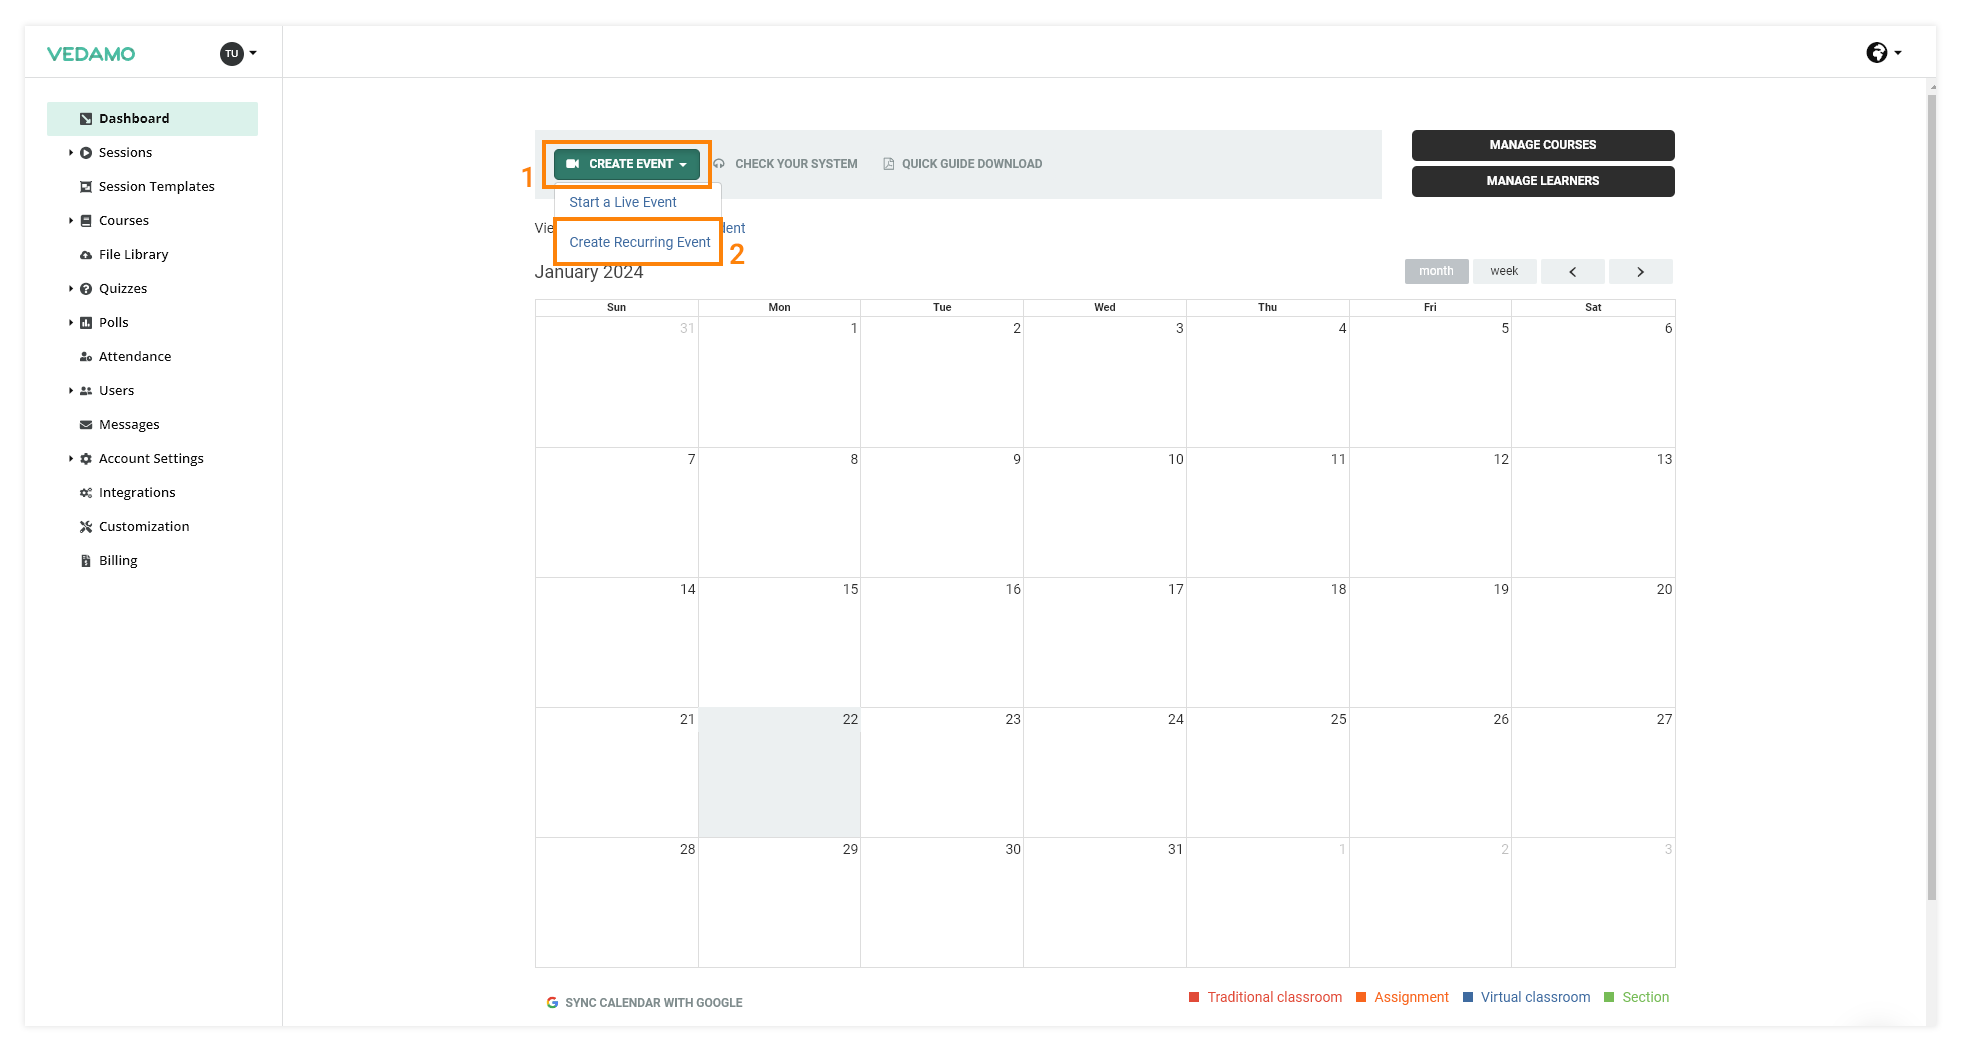
As soon as you click on that button, you will have to choose the action you would like to execute – either to create a Recurring Event or start a Live Event. This article is a guide on how to create one, so let’s stick to that action.
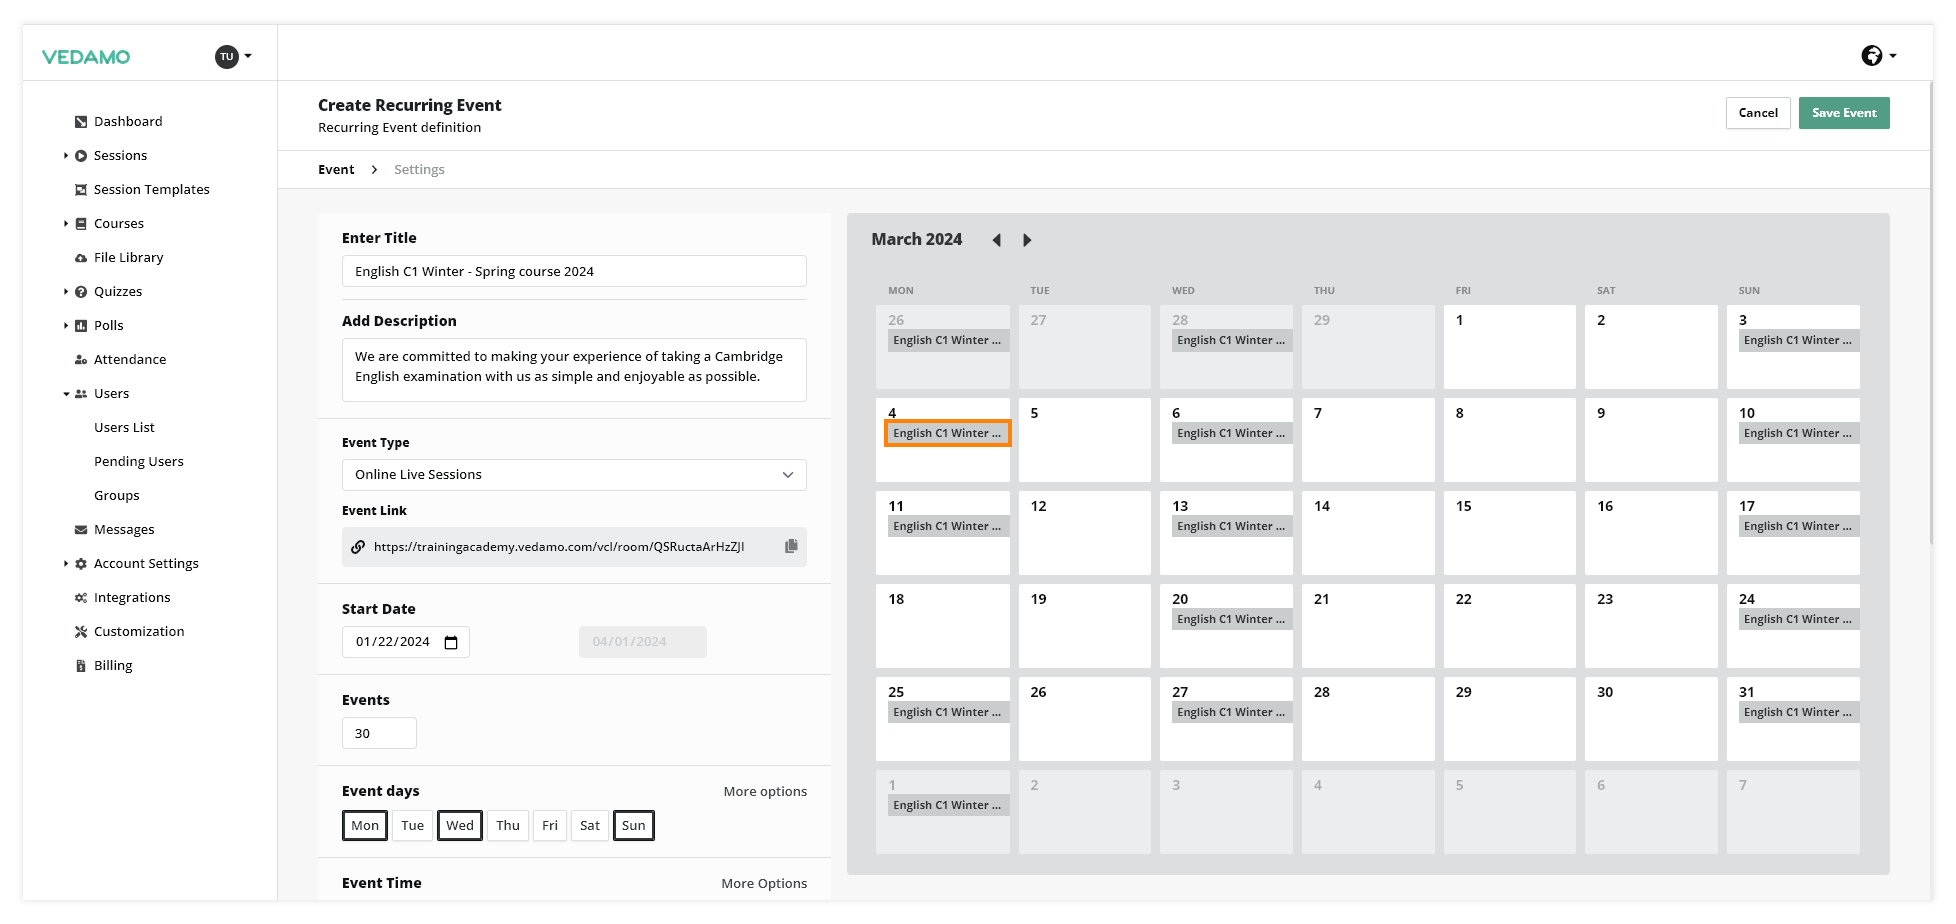
Upon choosing to create a Recurring Event, you will be redirected to the section itself in order for you to start working on it. On the left side of the screen you will see all the options available, and on the right side – the dashboard calendar with all the events you are currently creating or you have created already.
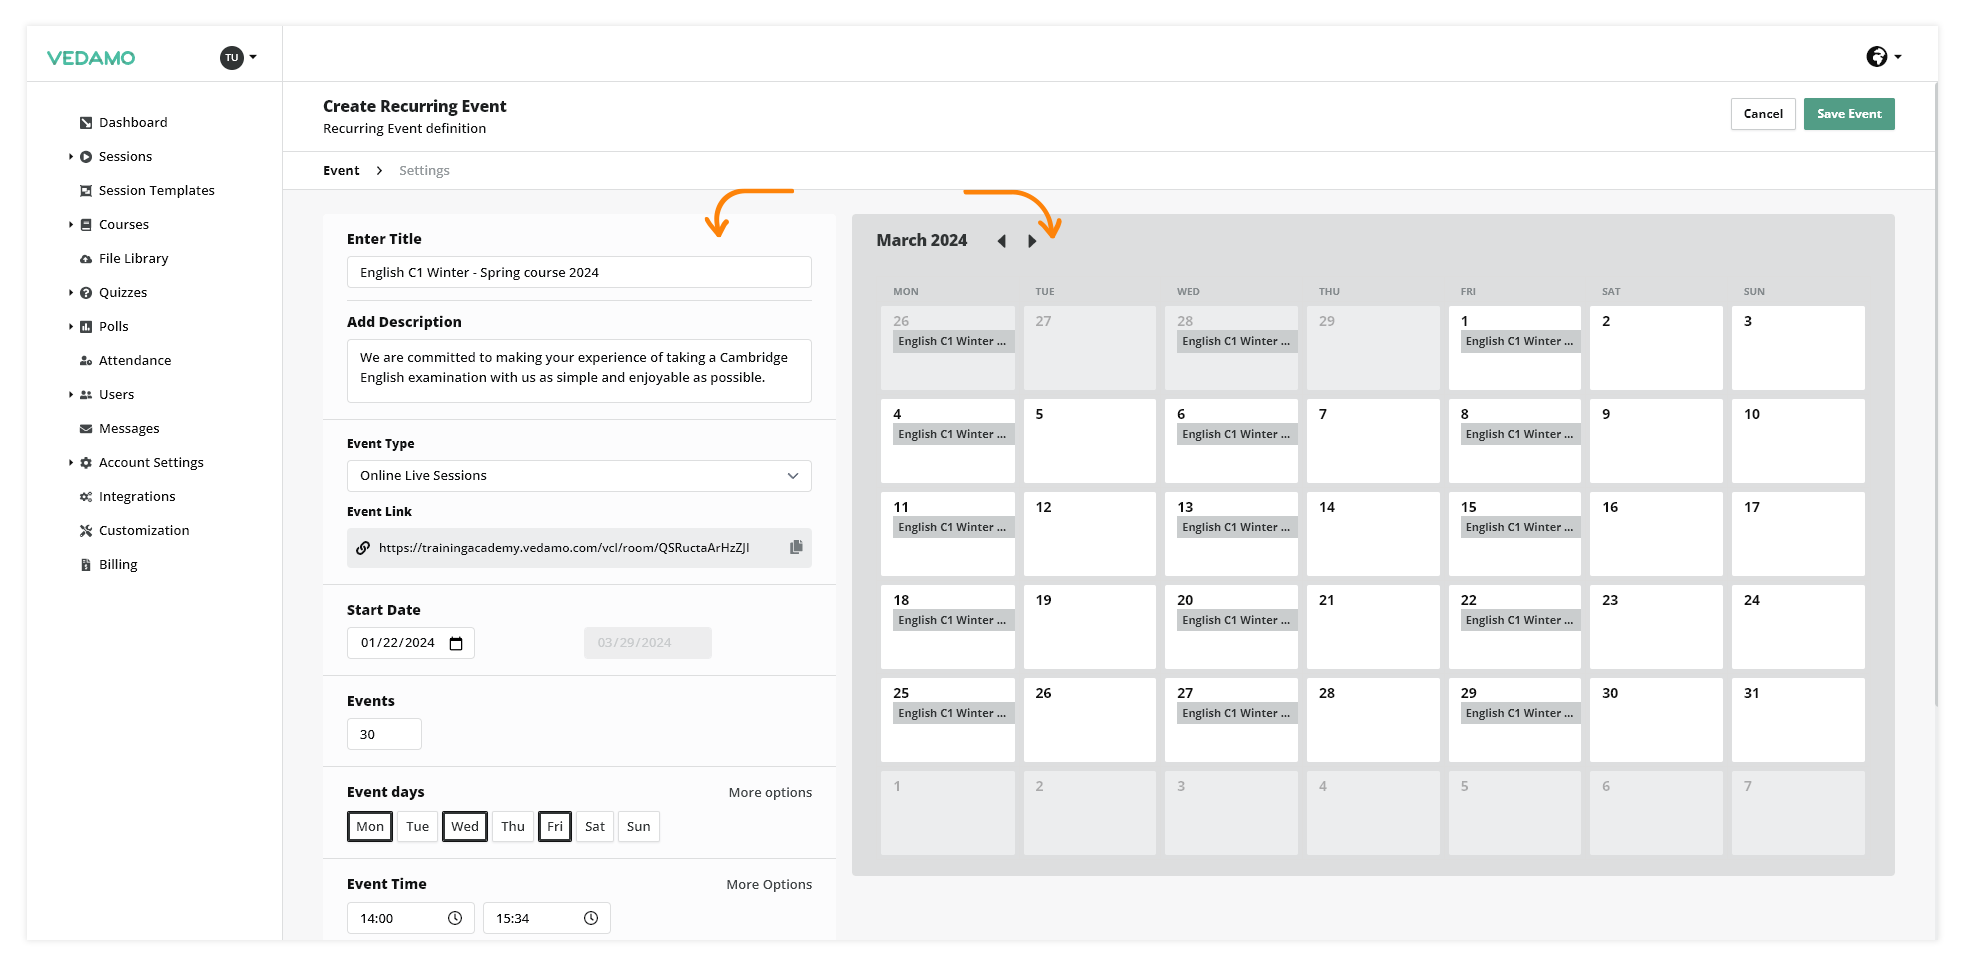
Now let’s start creating the Recurring Event. First, provide a Title for it, and then, you can add a brief Description in order to provide helpful information about it. However, providing a Description is purely optional, not mandatory. As soon as you give the Recurring Event a Title, it will automatically become visible on the calendar presented on the right side of screen. Bear in mind that this Title will be set to all events (lessons) included in this Recurring Event.
When you are done providing a Title and Description, you can move on to the next step – choosing the type of your lessons.
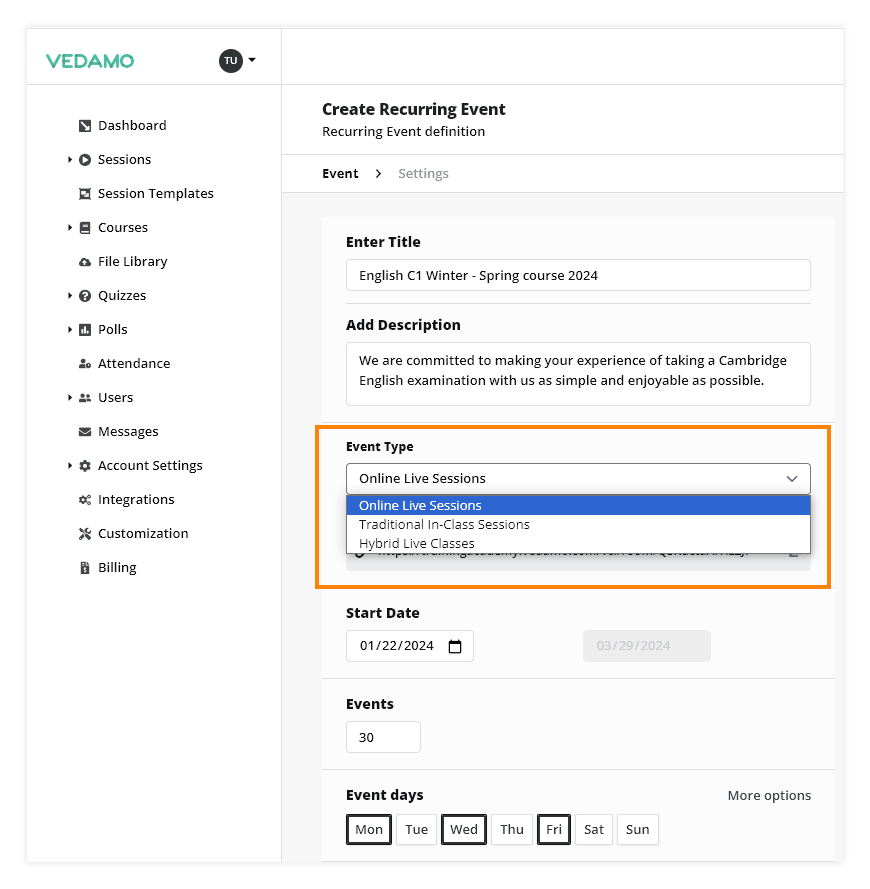
You can choose between three different types of Recurring Event – Online Live Sessions, Traditional In-Class Sessions and Hybrid Live Classes. If you are not sure what type of event you need, please see the short description below:
The online live session is a virtual gathering where all participants take part via their own devices and engage in interactive activities, discussions, or presentations.
In a traditional in-class session participants are face-to-face in a physical classroom setting, whereas a hybrid live class combines elements of traditional in-person instruction with online components, allowing both physical and remote participation simultaneously.
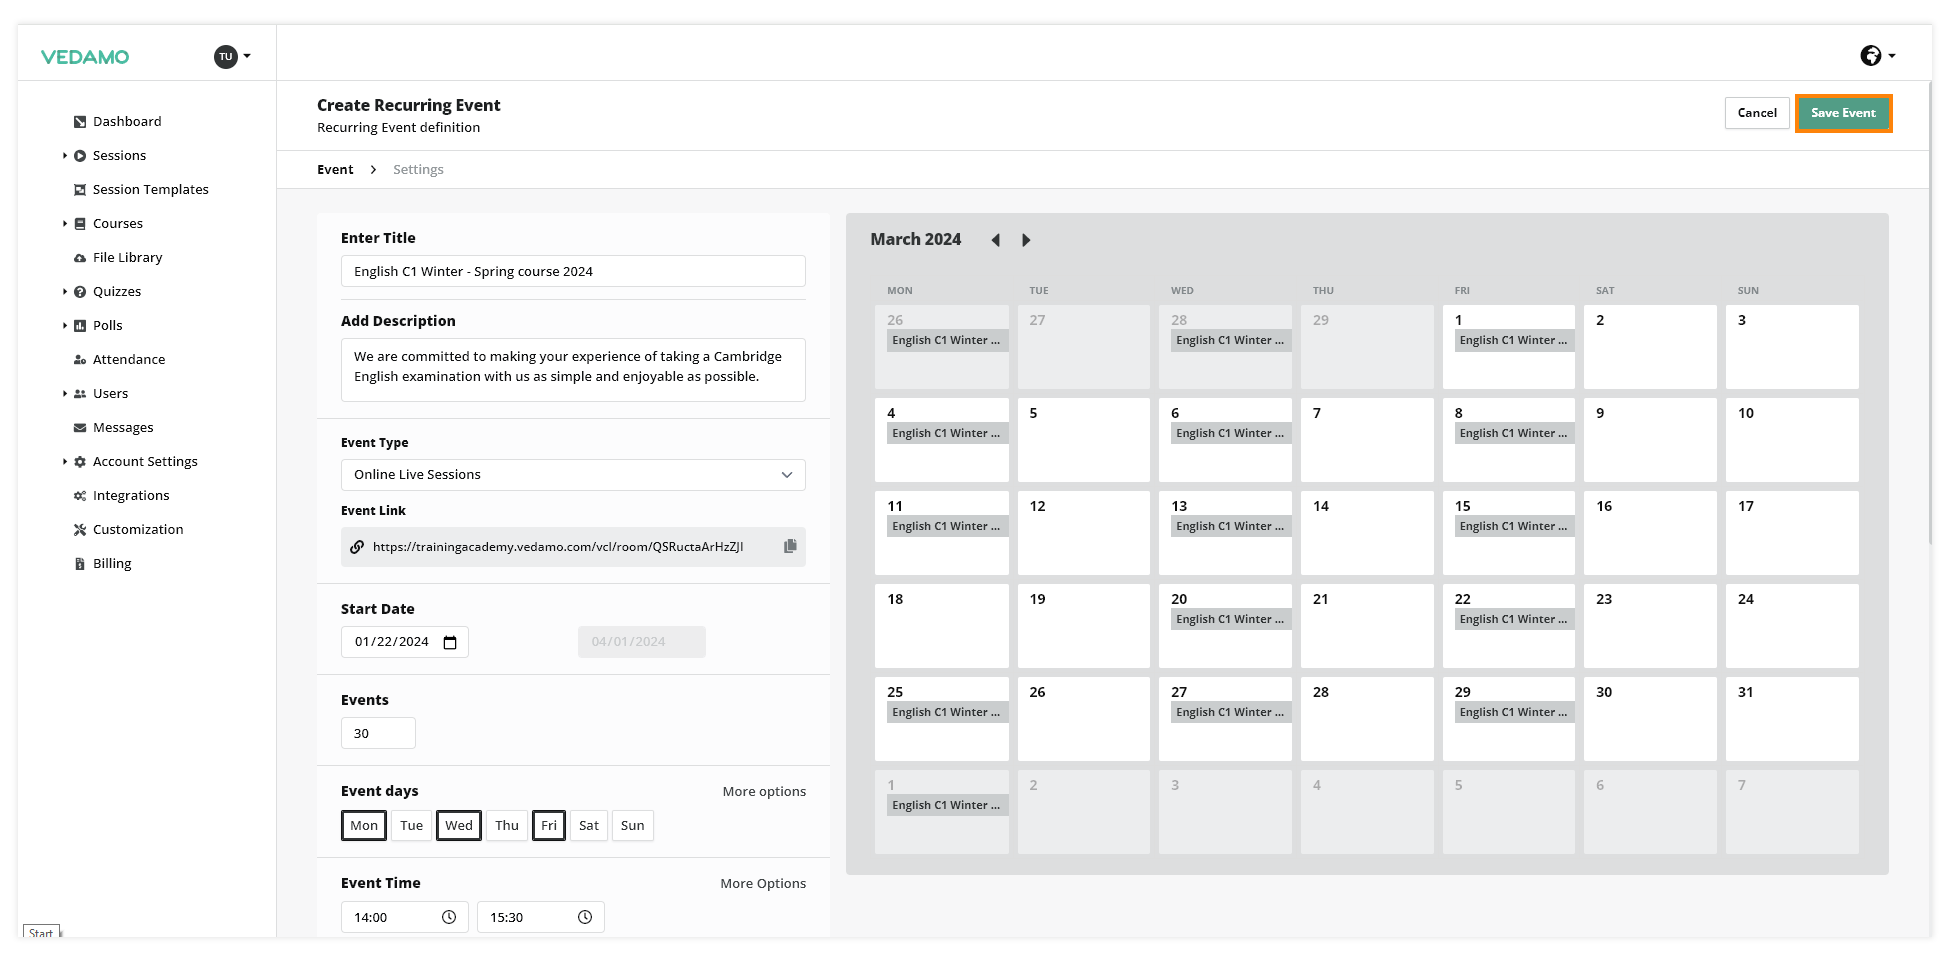
Let’s start creating a Recurring Event using the Online Live Sessions type. Select this type and right below this field you will first notice the permanent link for the event. The teacher(s) and all participants enrolled can use this link to enter every lesson from this particular Recurring Event.
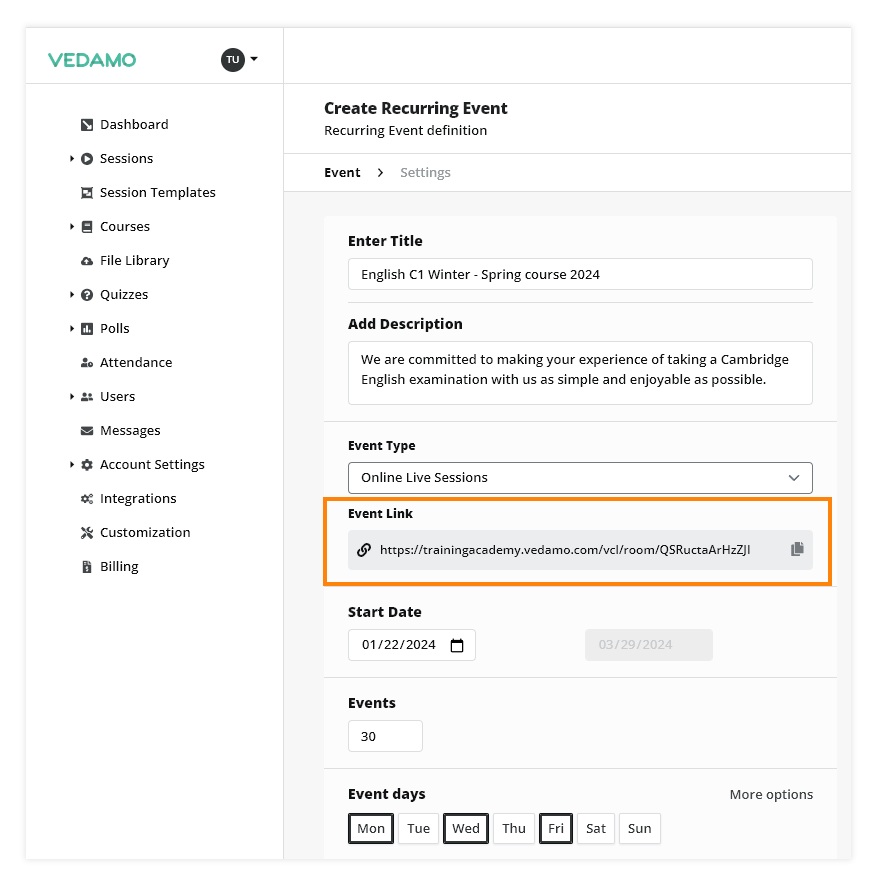
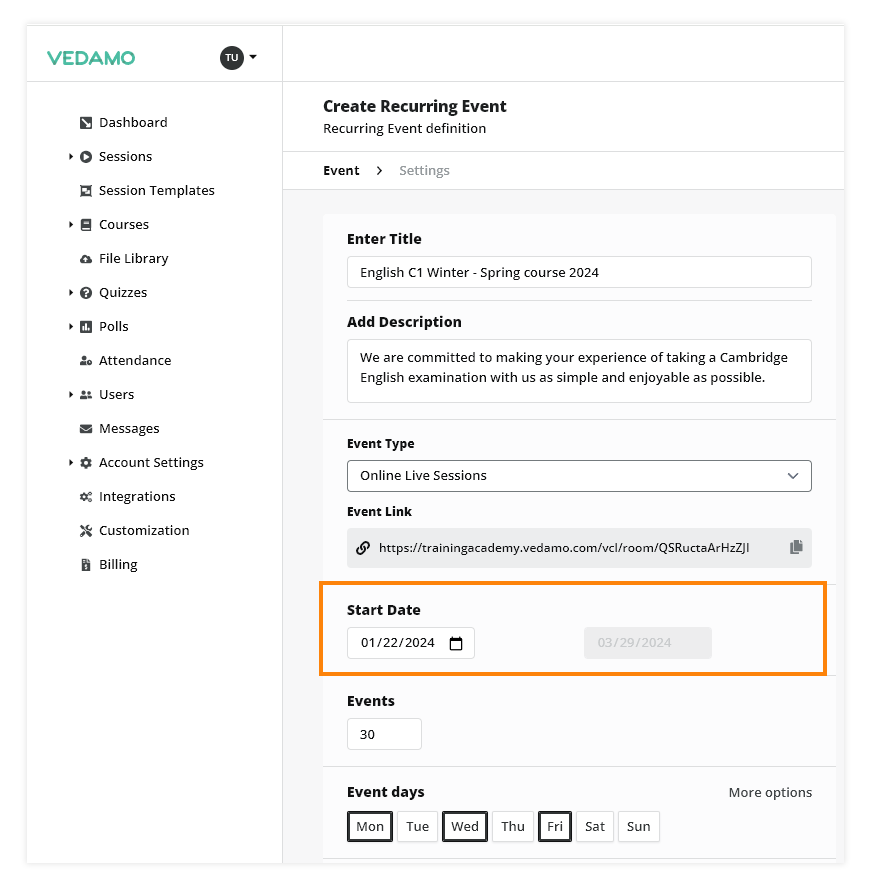
In order to start creating the event, you need to provide a Start Date. The End Date is calculated automatically upon setting up all other criteria. Select a Start Date and then choose the number of events that will be included in the Recurring Event. The number of events means the number of classes (lessons).
For example: if you select 10 events that means you will have 10 recurring classes (lessons) conducted for the chosen period.
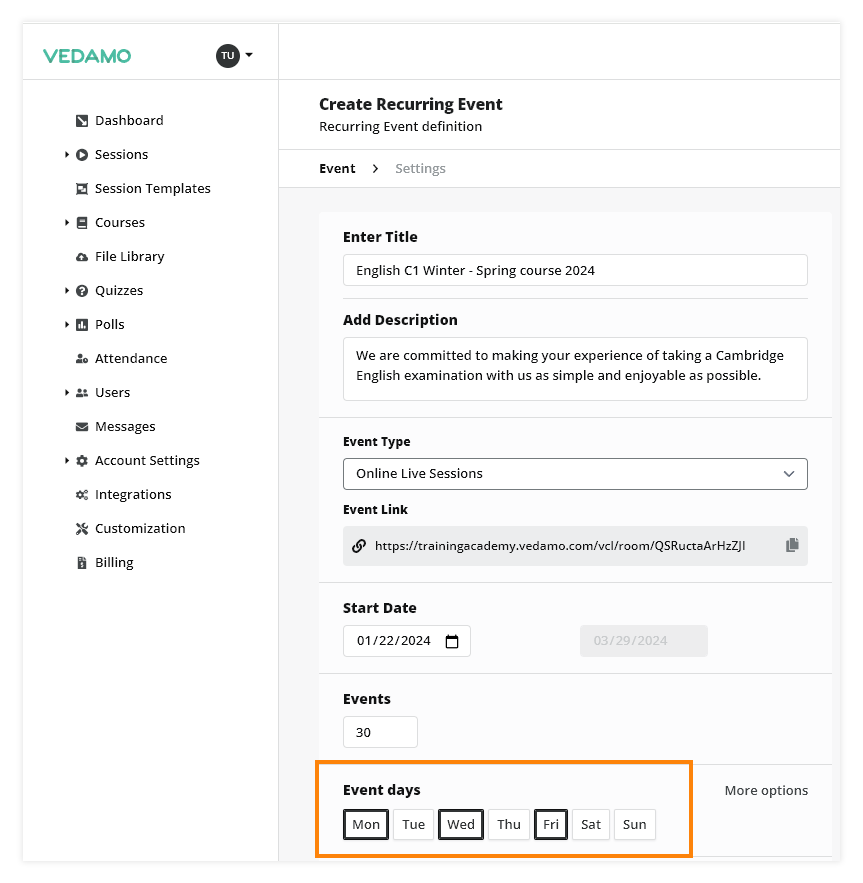
Set the event days that you want your session to take place.
For example: If you want your lessons to be conducted on Monday, Wednesday and Friday.
You can choose if you want the events to take place every week or every other week. Also, there is an option to have a break between sessions.
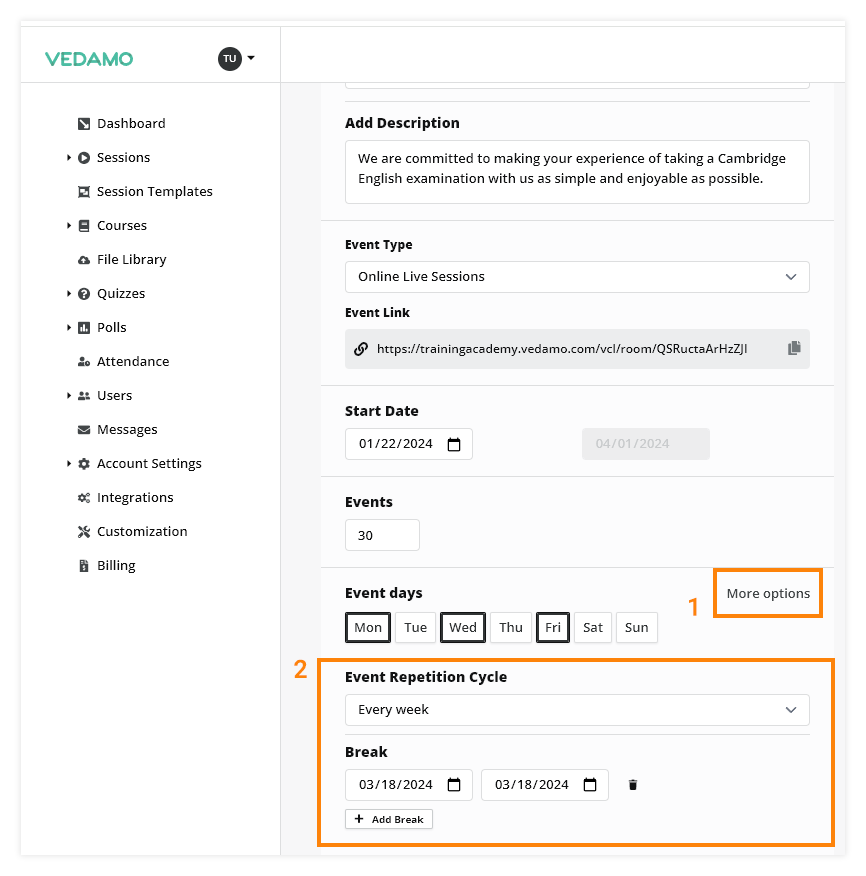
For example: You want sessions to take place every Wednesday for 10 straight weeks. But on week 2 and week 6 you want to have a break.
Set the time for the recurring events.
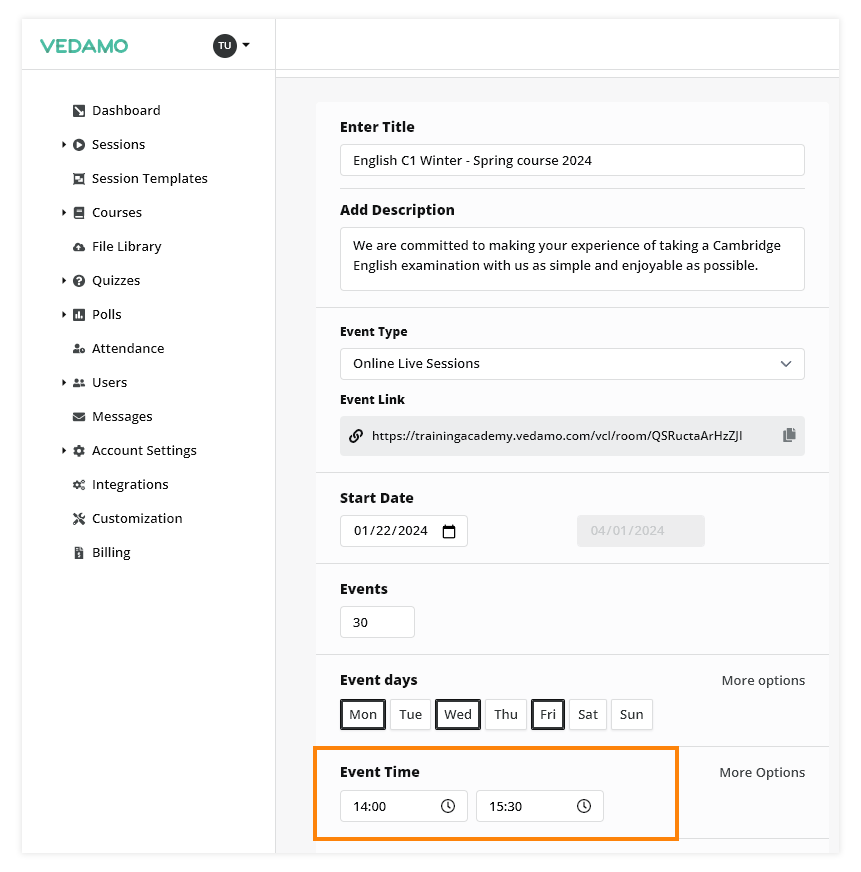
You can set up additional time slots for the same date or change the time for a particular event.
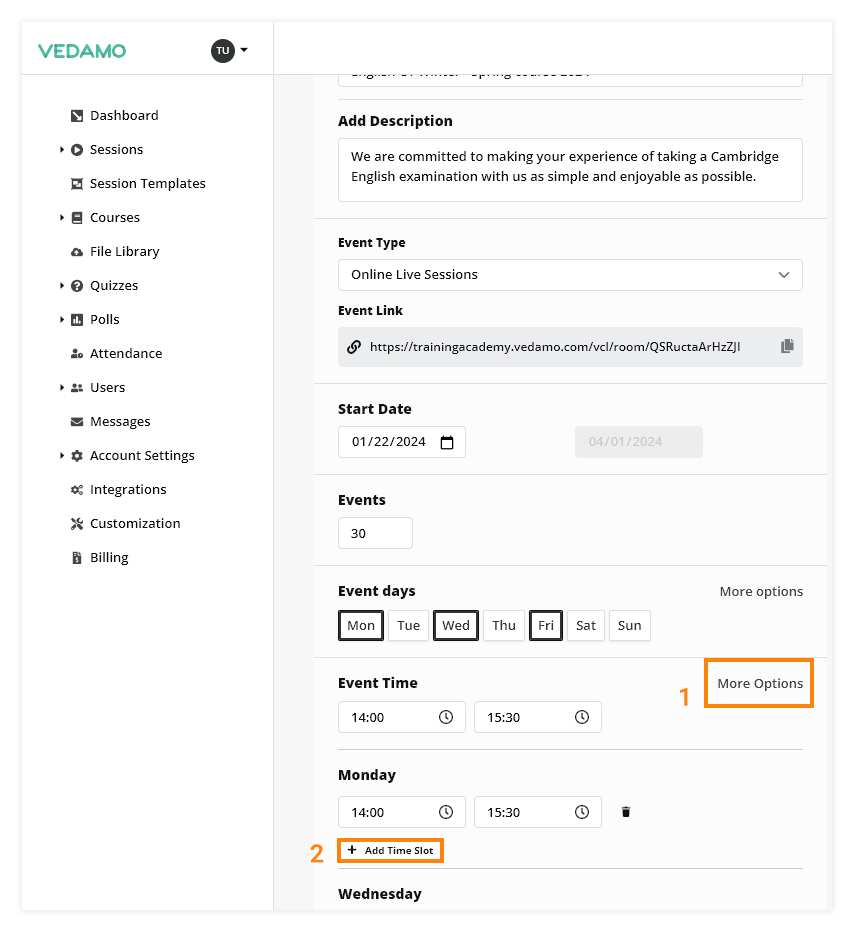
For example: You can change the time for certain events or add additional time slots.
Set the event content (templates) for the events. When you start the session the content will be automatically uploaded to the whiteboard.
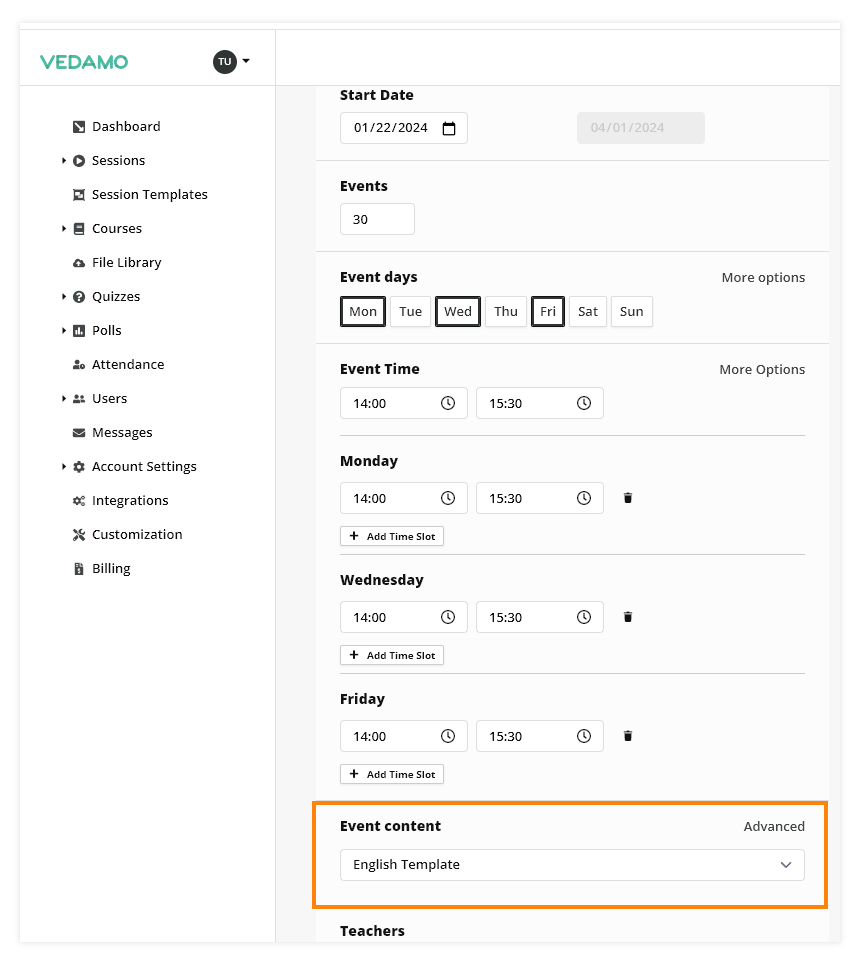
You can add individual content to each particular session.
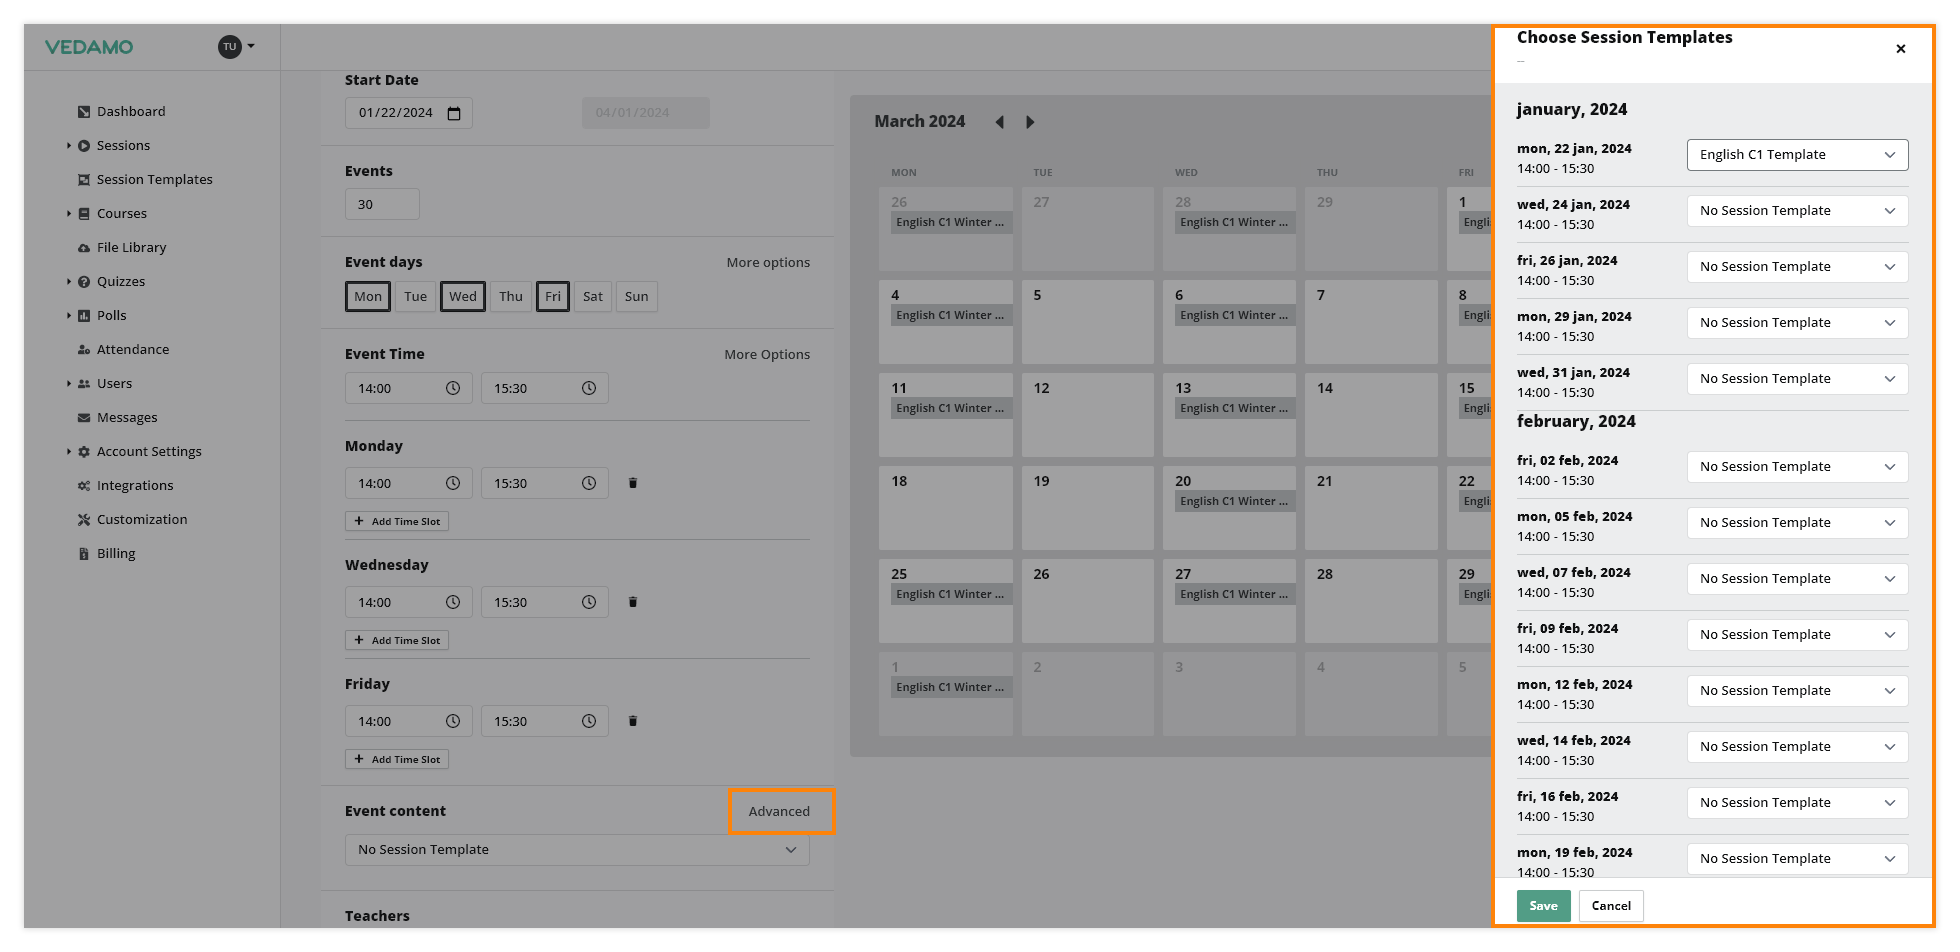
For example: Assign content (templates) for all events or separate content for each event individually.
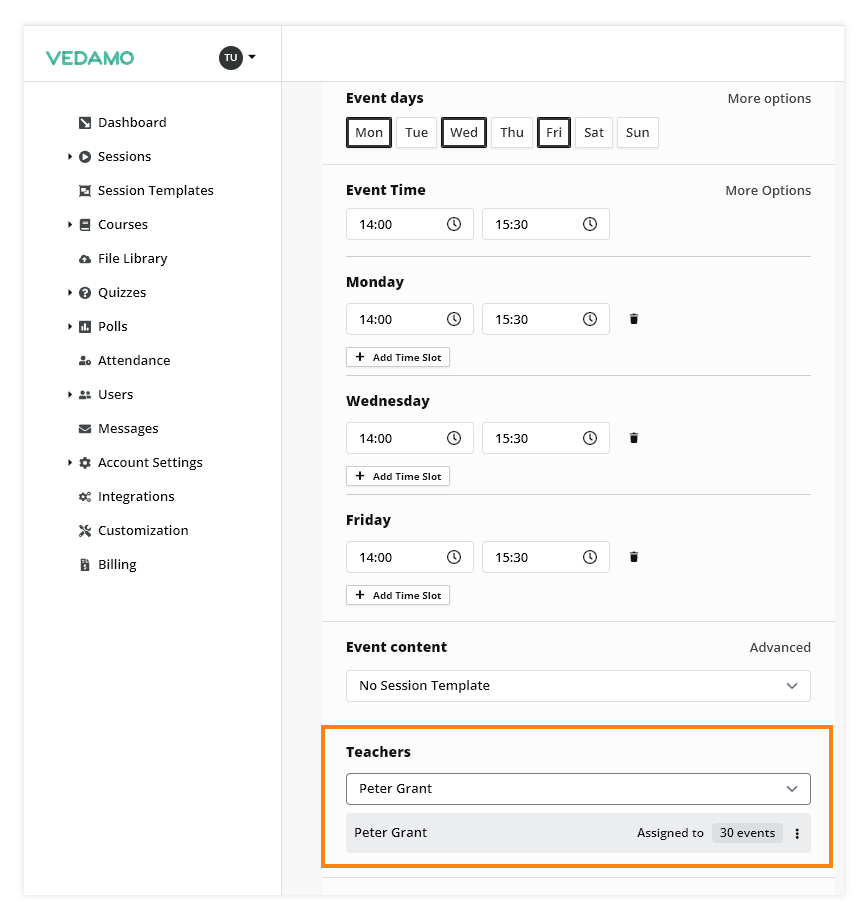
Assign teachers/hosts to the recurring events. Those hosts can be assigned to the whole recurring event or for a particular session from the event. The assigned teachers will be able to see the sessions in their dashboard.
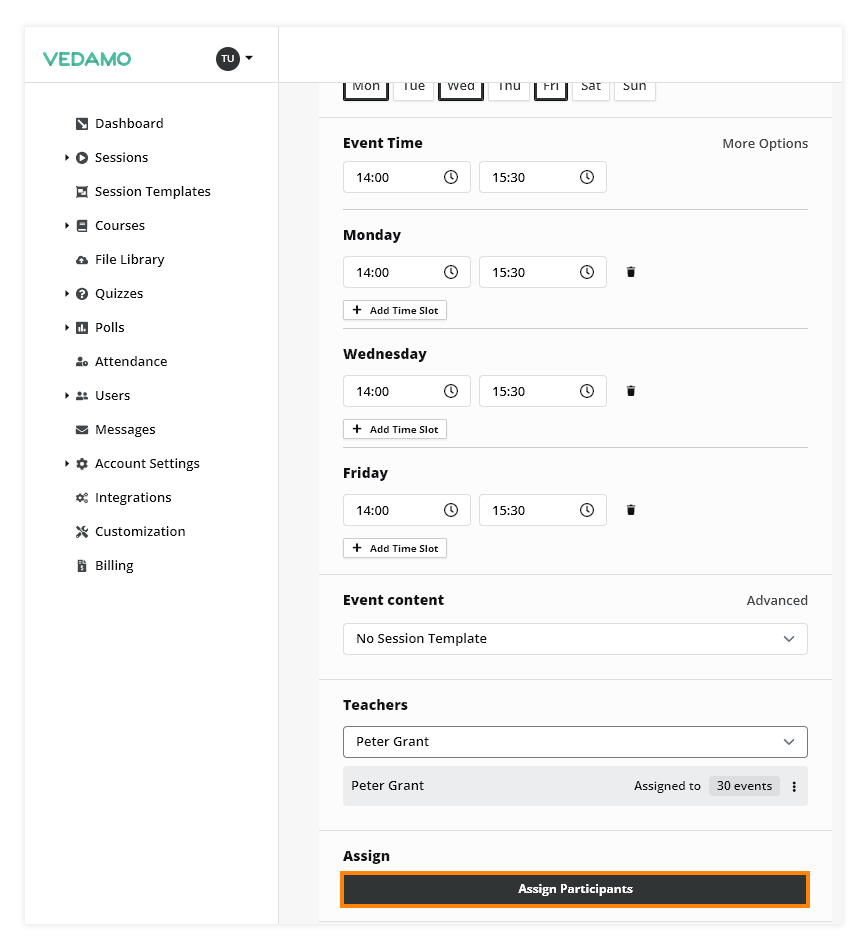
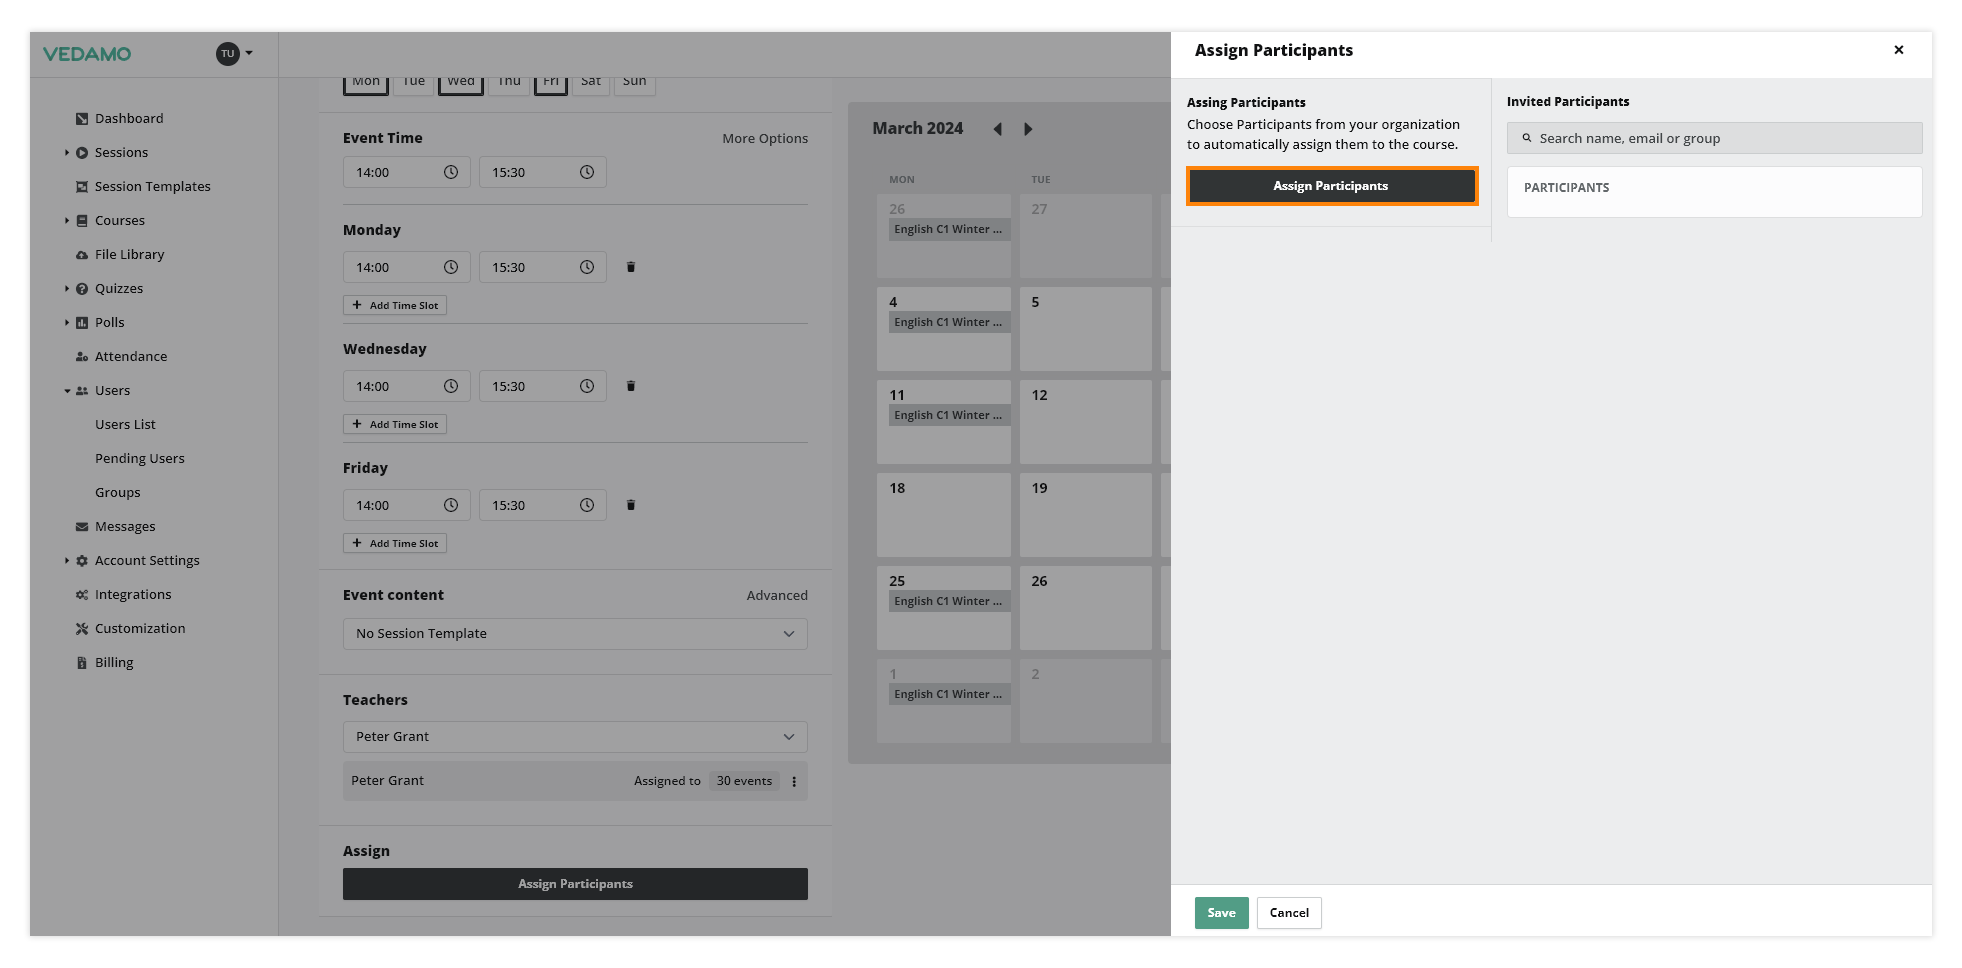
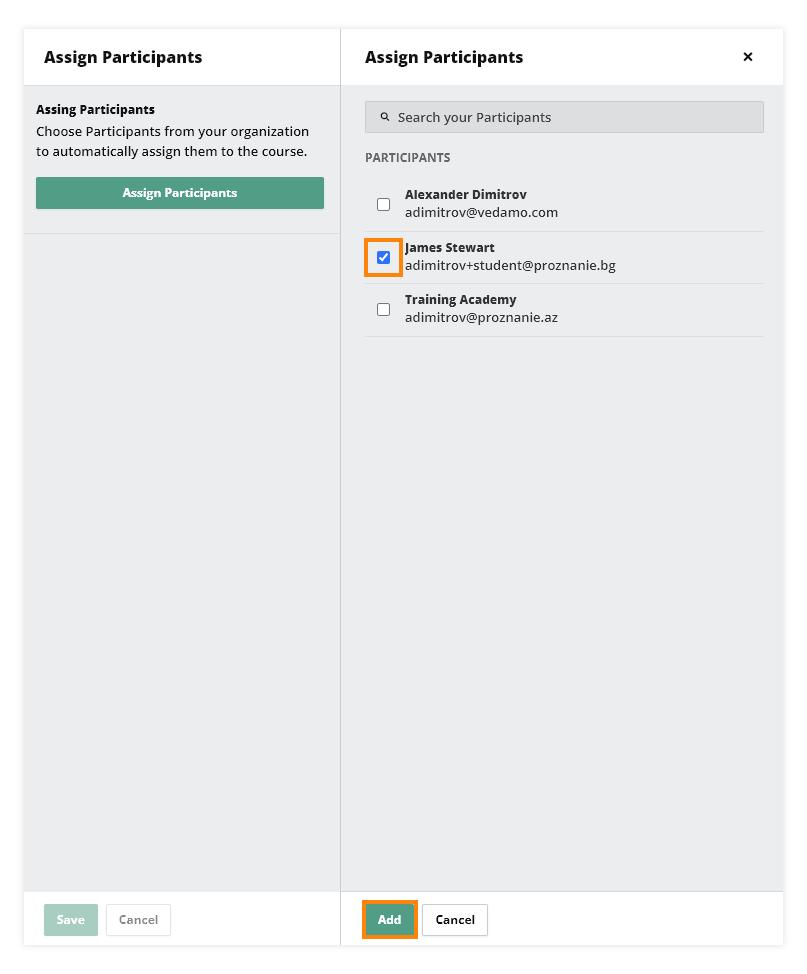
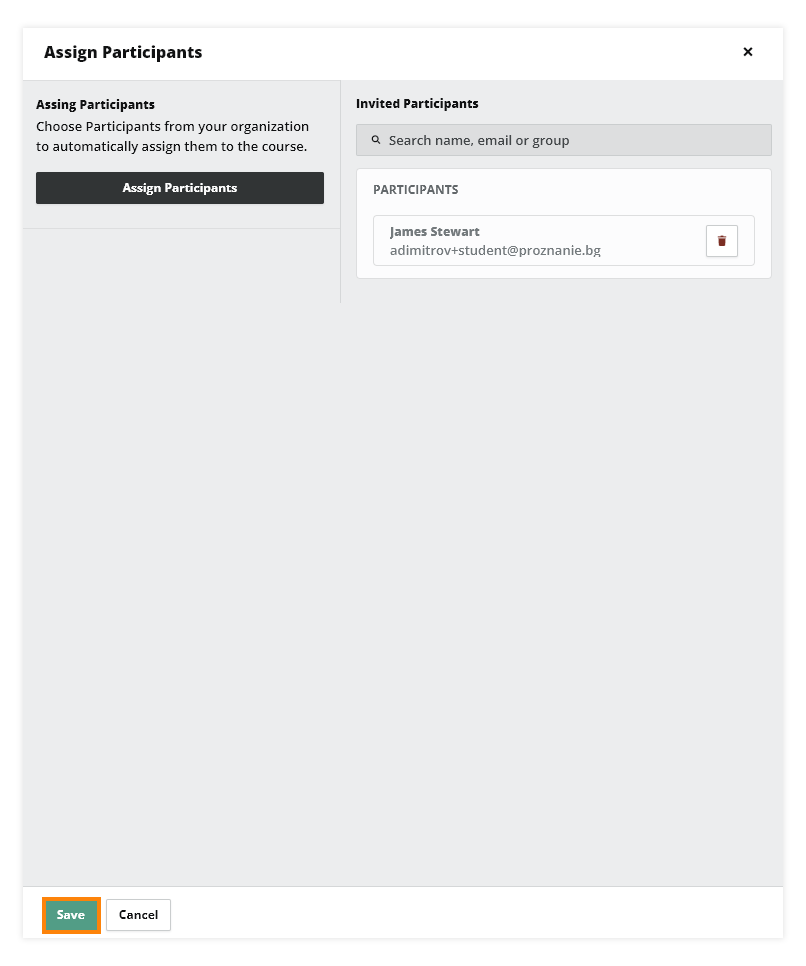
Assign participants/students to the recurring event. The assigned students will be able to see the sessions in their dashboard.
Set the settings you want your recurring events to have. From there you can adjust the permissions and layout for the sessions you would like to have.
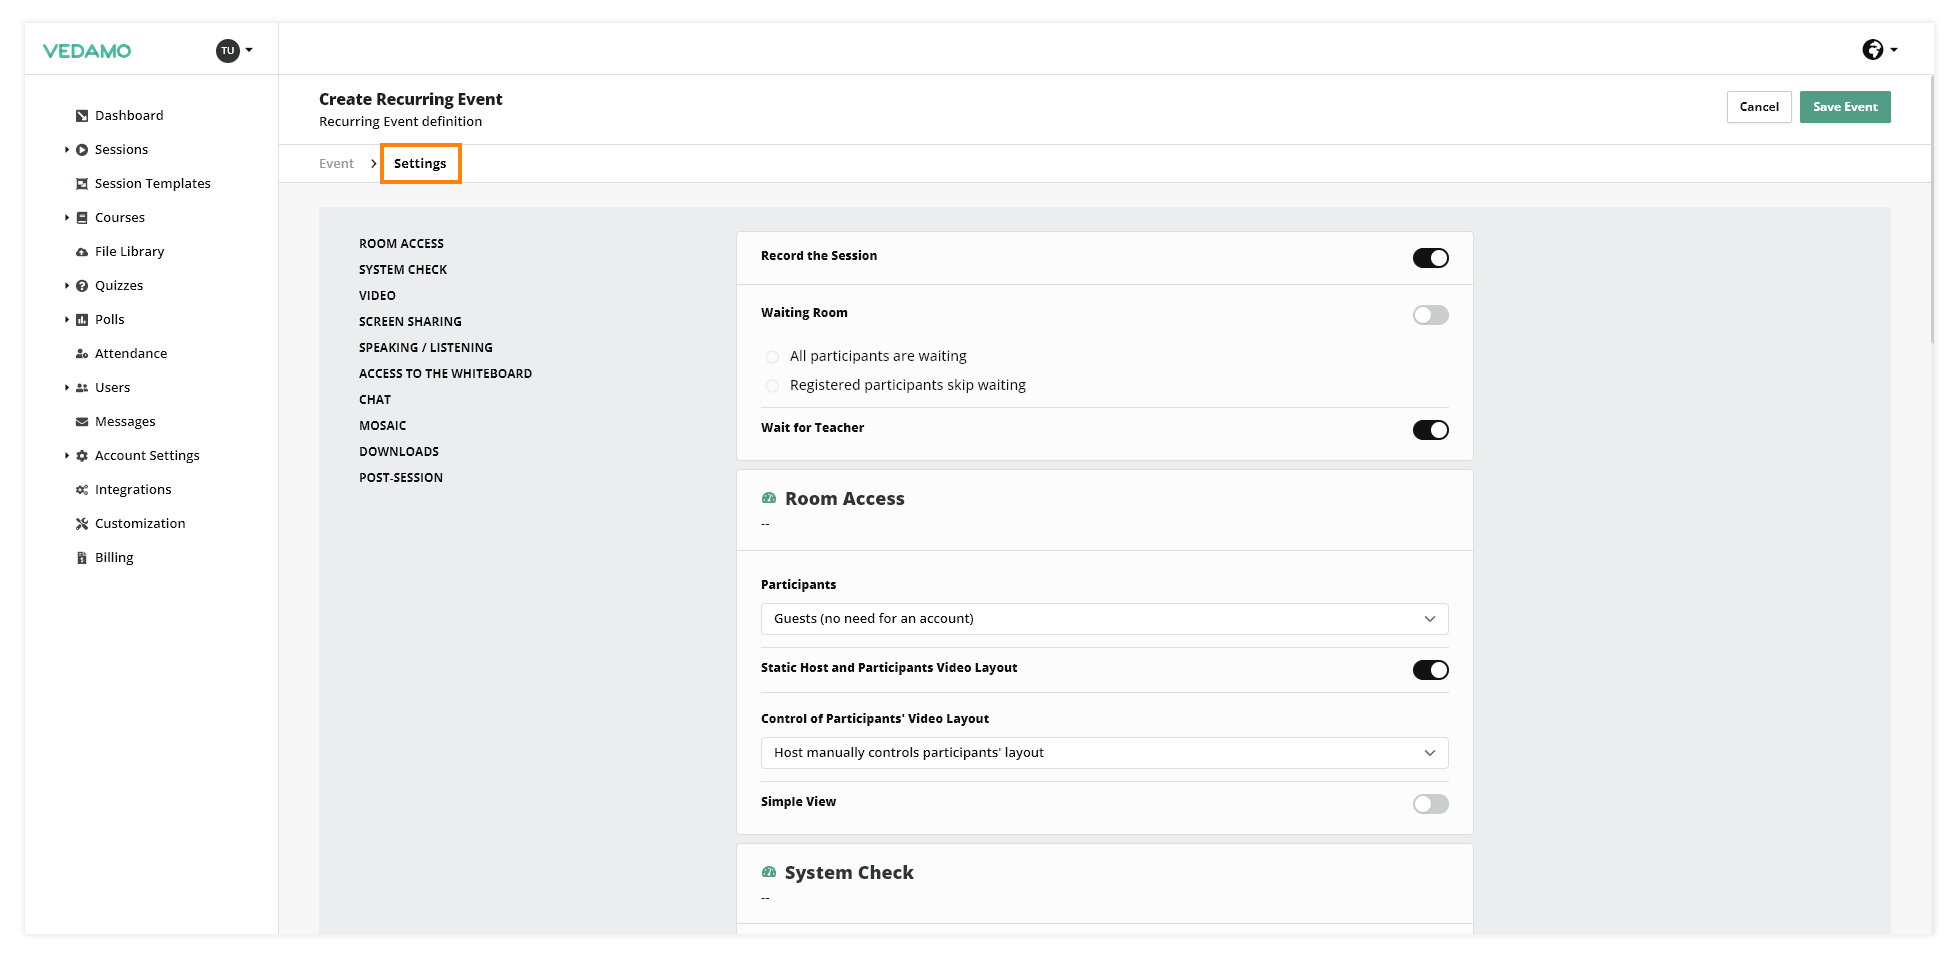
For example: If you want your session to have a waiting room you can go to the settings menu and turn on the option.
Finish the recurring events setup. After everything from the preparation part is set up, all that is left is to save the recurring event.
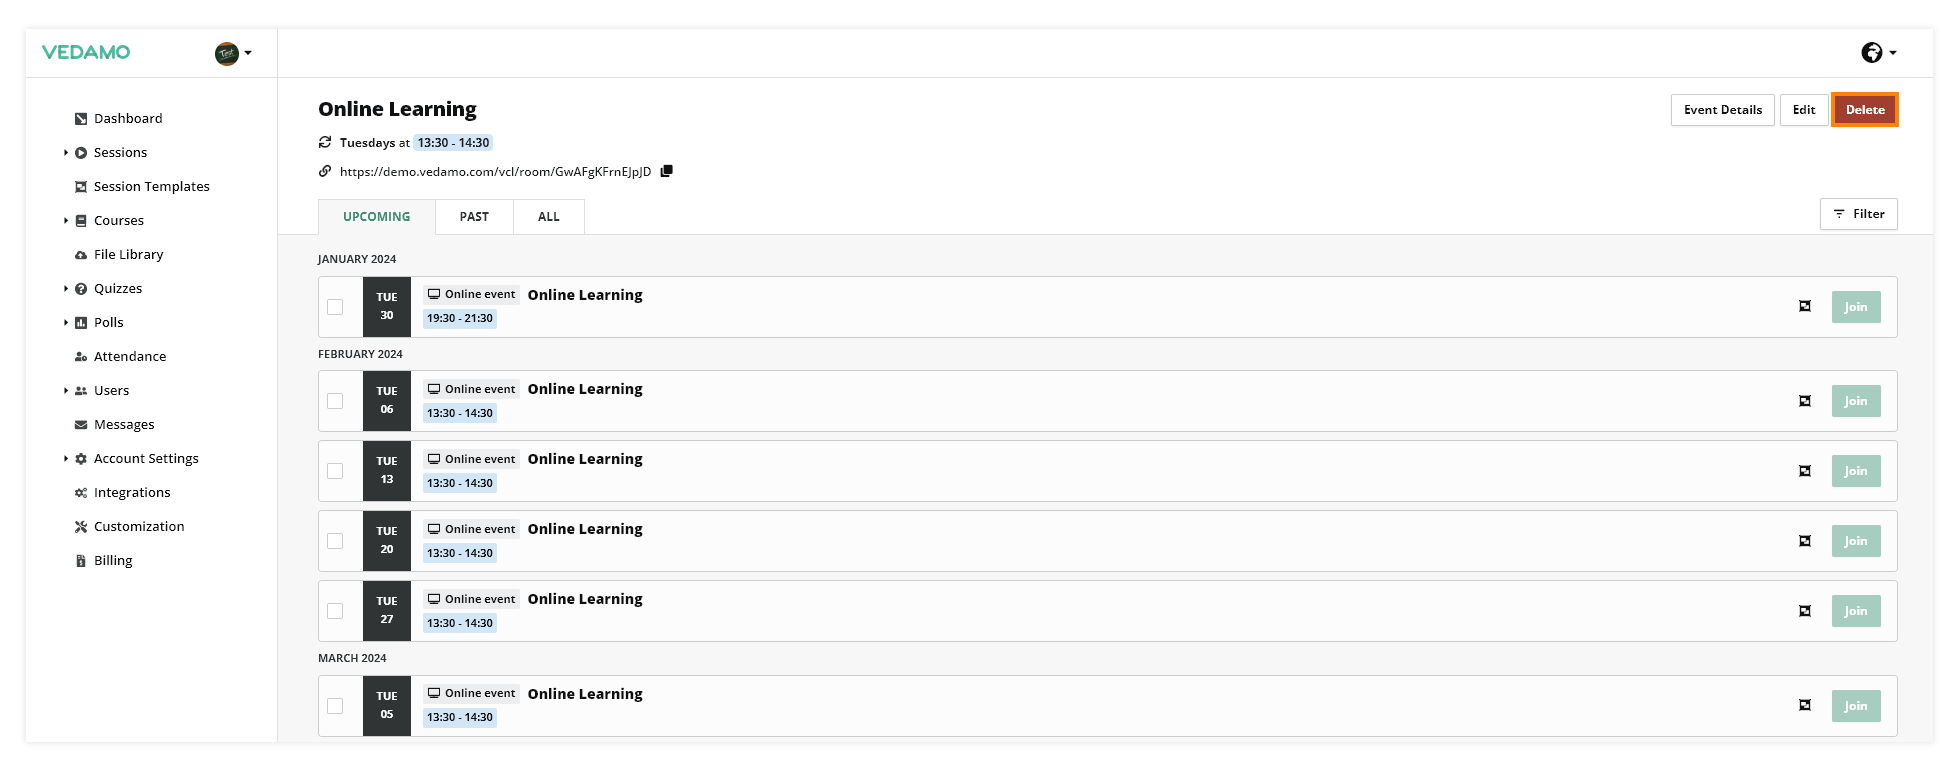
If there is a need to change something that has already been set in the recurring events you can edit them from the dashboard where they appear after being saved.
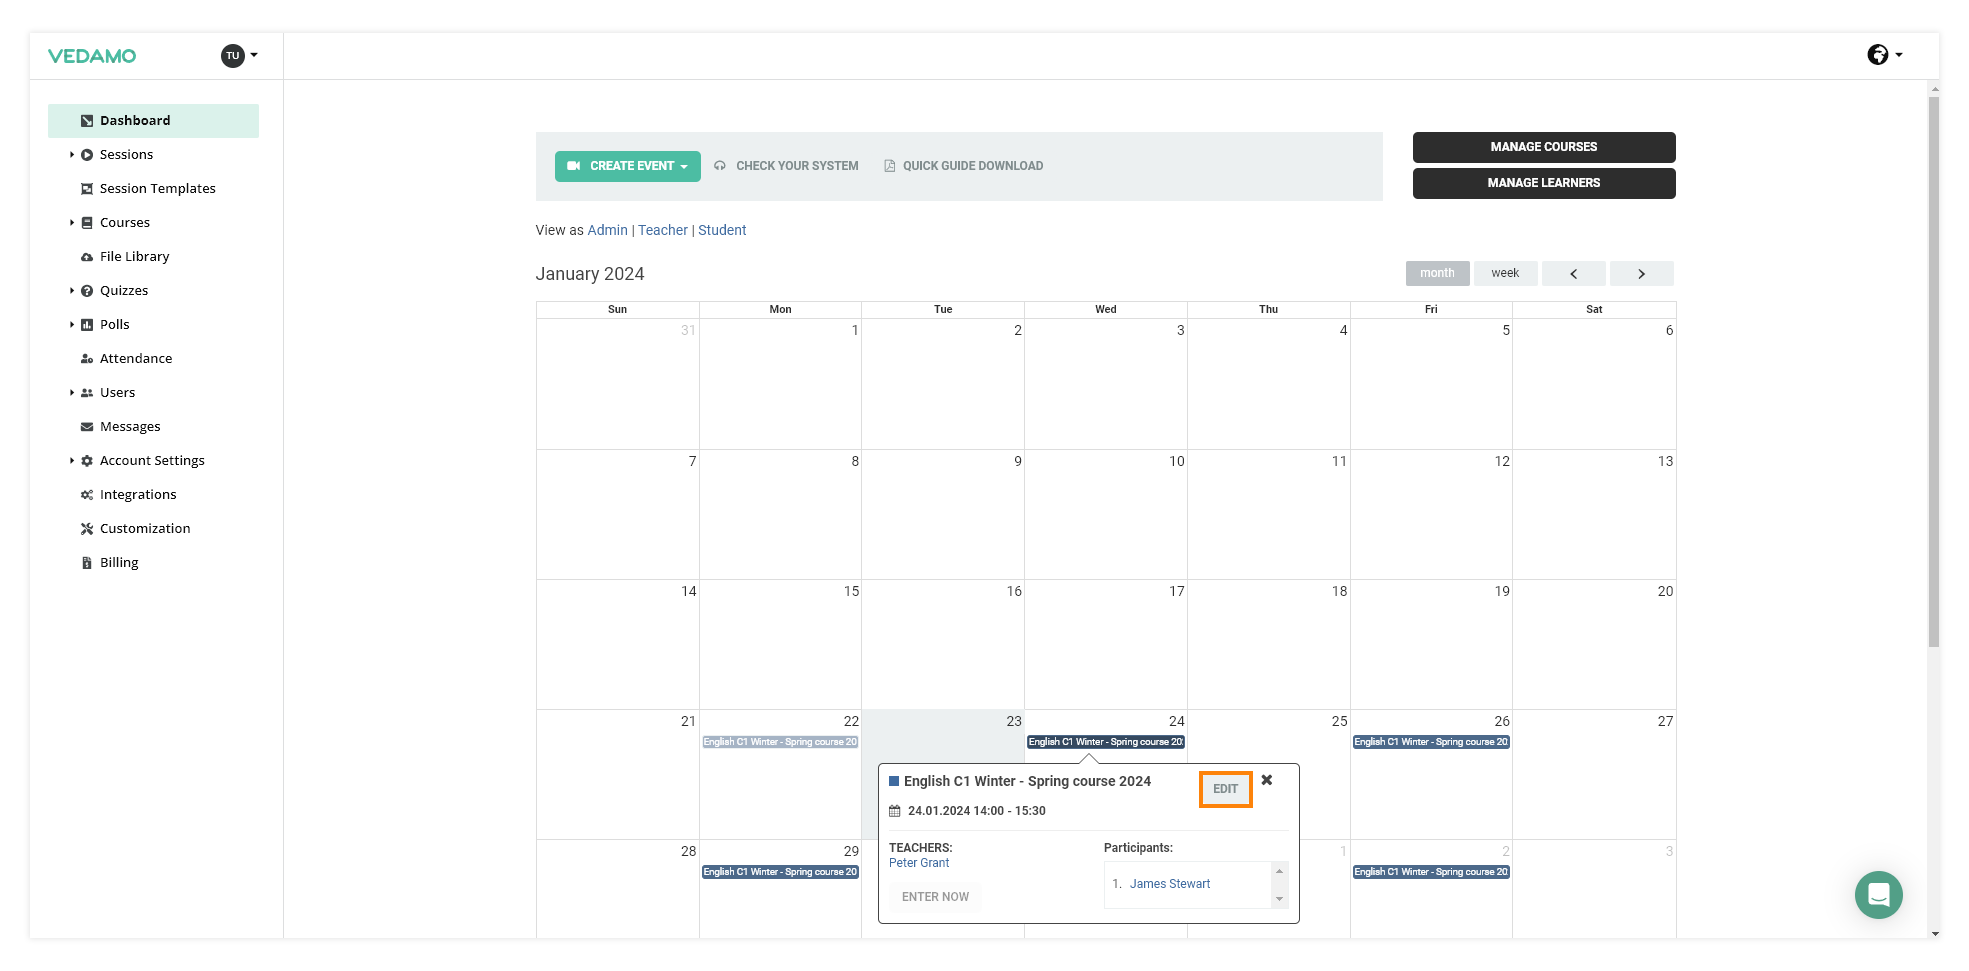
For example: If you want to change the schedule of the recurring event and set all Monday sessions for Friday you can do it from here.
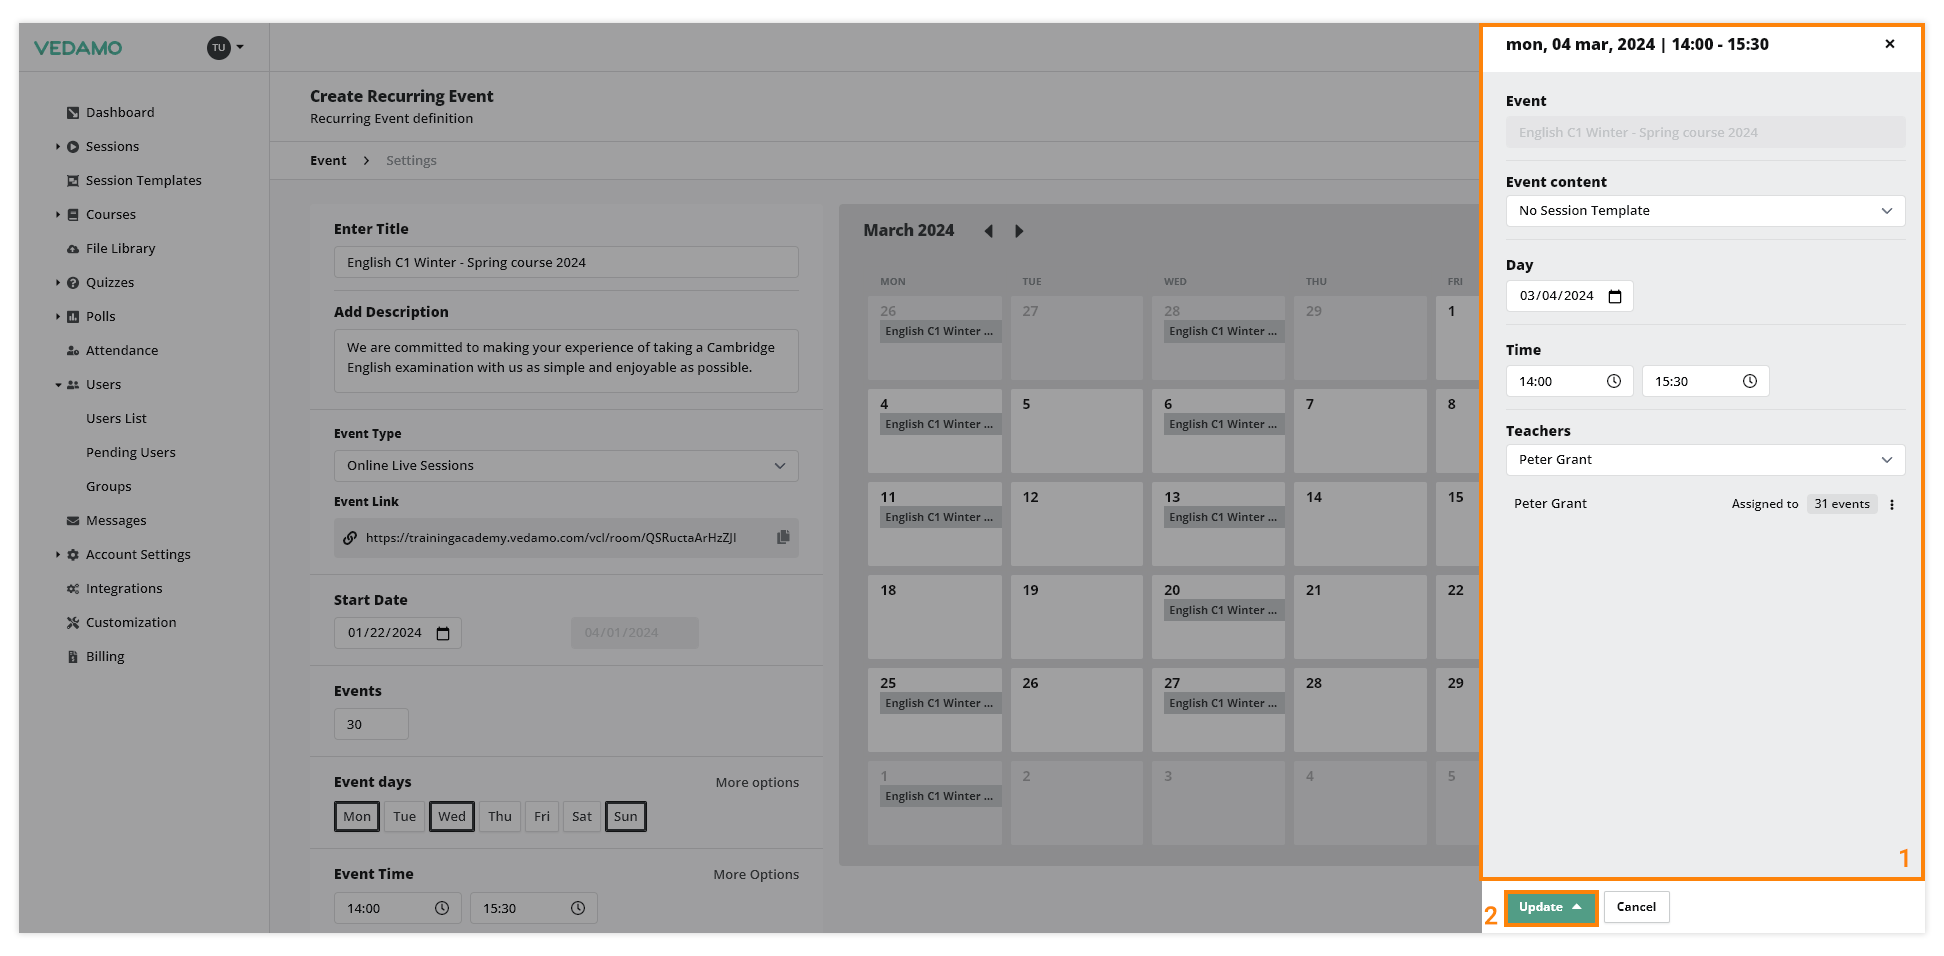
You can edit the whole recurring event or a single event that is part of it. When you click on the event on the calendar you will get a new window pop-up.
From here you can edit the date and time for the event, the teacher, as well as the template that you want to be used in it.
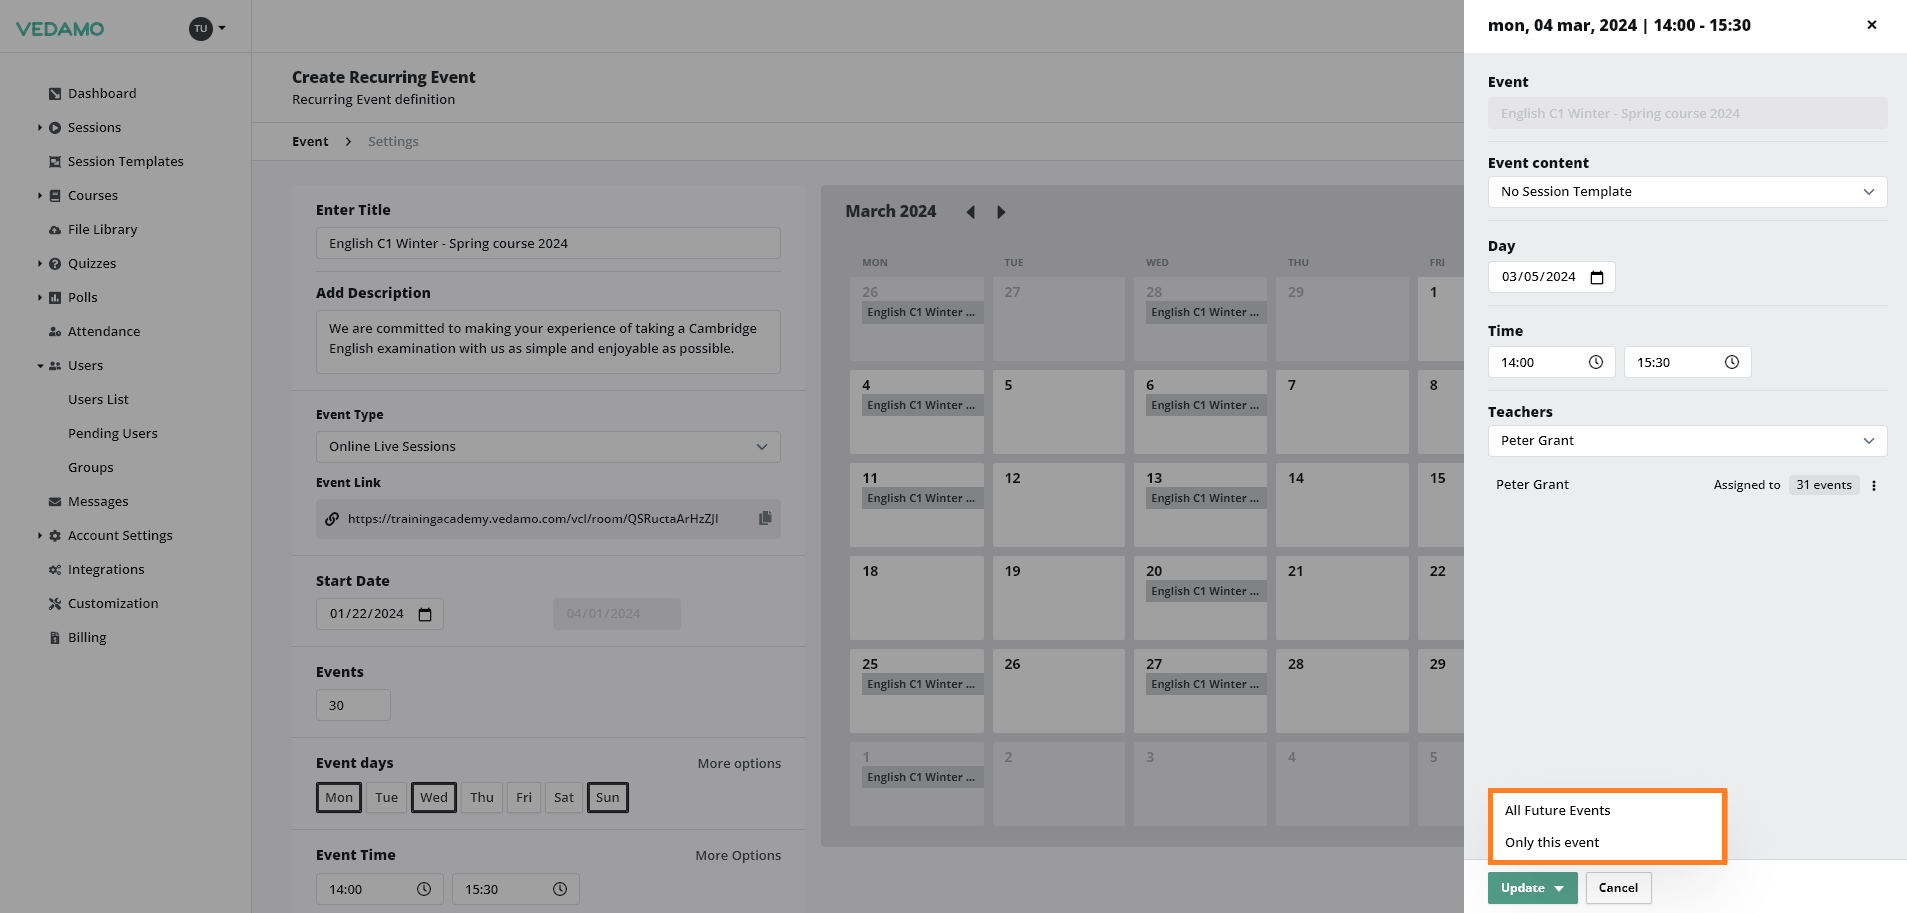
After you have made the edit of the information you can choose if you want to update for the single event or for all future events from this point on.
Recurring events Page
You can also access the Recurring events from the Learning Management System dashboard. Click on the “Sessions” section and then you will have a drop-down menu that has the “Recurring events” option there.
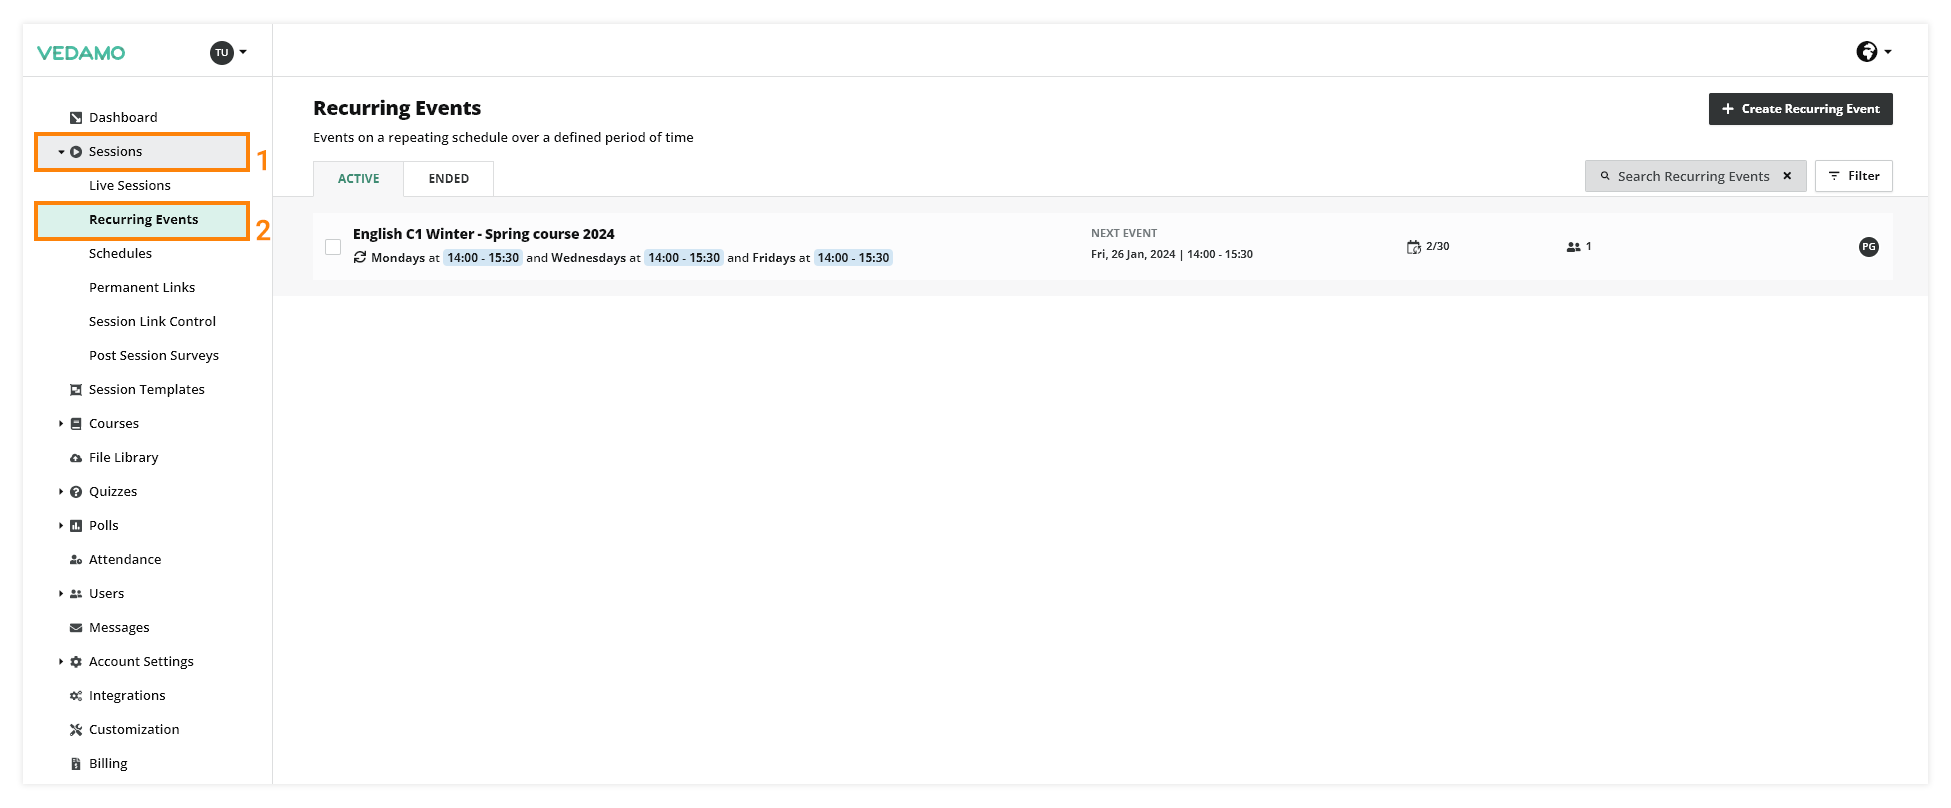
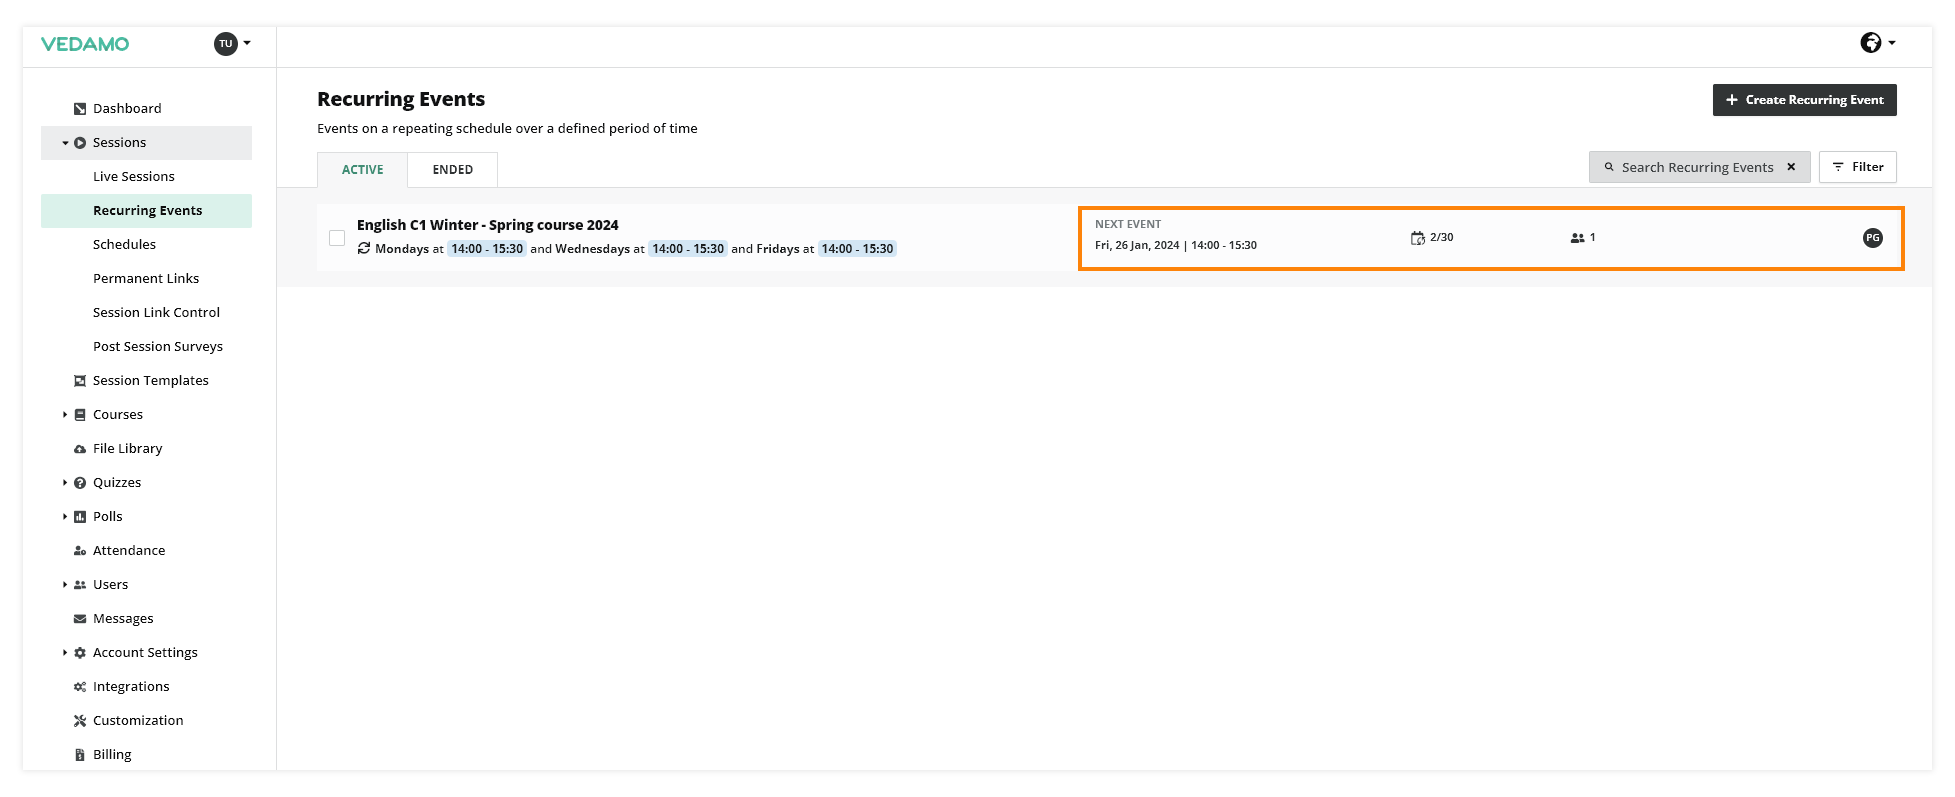
From here you can access a list containing all of the Recurring events created in the academy.
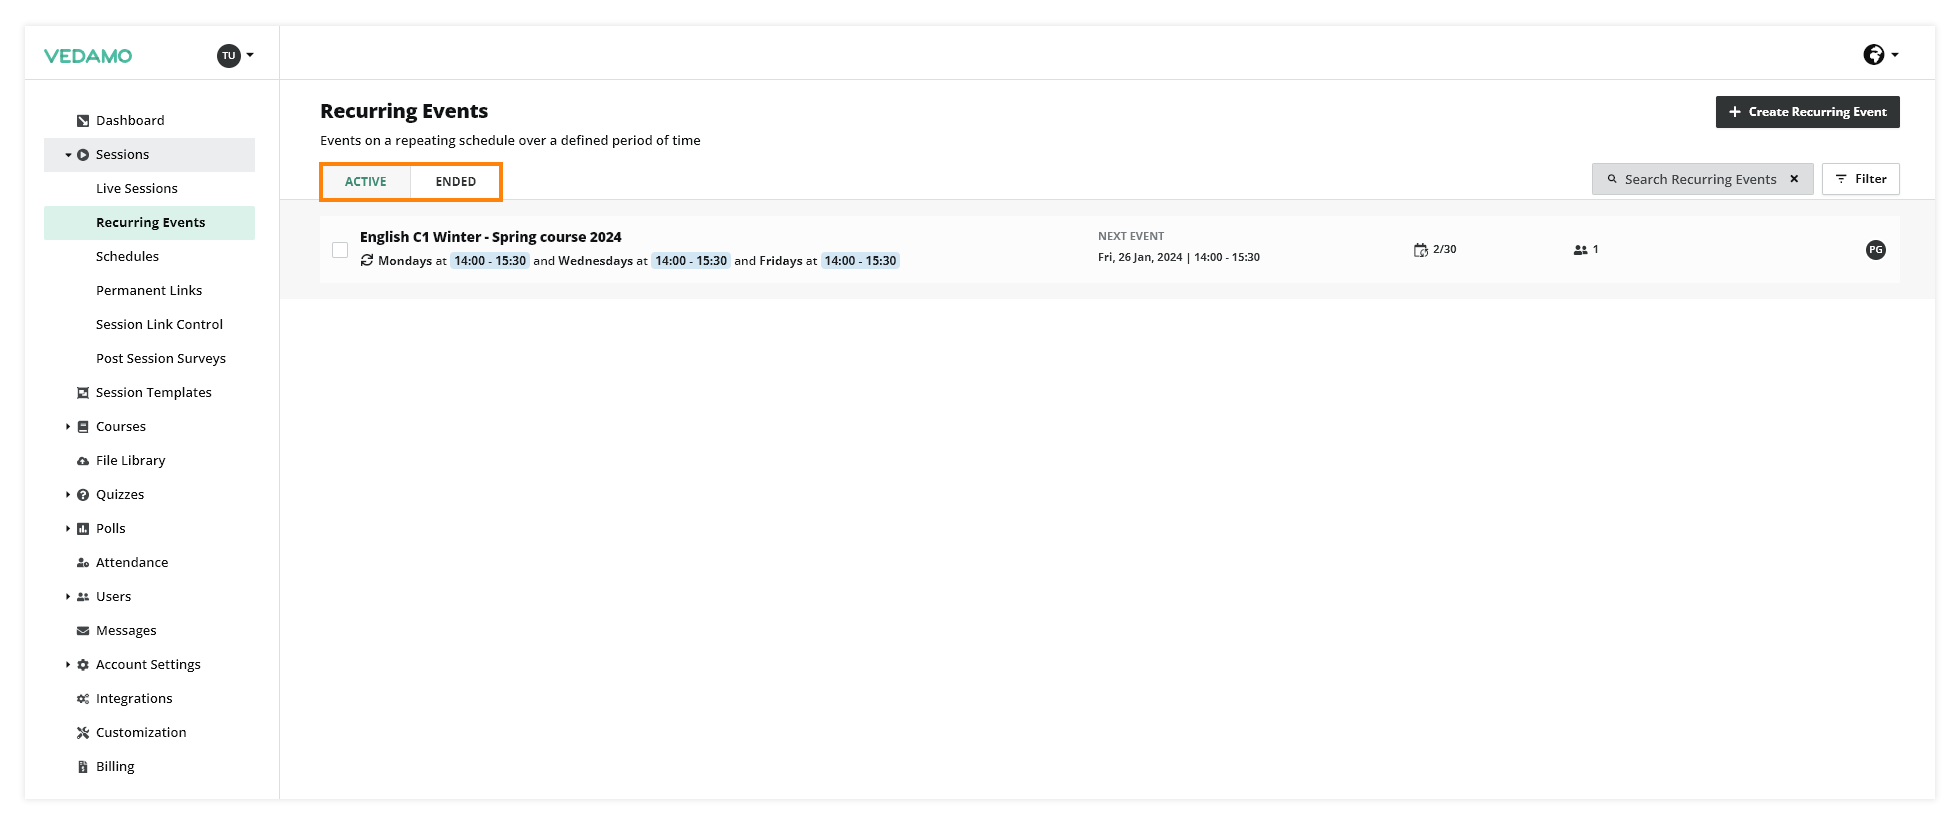
The recurring events will be split between Active and Ended. In the Active section you can see all future recurring events and in the Ended section you can see all of the Recurring events that have already passed.
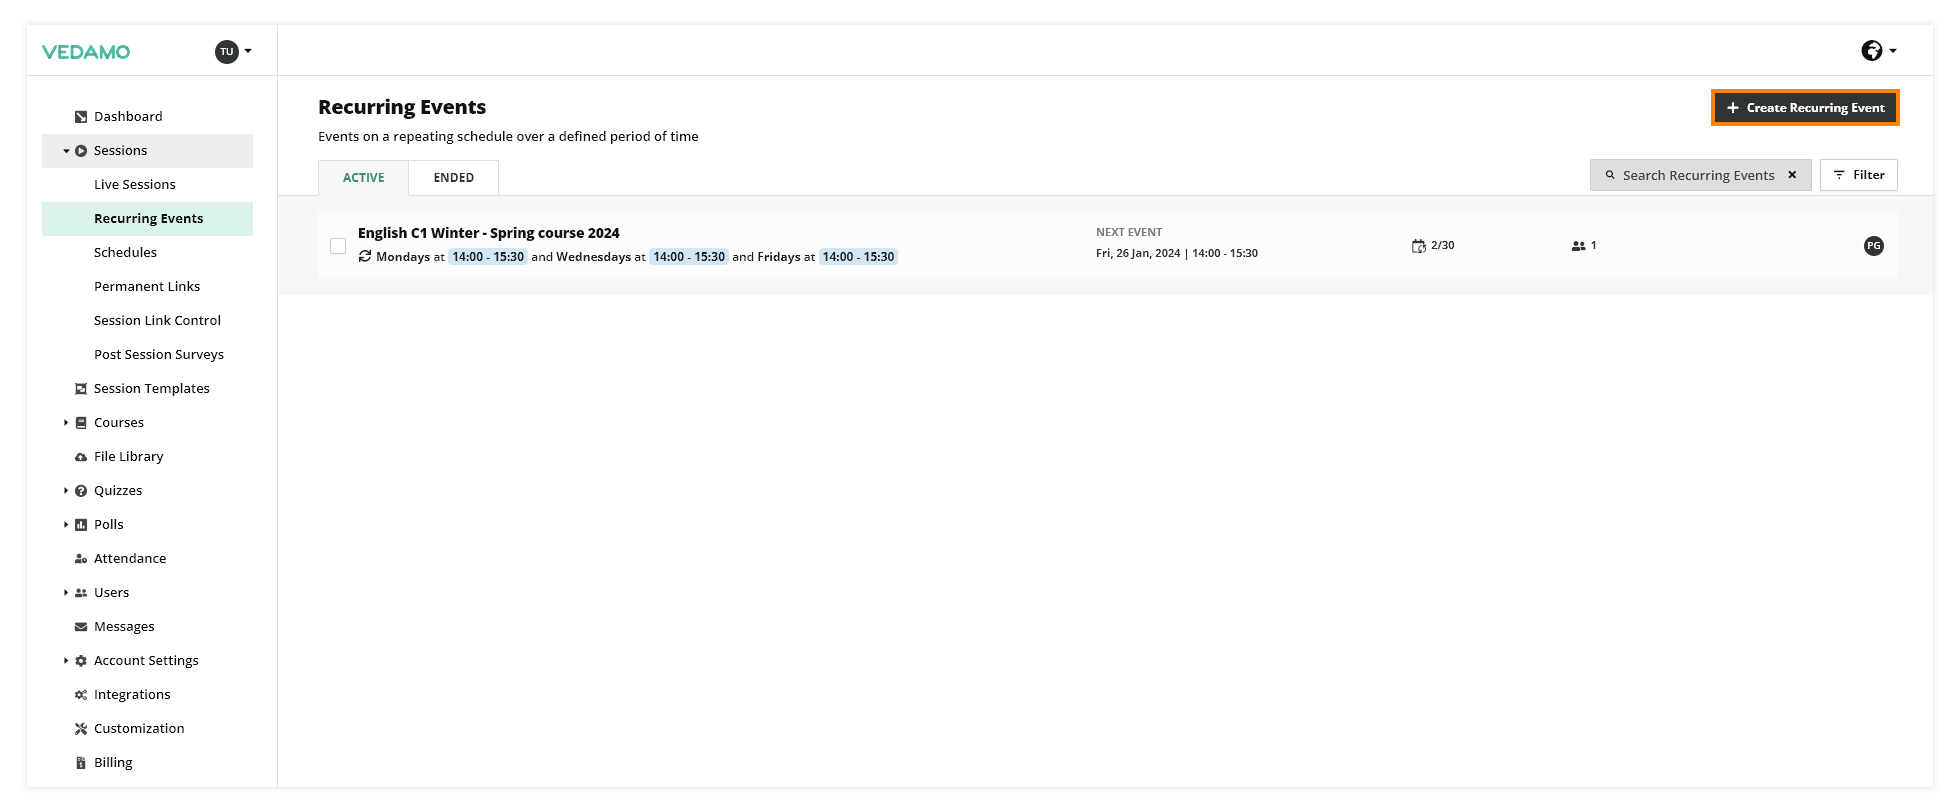
To create a new Recurring event click here:
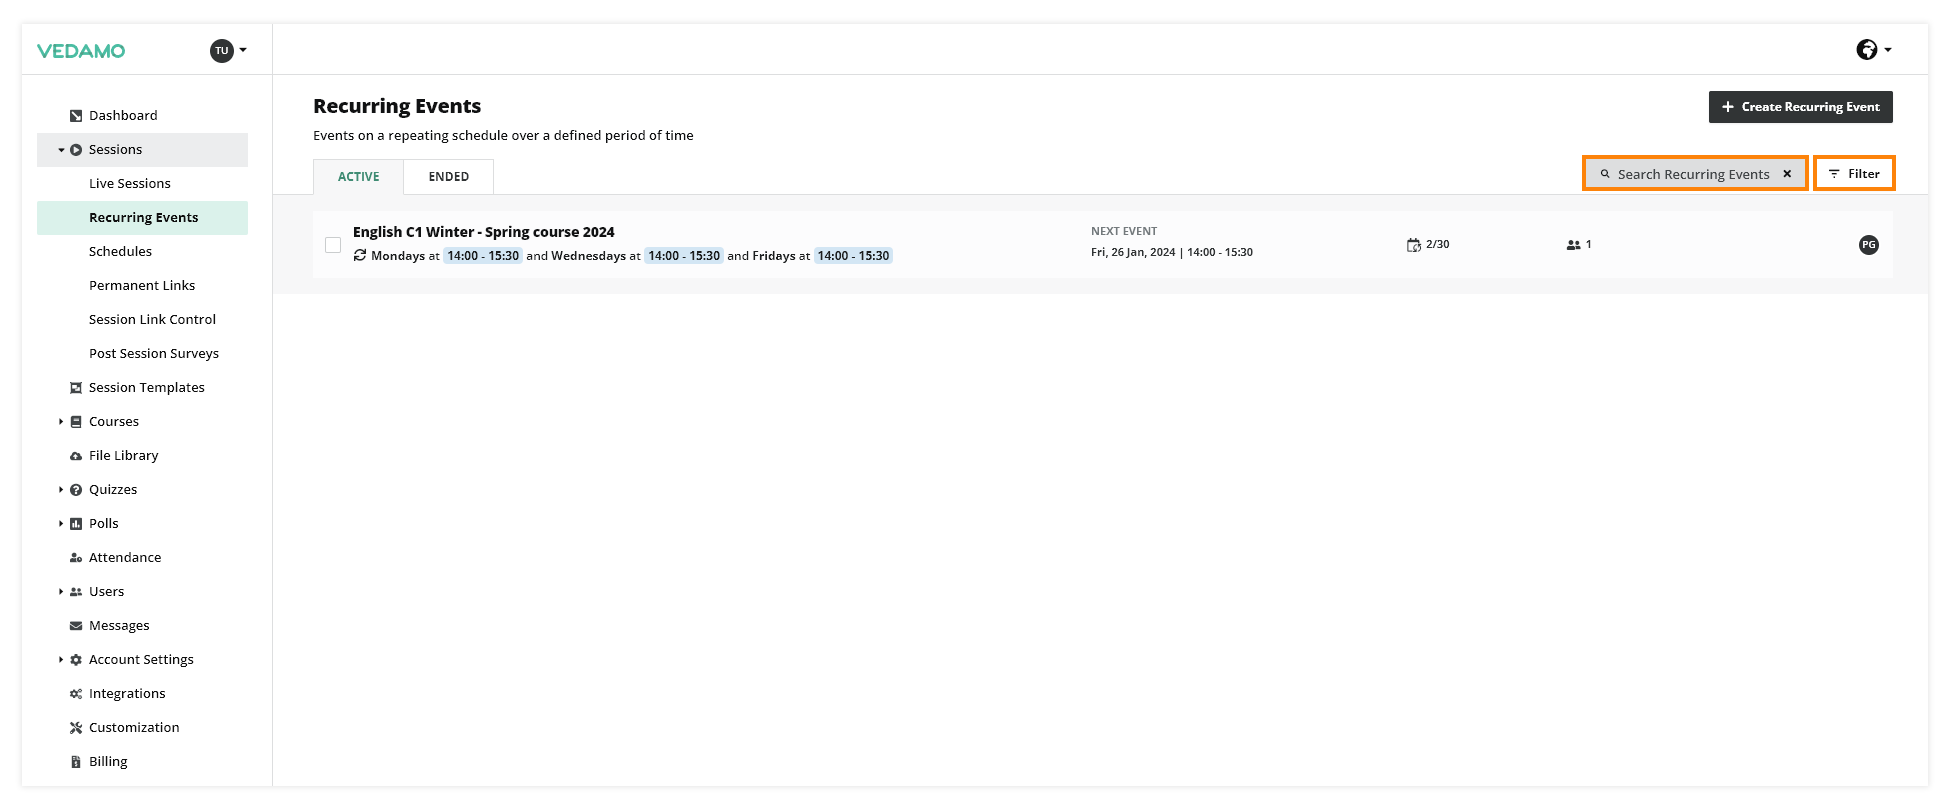
You can search for a particular event or from the filter section.
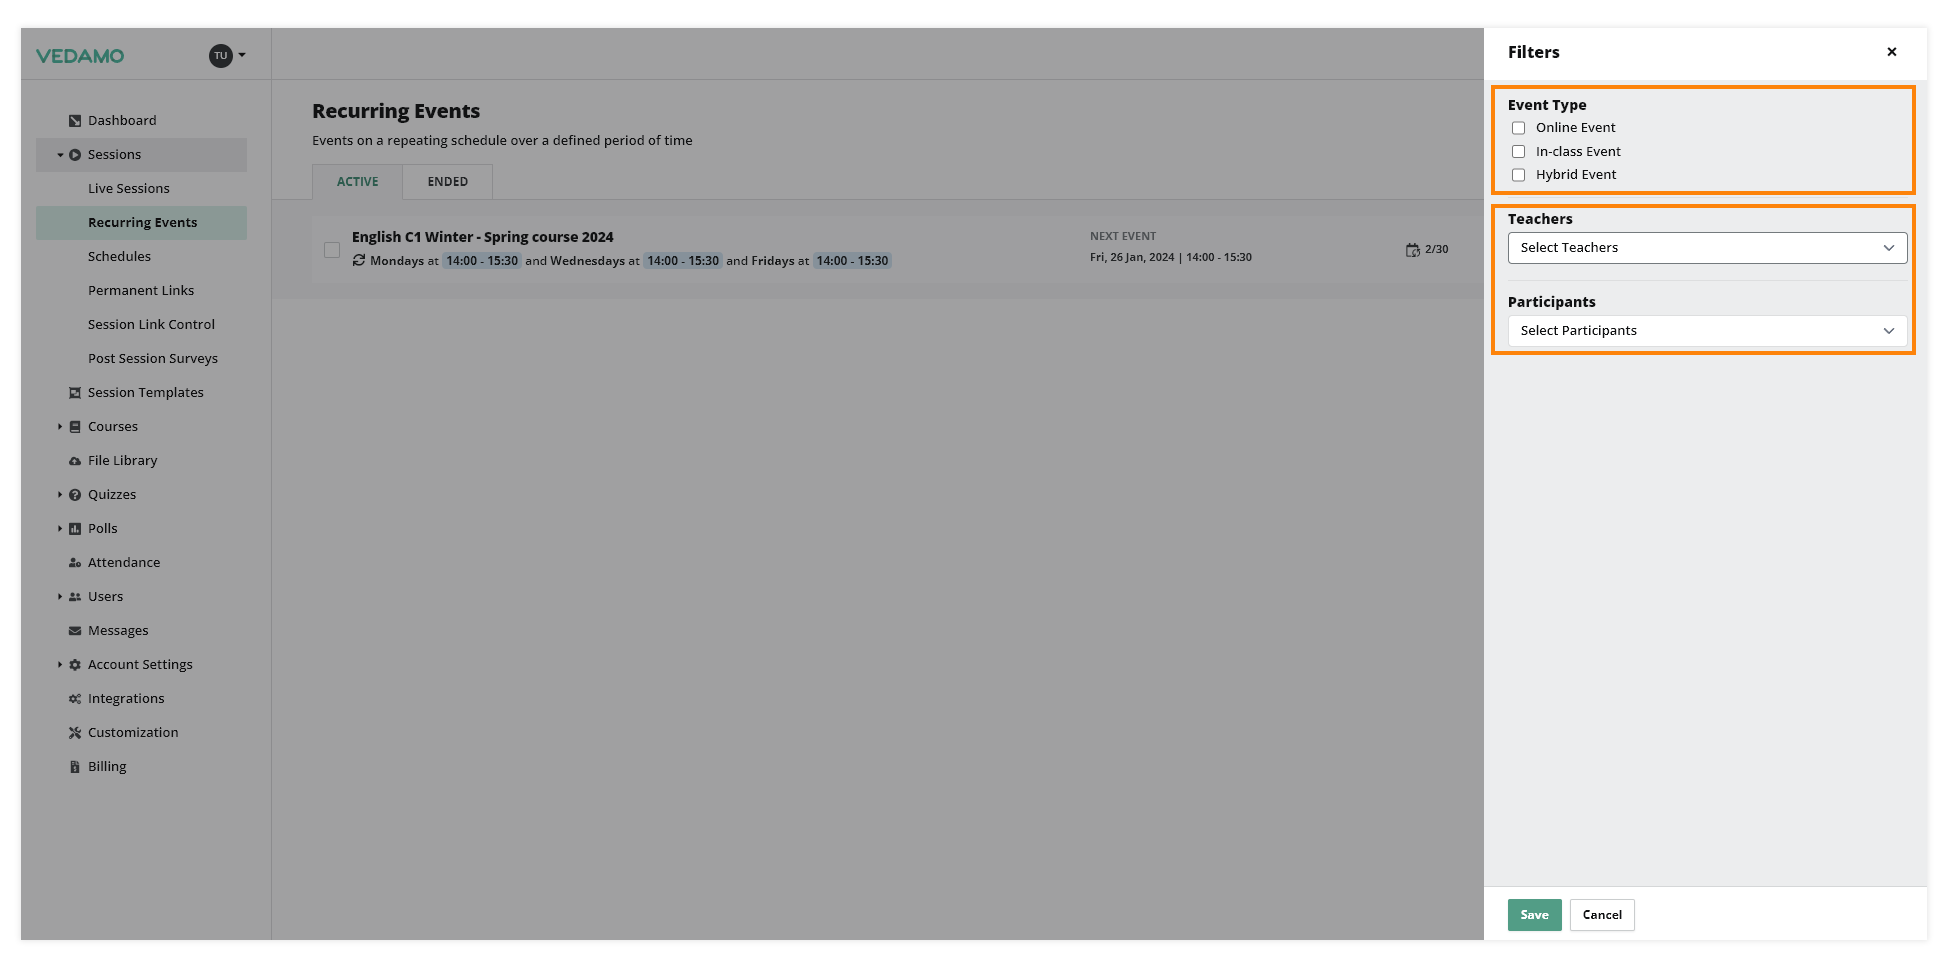
From the filter section you can choose to search by teacher or participants, as well as the type of session/event.
Here you have information about how many of the recurring events have passed already, how many participants are enrolled for the event and when the next scheduled event.
When you click on a particular event you will have additional information about it. If the session is colored in red this means that the time has come for the event to start.
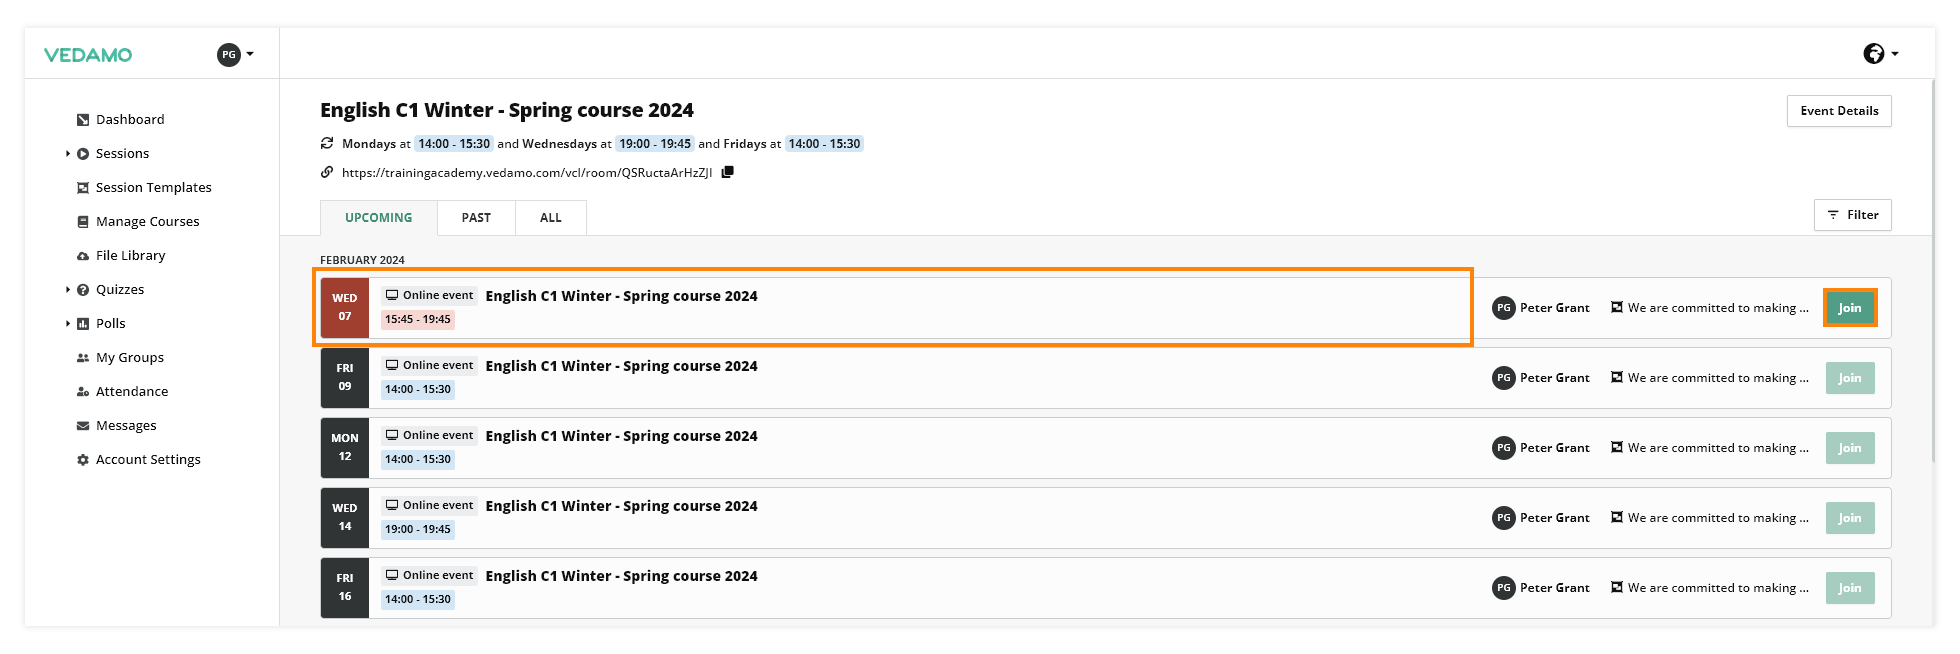
Note: For 30 minutes before the start of the scheduled time of the event the color will be yellow.

To edit the recurring events click here.
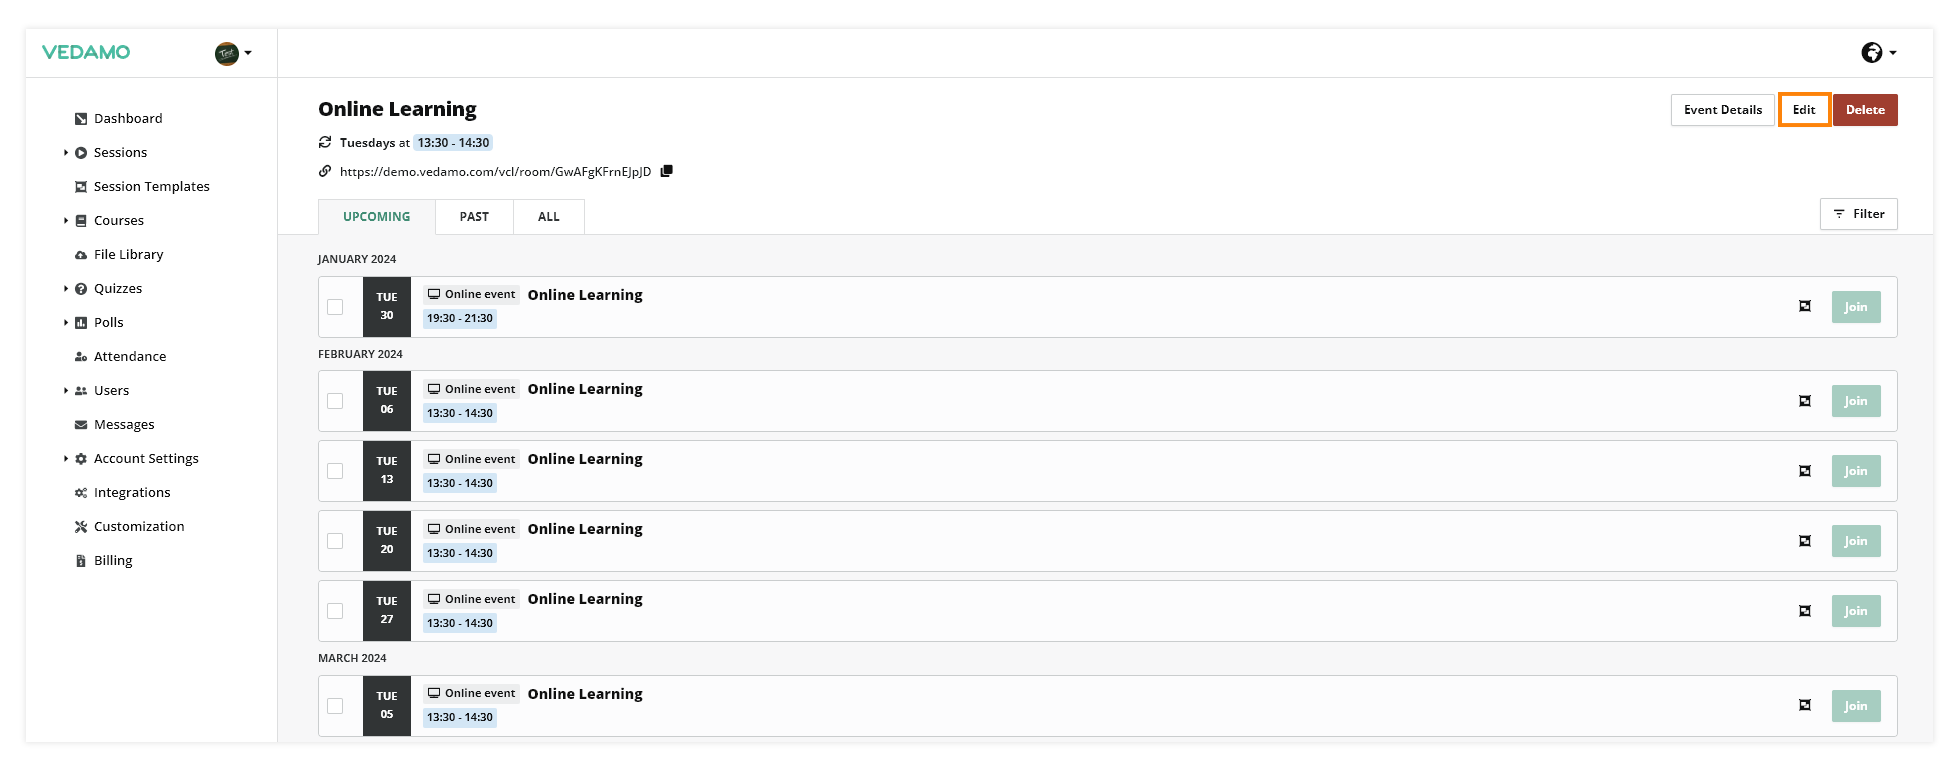
If you want to delete the recurring event you can do it from here.
