The most important feature of your VEDAMO account is the ability to create a new virtual classroom and invite students. You have several options to choose from in order to do that and we will take a look at these steps as part of this article.
Start a classroom
First method (1):
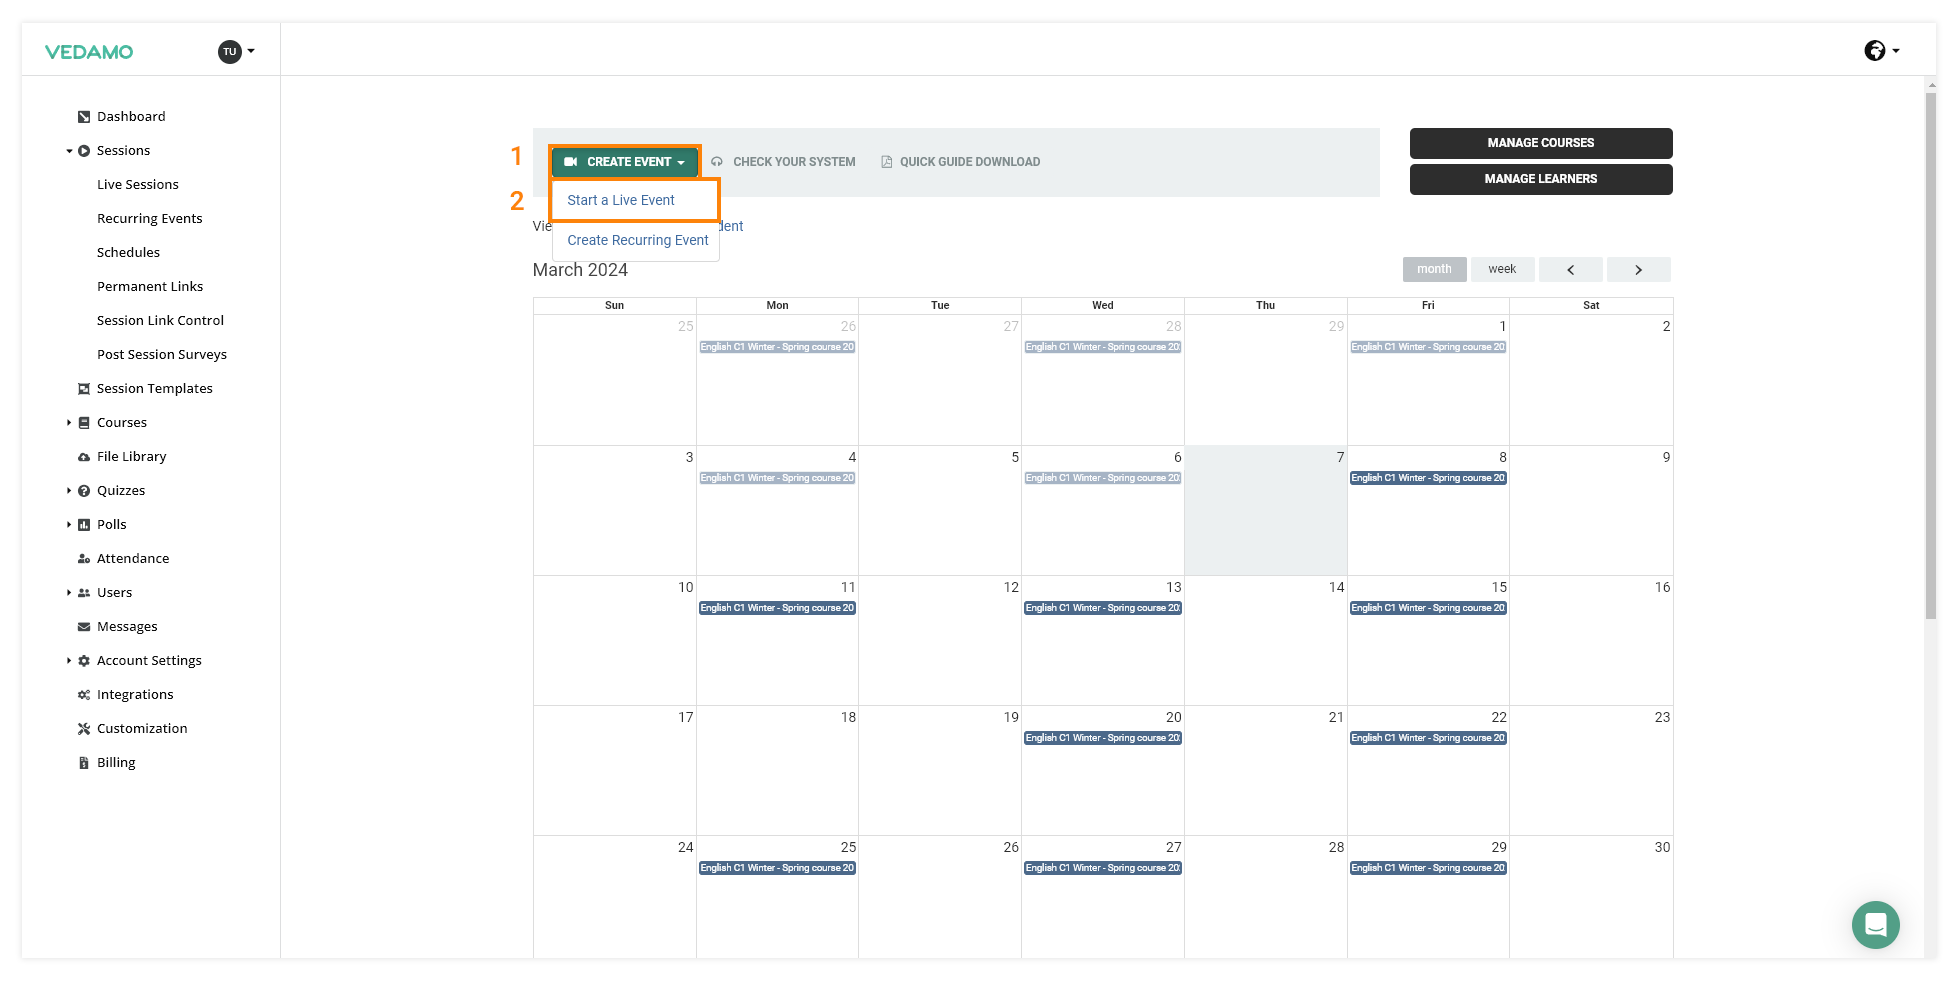
The Create event button on your dashboard: There is a button called Start a live event in the center of the dashboard, which will take you to the room creation page. However, bear in mind that only Admin roles can create a virtual room from the Dashboard.

Second method (2):
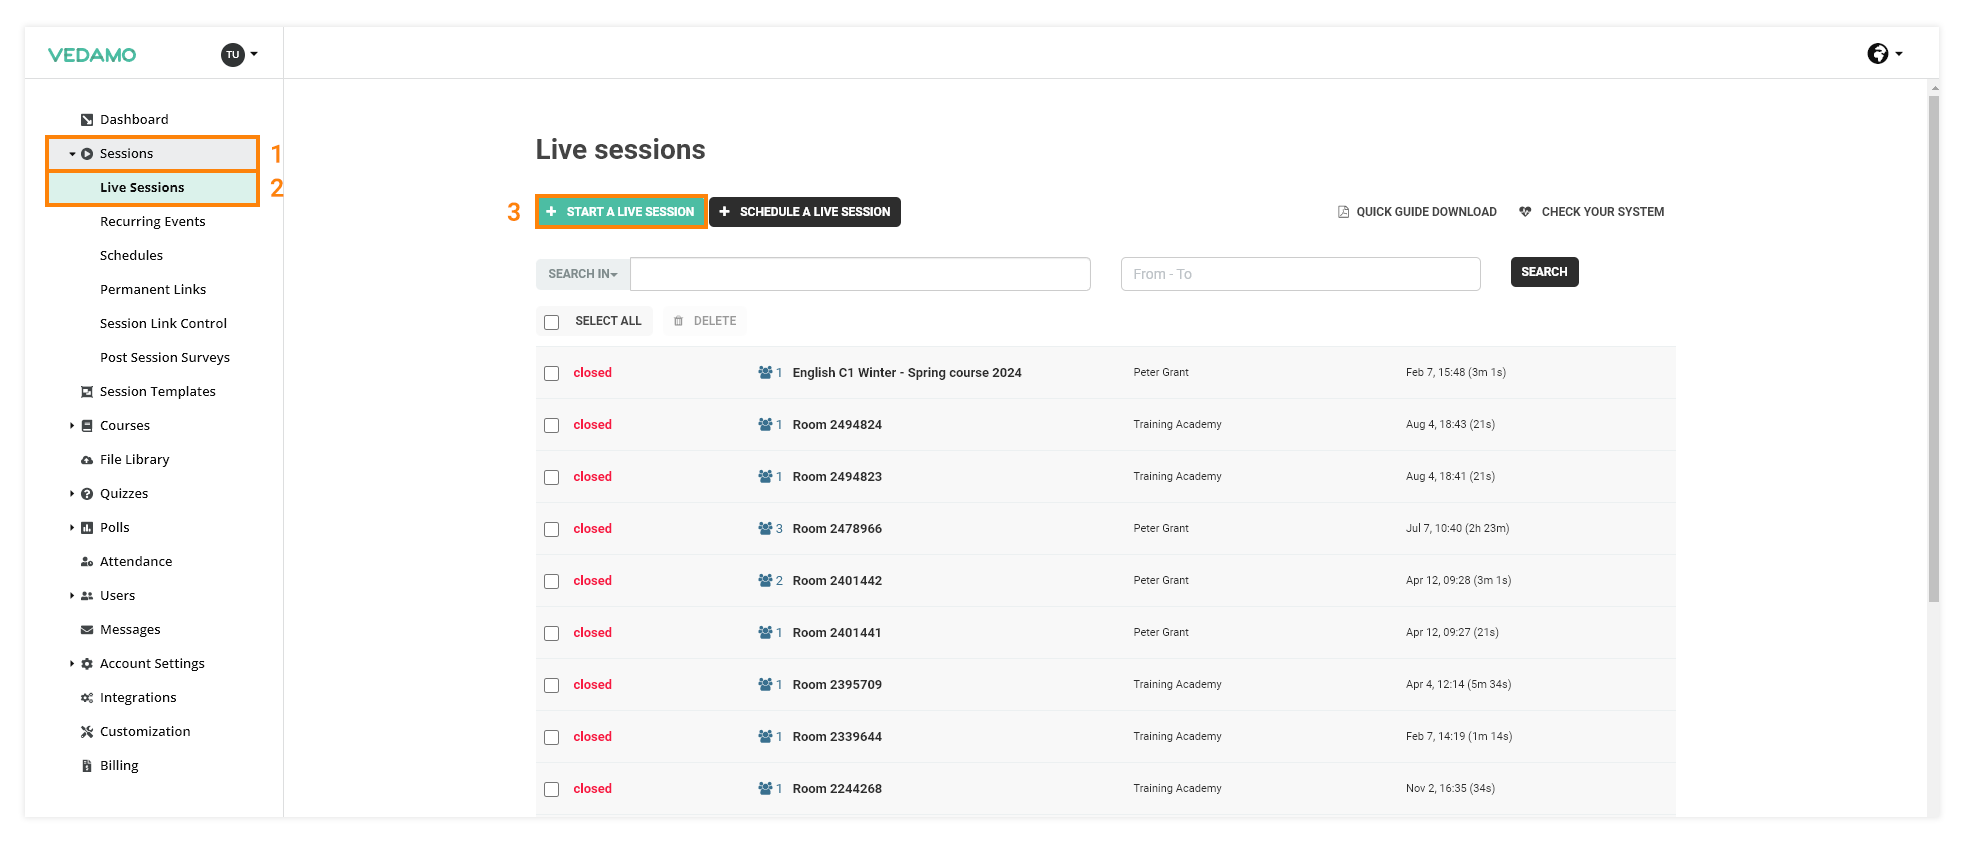
Click on the Sessions button. If you are currently on the Live sessions page (accessible from the left side menu), you can open a classroom from here. To do that, use the button called +Start a live session located directly above the classroom list.

New virtual classroom menu
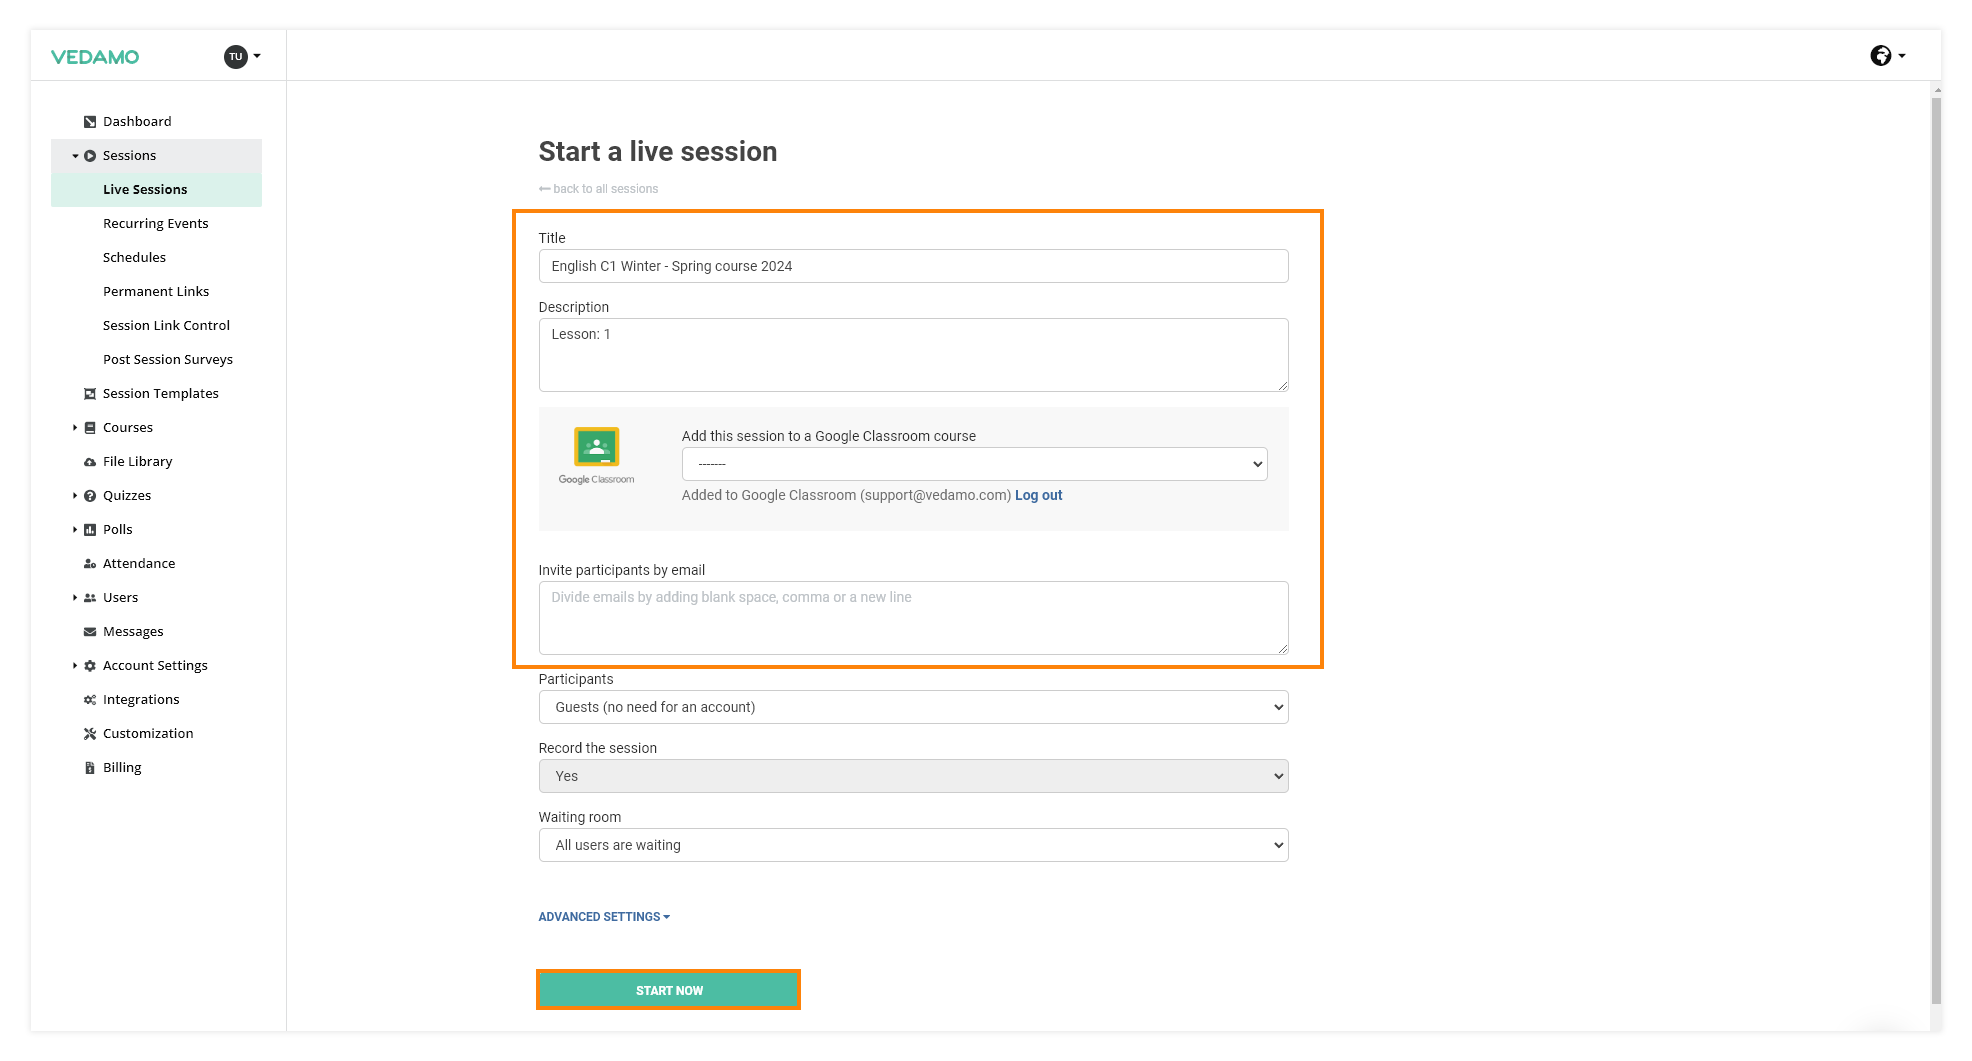
You have several customization options available to you prior to opening the room, all of which are optional.
- Include a room title, which will make the room easy to identify in your statistics later.
- Add a description to your classroom, such as the session’s topic or goal.
- Invite participants to your session via email.
The room description will also be sent as part of the invitation email your participants will receive.
NOTE: It is not obligatory to send the invitation this way, as you will get a unique link to your room once you create it. Copying this link and sending it to participants will also allow them to access your room.
You can click on “Advanced settings” if you want to edit the settings or on “Start now” to directly open the virtual classroom.
