Getting VEDAMO’s integration credentials
1. First, login to your VEDAMO account at www.vedamo.com. In case you don’t have a VEDAMO account yet, you can easily create one, and get a free 30-day trial, or directly purchase the Premium plan.
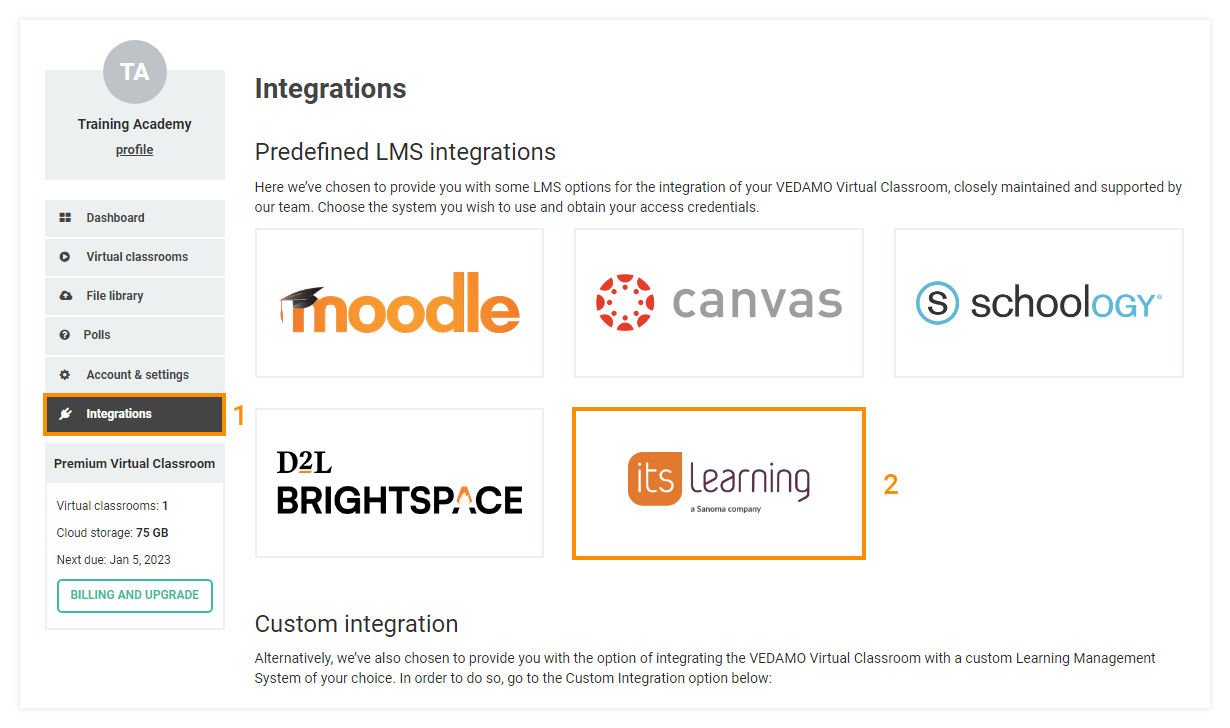
2. Go to the Integrations section of your account and choose itslearning.
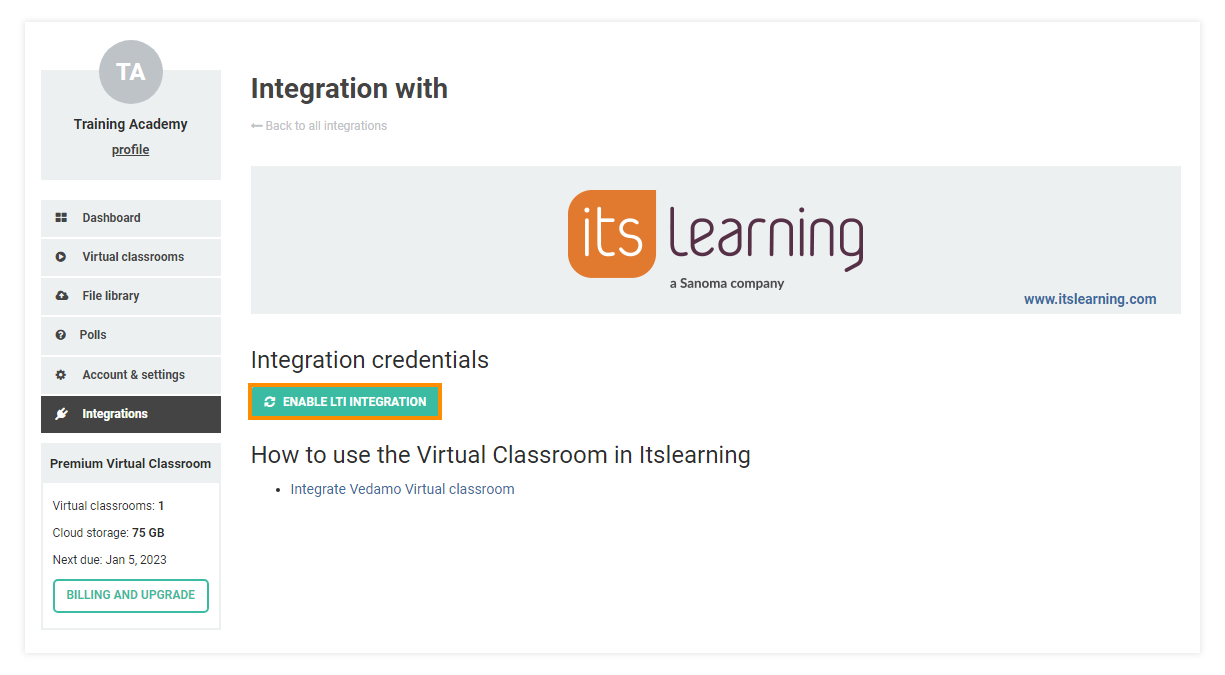
3. Then click on the Enable LTI integration button. This will take you to the integration menu, where all information required is located in order for you to complete it from VEDAMO’s side.
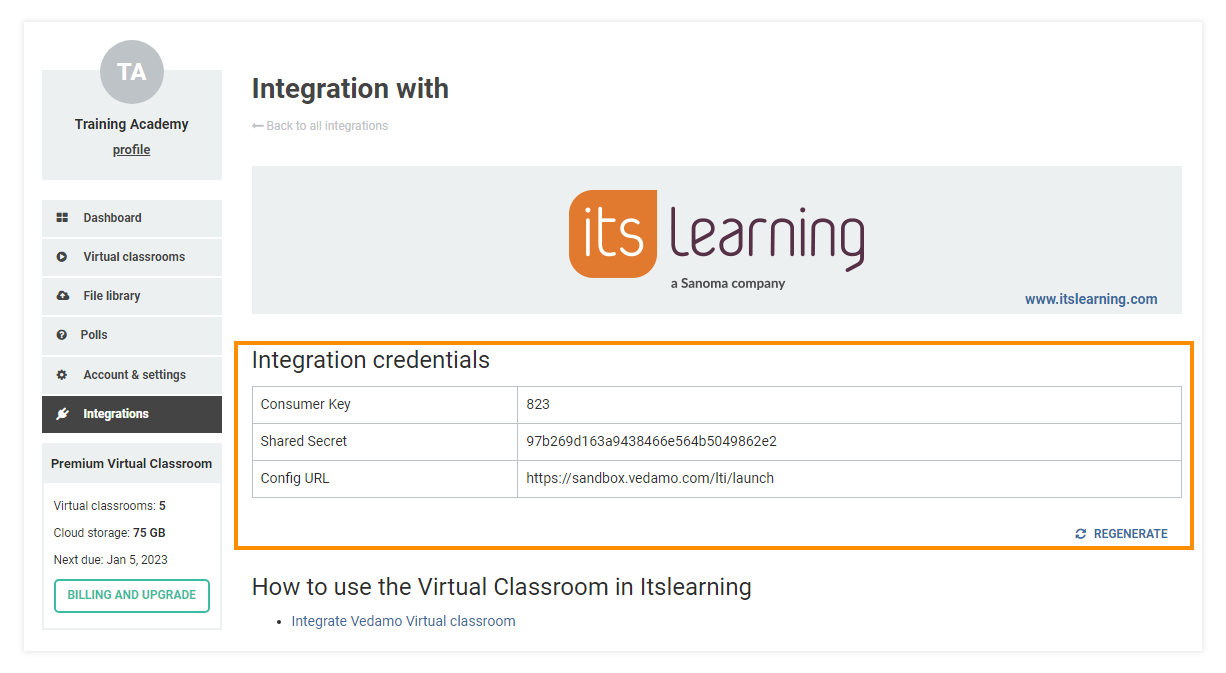
4. You will need to use these generated integration credentials on itslearning in order to complete the process.
Completing the process on itslearning
1. Login to your itslearning account and then access the Developer tab. This may need enabling on your Profile first, if it’s not currently visible (check Admins → Profiles as a System Administrator in order to change it).

2. Afterward, you need to click on the Add application button in order to start the integration process.

3. A new page will open where a few settings and details need to be filled in.
● Title: a text to identify the application, for example, VEDAMO.
● Short description: a text of your choice.
● Available for: My site only.
● Support homepage: https://www.vedamo.com
● Support mail: support@vedamo.com
● Homepage: https://www.vedamo.com
● Mail: support@vedamo.com
● License details: Only in itslearning.
● Licensing option: Free.
● SSO type: Use LTI 1.1
● OpenIn: Existing window.
● Launch URL: Use integration credentials provided (step 4) in your VEDAMO account (Config URL).
● Application key: Use integration credentials provided (step 4) in your VEDAMO account (Consumer Key).
● Application secret: Use integration credentials provided (step 4) in your VEDAMO account (Shared Secret).
● Privacy level: Name only.
● Hash algorithm: SHA-1
● Custom parameters: Leave it blank.
4. Once the application is installed, the next step is to define availability to users under Admin → Manage apps.
5. Once you are in the Manage apps menu, click on the Add app button.
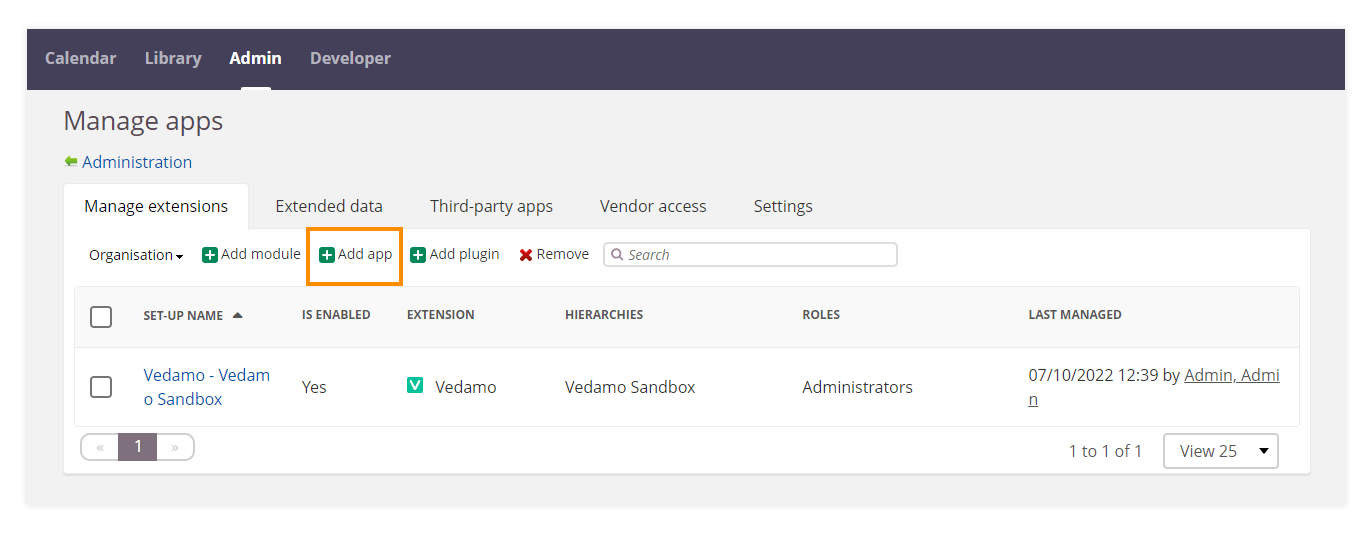
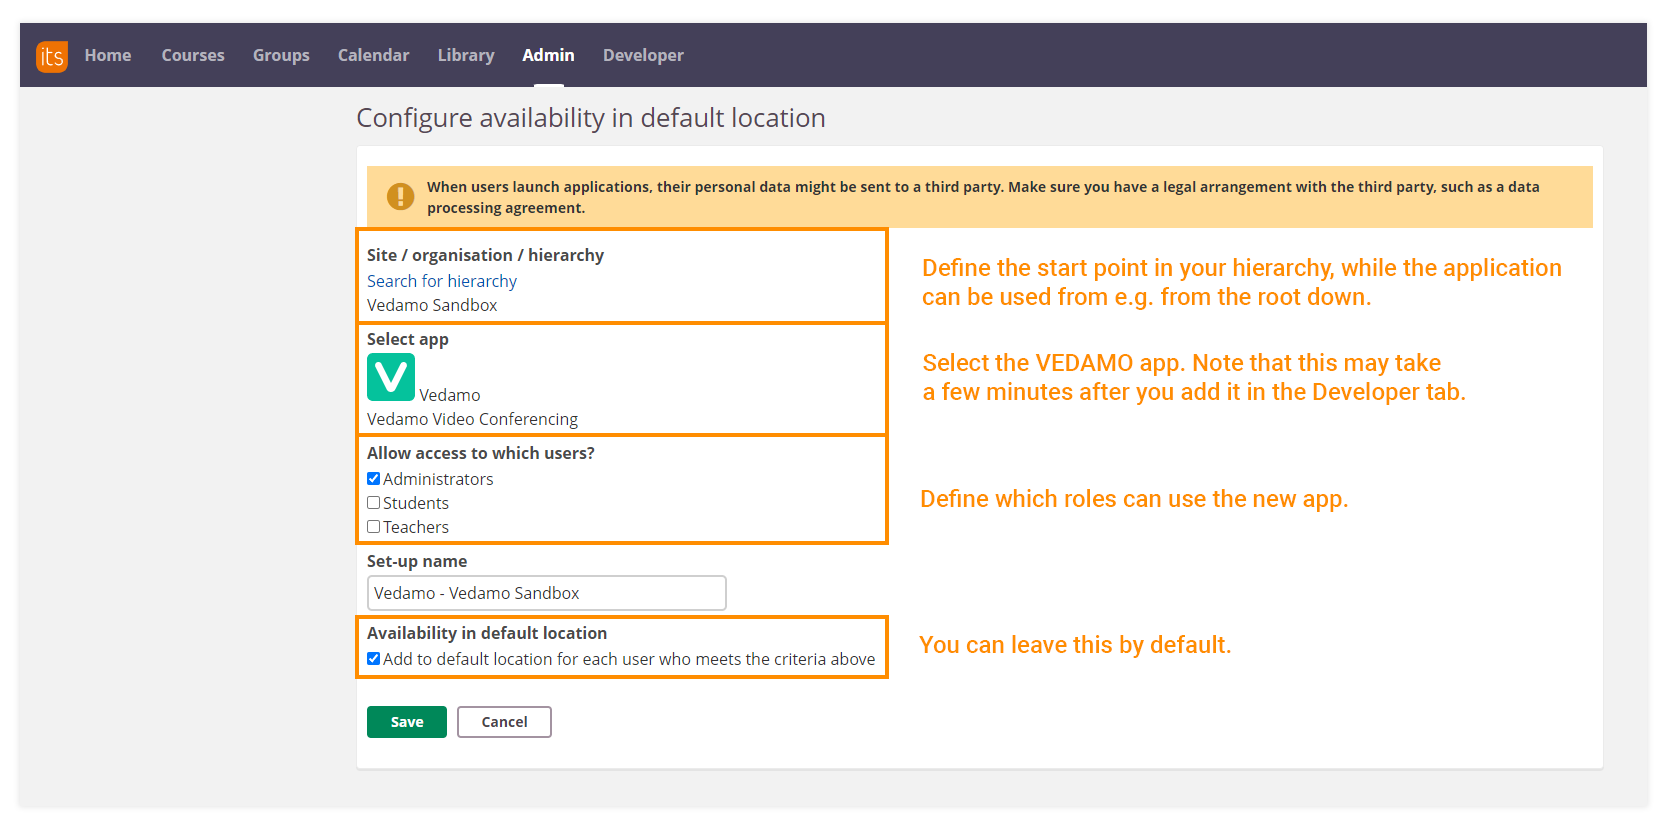
6. Finally, you need to configure the following settings in order to complete the integration process.
