How to manage your LMS Account and Settings page
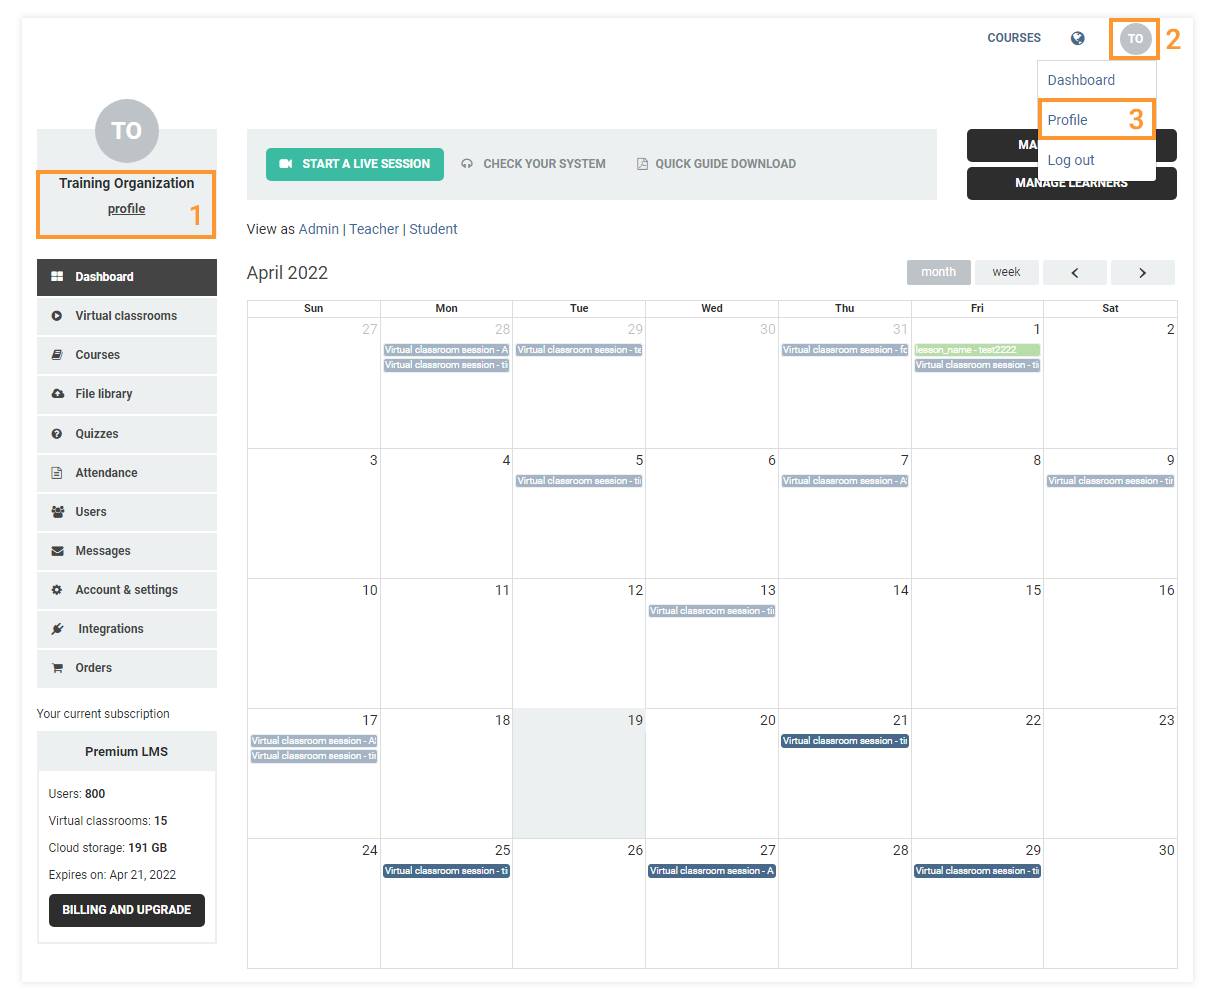
The LMS Account and Settings page allows you to edit your account information. Every registered user can do this. The account information is accessible from the left side menu through Account and Settings. You can also click on your name in the upper right corner and then select Profile from the drop-down menu that appears.

Basic information
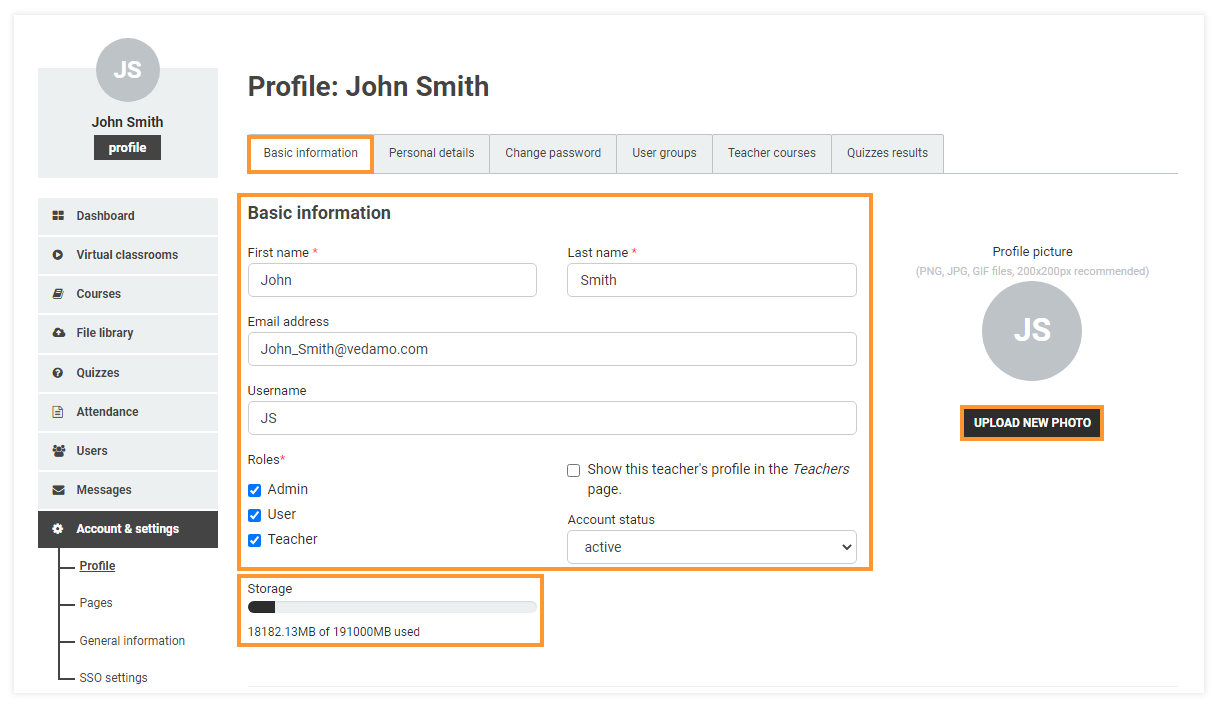
The Basic information tab offers you the option of editing the information present on your account. You can change your name, e-mail address, or username. You also have the option of uploading a new profile picture using the Upload new photo button.
The Storage bar allows you to see how much of your personal storage space you have used and how much of it you have left.
NOTE: You can use either your email address or username in order to log in with your account.

Note: Once you have made your desired changes, press the Save Changes button in order to confirm them.
Personal details
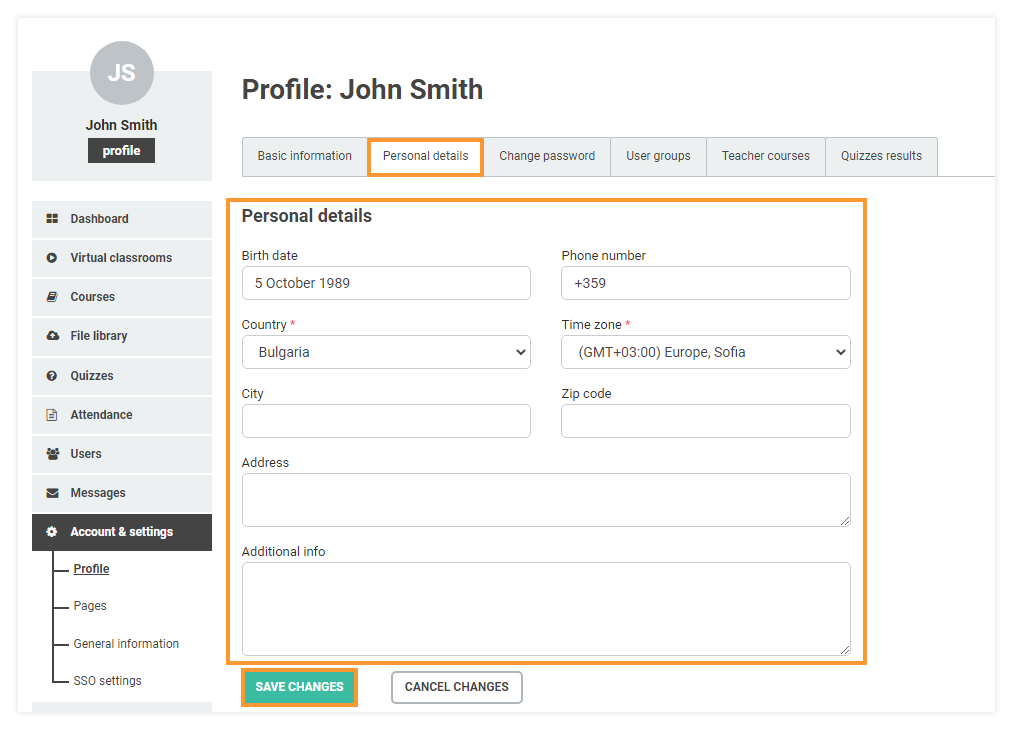
The Personal Details tab lets you put in some additional personal information, such as your date of birth, country, time zone, and address. The Additional info field lets you put in any further information you would like to share. This information is only visible only to Administrators and Organizational accounts.
Again, clicking on Save changes will submit your changes.

Change password
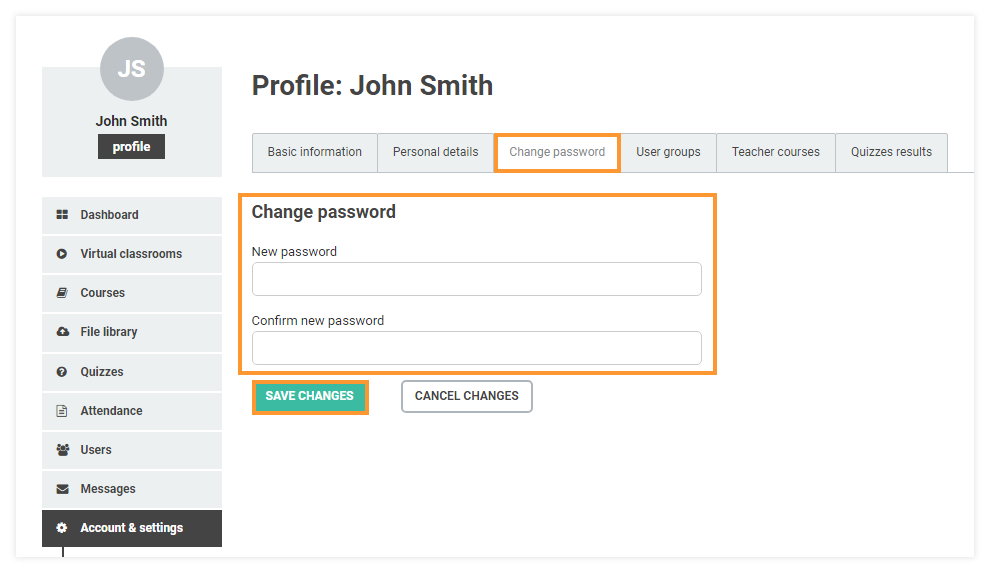
The Change password tab allows you to reset your account’s password. It requires you to input your current password and the new one. The third field must also be filled in order to confirm the new password. Click on Save changes in order to submit your new password.

General Information
Sub-menus: User groups, User Courses/Lessons allow you to check in which groups and courses you’re currently enrolled in, while the Quizzes results tab gives you access to all the quiz results which you have undertaken. Organizational accounts have access to an additional sub-menu under Account and Settings called General Information. They can use this menu to make changes to their company details, add a custom logo and adjust several other settings.