Description
As an organization, you have the option of editing the details and appearance of your LMS. The General Information menu under LMS Account and Settings allows you to adjust those, and more, settings for your organization.
Location
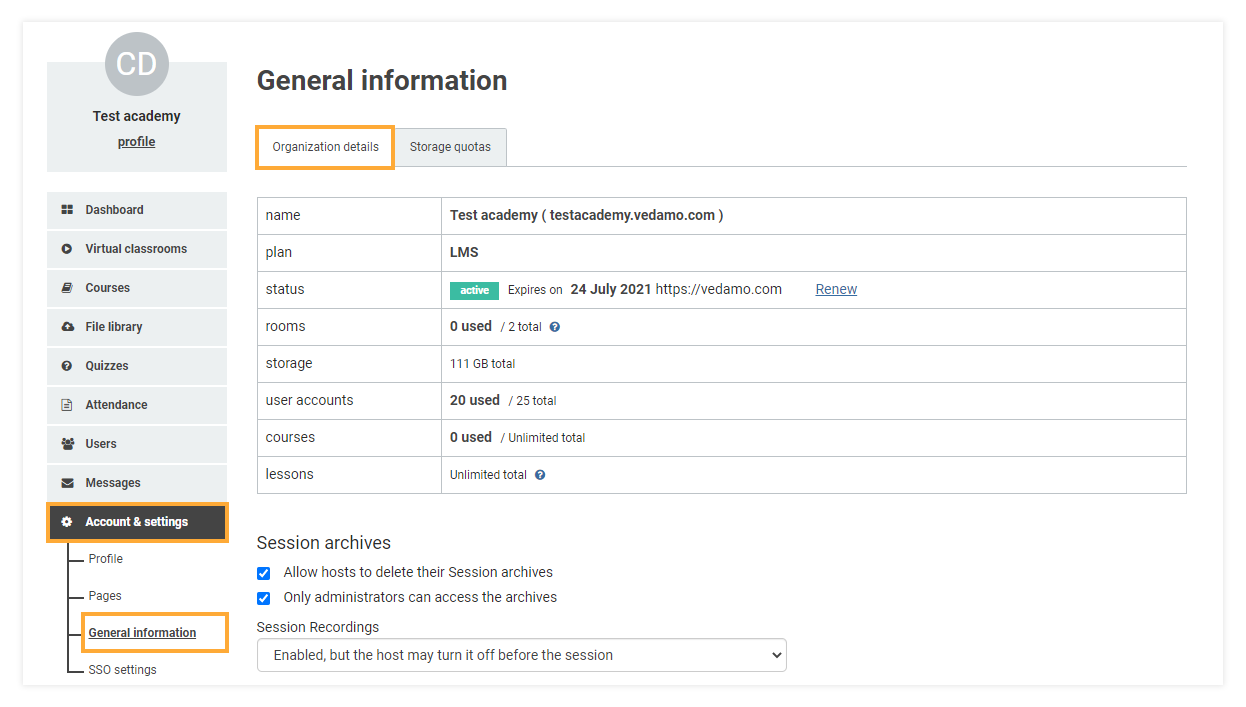
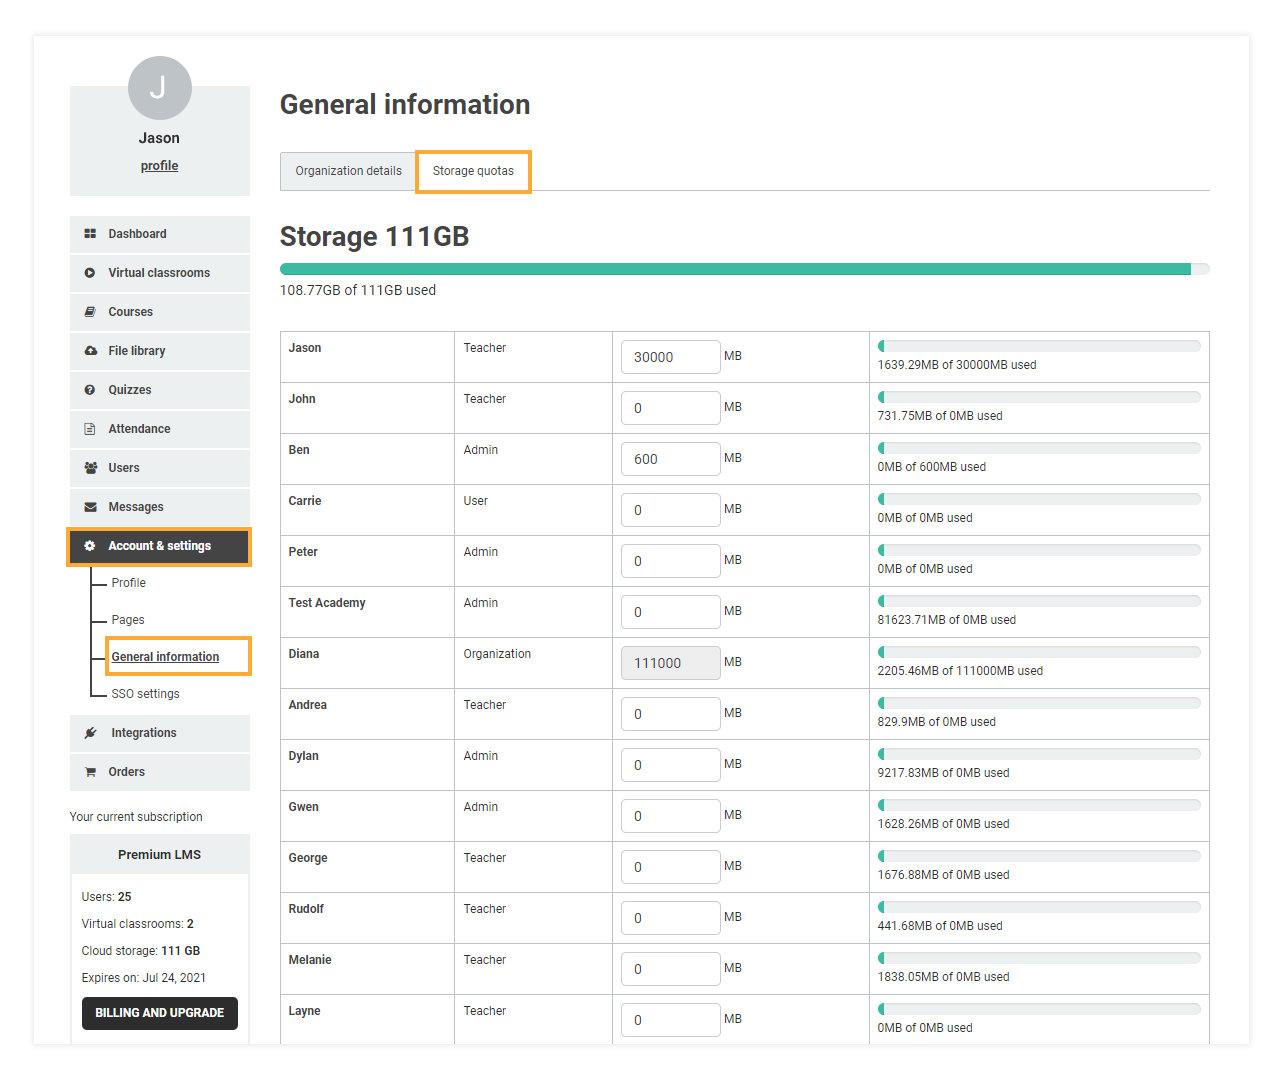
The menu can be accessed by clicking on Account & Settings in the left-side menu, and then on General information. The Menu is divided into two tabs: Organization details and Storage quotas.
Organization details and LMS Account and Settings
Once you click on General information, you will find yourself on the Organization details tab where you can edit your Learning Management System’s settings.
Subscription details
The first part of the Organization details page contains details regarding your plan. You can see the following details:
- Name: the name and sub-domain of your LMS;
- Plan: the type of plan you are subscribed for.
- Status: this is the current status of your subscription plan, either active or expired. This field also allows you to upgrade your subscription, adding new features to your plan. You will also have the option of renewing the subscription,
- Rooms: the first number shows you how many rooms are currently open in your LMS. The second number shows how many rooms you can open at the same time.
- Storage: this shows you the amount of storage you can use for uploading files and keeping interactive recordings of your lesson.
- User accounts: the first number is the number of accounts currently created, the second shows the total number of accounts that can be used in the academy.
- Courses: number of courses that are created.
- Lessons: number of lessons which you are allowed to create. Free LMS accounts can use up to 10 in total, premium plans are not limited in the number of lessons that can be created.
Organization settings
You get access to various settings if you have subscribed to the premium Learning Management System plan:
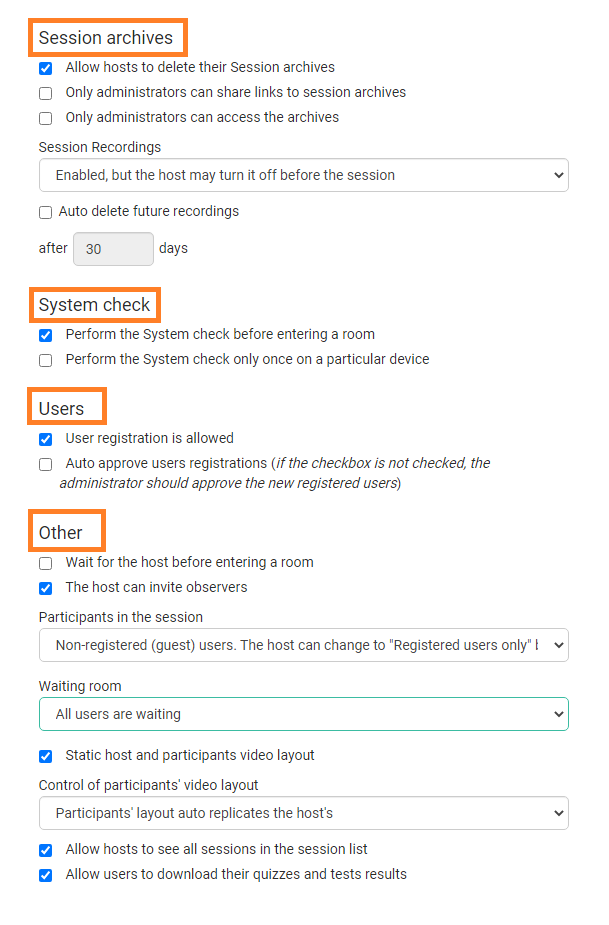
These settings are available in the LMS. As you can see, they are divided into sections, which we will now explain in more detail.
“Session archives”
- You can define whether the hosts (accounts with a teacher role) should be able to delete the recordings of the rooms they created.
- Allow or deny access to the hosts to the links of the session archives. If this setting is turned on, only administrators will be able to manage them (the “Share link” – option will be unclickable for the hosts).
- Set only the administrators to be able to convert, download, and share the links to the archives (however, the hosts will still be able to see them, as well as the registered users who were part of the sessions).
- Define whether or not the rooms created in the academy should have recordings and whether or not the host should be given a permission to control this adjustment in the room.
- Decide if all future recordings should be automatically deleted and, if so, after what period of time.
“System check”
- You can choose whether or not a system check should be performed before entering a room. We recommend turning this option on since any issues with the device can be identified before the beginning of the session.
- You can set the system check to be performed only once on a device. This will save you some time.
“Users”
The options available here will be explained in more detail below in the “User approval” part of the article.
“Other”
- You can decide whether or not the users/students have to wait for the host before they enter the room.
- You can decide whether or not the host is able to invite observers (if turned on, an option in the Advanced settings of the room will be visible).
- The room type can be set here either for registered users or for guests. Also, the academy can set one type of a room but allow the host to decide to change it.
- The waiting room can be turned on or off.
- The default video layout can be adjusted here as well. The room can be set to a static layout (all video boxes cannot be moved or resized; the individual video and video mosaic are shown on the right side of the screen) or not (video boxes are movable and scalable).
- Different ways for controlling the video boxes can be chosen – whether the users/students are able to open/close their video boxes or if they are controlled by the host).
- You can decide whether the accounts with only a teacher role are able to see all the sessions created in the academy or if they can only see their own.
- Allow/deny the users the ability to download their quiz results.
Customization options
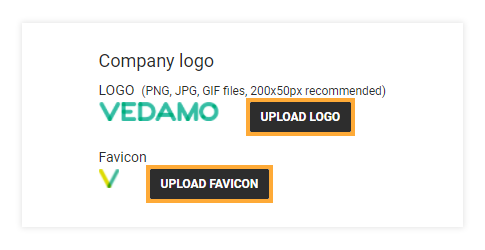
Next in the list are the Company logo and Favicon fields. The Upload logo button allows you to upload a custom logo for your academy. This will show up in the top left corner of your subdomain and replace the default VEDAMO logo. The Upload favicon lets you upload an icon that will appear on the browser tab in which your academy is open and it replaces the regular Vedamo V icon that normally appears there.
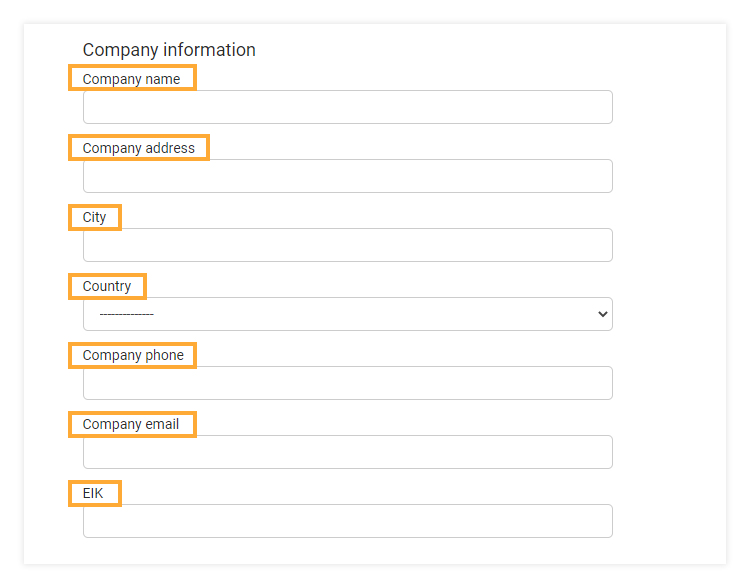
Company information
Finally, the menu offers seven more fields that you can use to include additional company details.
Storage quotas
Storage quotas is the second tab in the General Information menu. It allows you to distribute your total storage space between the different users in your academy. Your Organization account contains the full storage quota by default. The total size of your quota depends on your current subscription package. The Organization account can then transfer some of that quota to teachers’ accounts as necessary.
FOR EXAMPLE: In the screenshot, you can see that this particular Organization account has a total quota of 111 GB The Organization would like to increase the teacher’s (Jason) quota to 30000 MB. To do that, they will need to type 30000 into that teacher’s box (you can also use the up/down arrows) and then click the Save Changes button. The teacher’s quota will now be 30000 MB and the bar showing how much space they have remaining will now say 1639.29MB of 30000MB used.
User approval
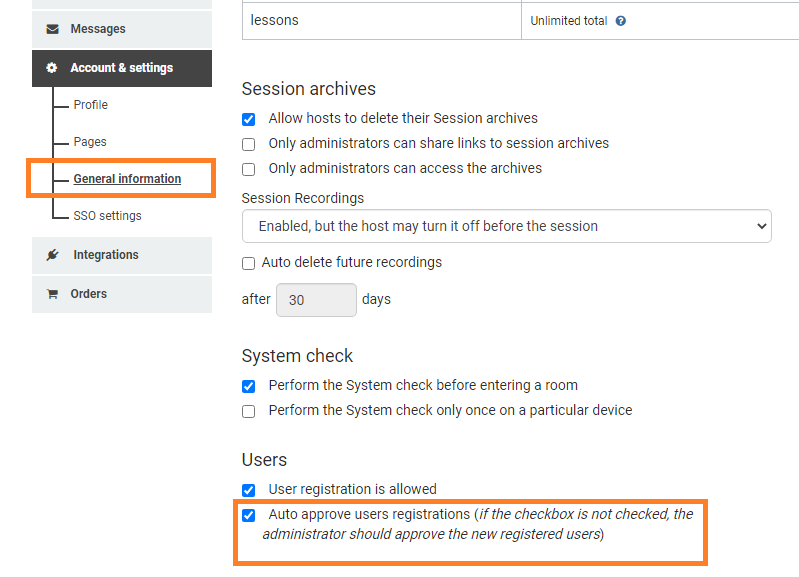
This functionality will let you choose whether or not user registration is allowed (if allowed, anyone can register in your academy, although only as a user by role).
If “Auto approve users registrations” is switched on all registrations won’t need any approval they will be completed automatically. Otherwise (not checked) the registrations will display “pending” status until the organizational/admin account has approved them.
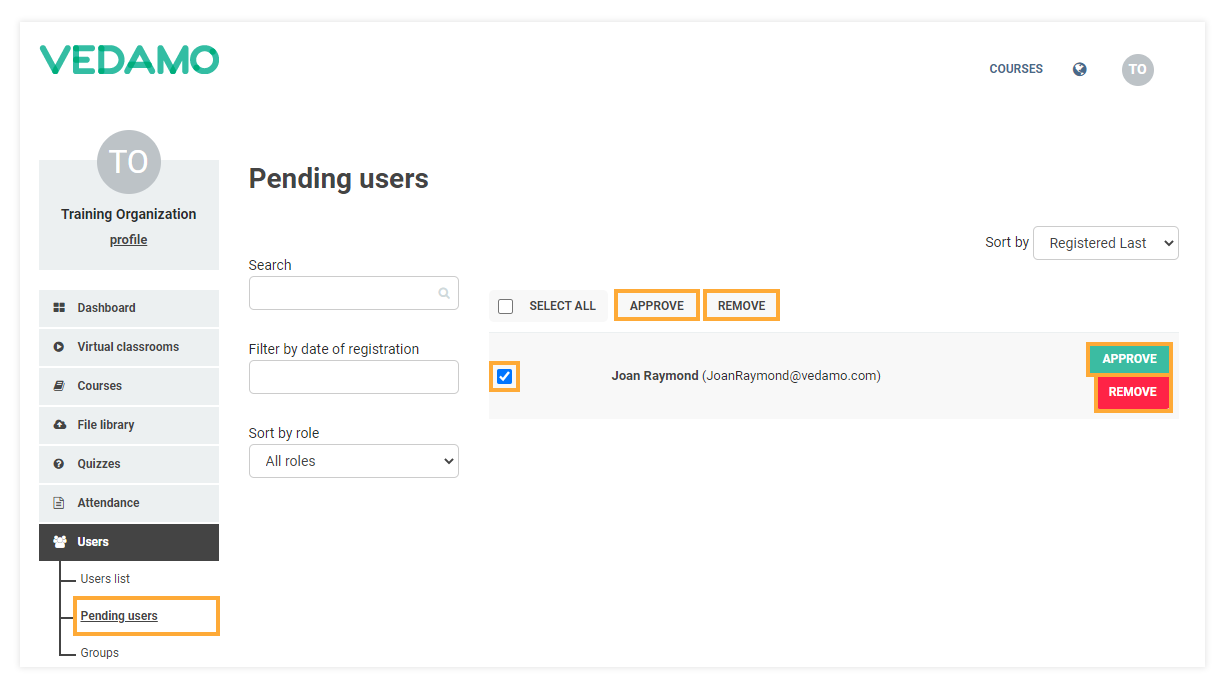
Note: Pending users will not increase the users quota.
If a user has not been approved (remove option is used), the user will be showing the suspended status.
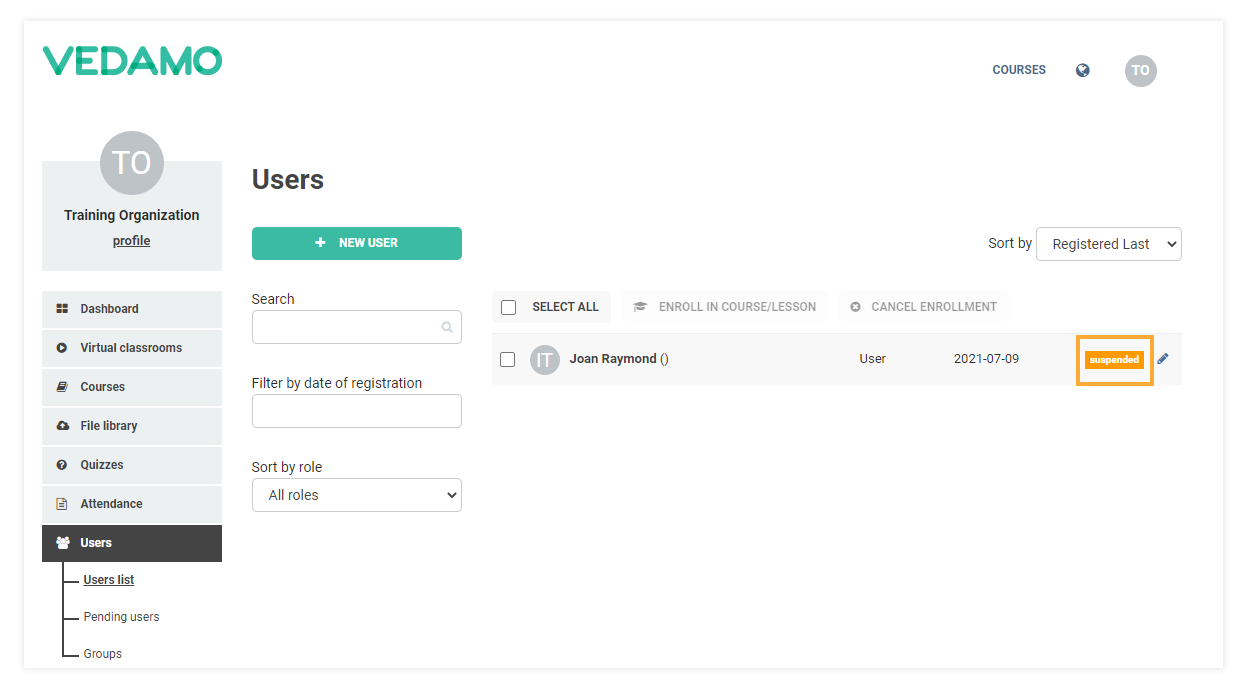
Note: Suspended users will not increase the users quota.
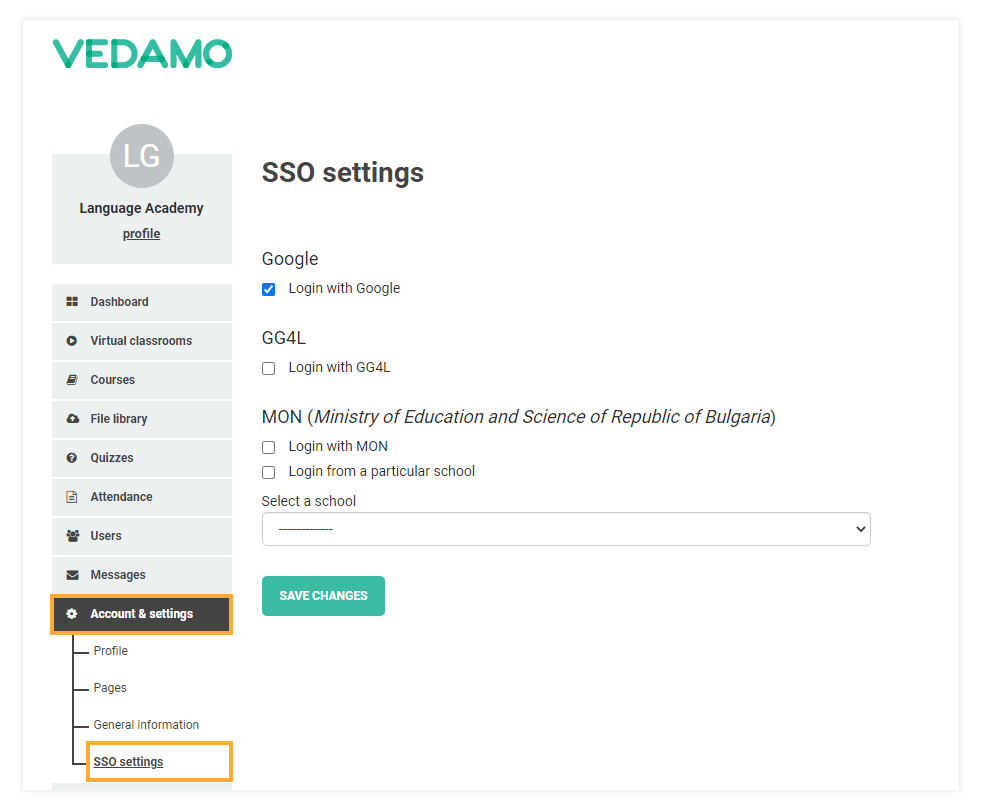
SSO (single sign-on)
Single sign-on (SSO) is an authentication scheme that allows a user to log in with a single ID and password to any of several related, yet independent, software systems. Single sign-on allows the user to log in once and access services without re-entering authentication factors.
Note: information provided from Wikipedia
At the moment the user can choose from the corresponding list:
-Google
-GG4L
-MON
