Introduction:
The File sharing feature in the LMS is a useful tool that helps your work process.
Benefits for the admins:
- Easily share files and folders with all the teachers and other admins in the academy
- Save storage
- Save time and optimize the academy’s content management
Benefits for the teachers:
- Allowing easy access to files for your students.
- Easily use shared files to create content session templates
- Use extra materials during your live sessions
Table of contains:
- How to share/manage files with individual user
- How to Edit/Change file rights for a particular user
- How to remove file rights from a particular user
- How to download shared files
- How to share files within the group
- How to share files within a section that is part of a course
- Shared files that are part of a template
Note: Only teachers, administrators and the organization account are allowed to share files. Regular student accounts with no special rights can only download a file that has been shared with them.
How to share/manage files with individual user
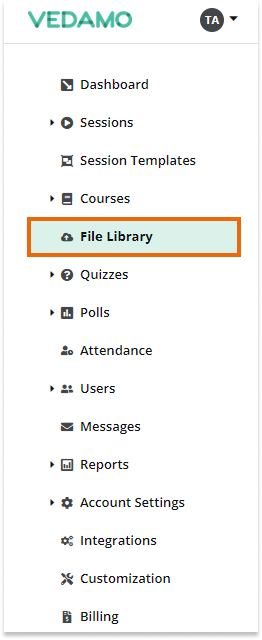
Once you have logged in your account you can navigate to the “File Library” tab to access the file sharing feature.
In order to share a file, you will have to locate the file of your choice and mark it.
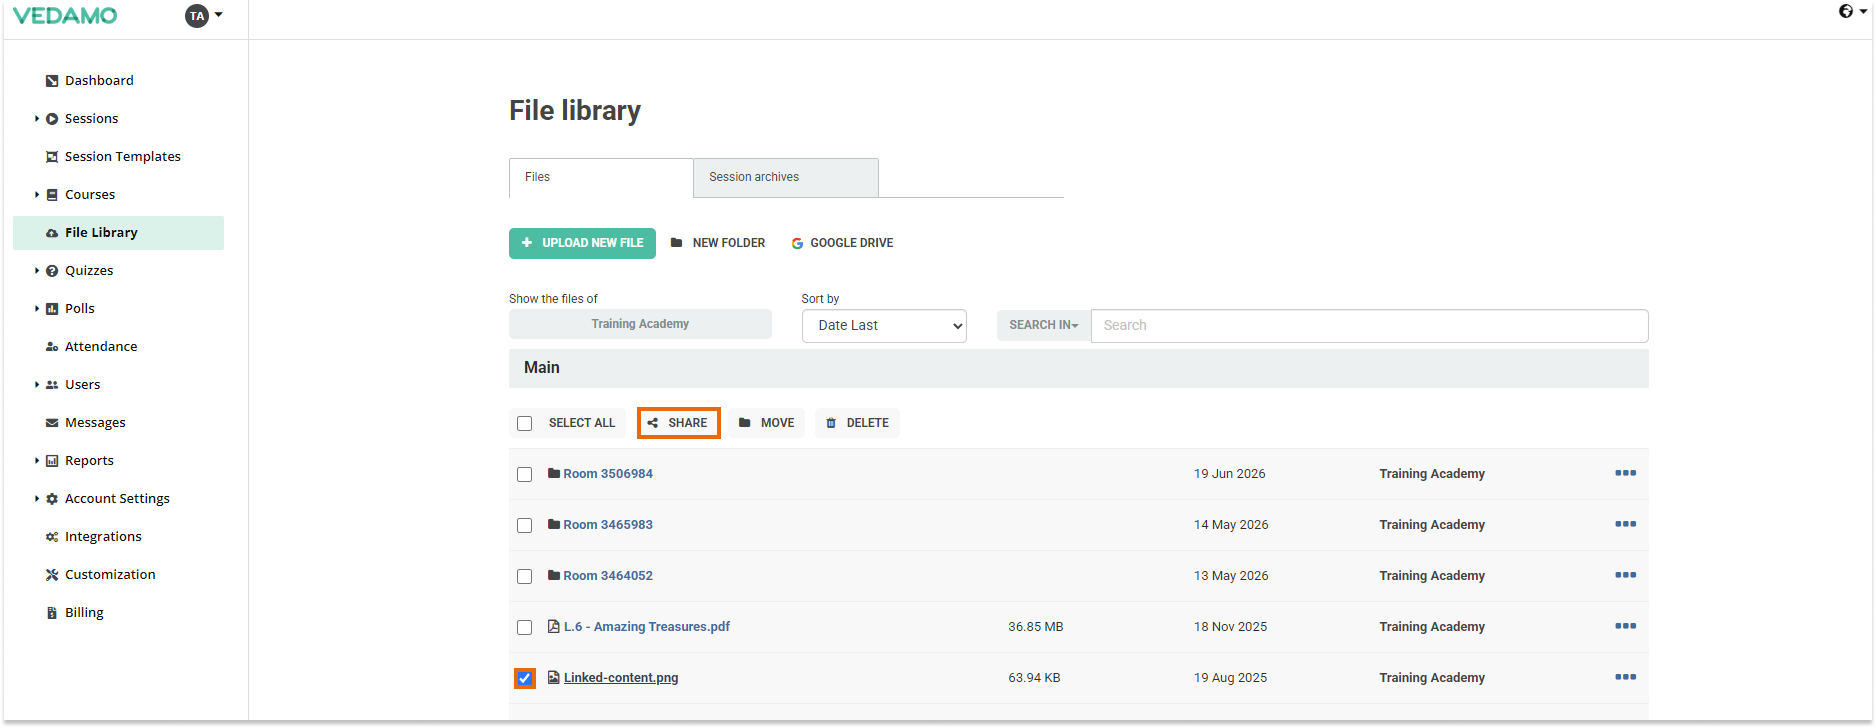
Note: The organizational account will see all the files that have been uploaded in the academy by all users.
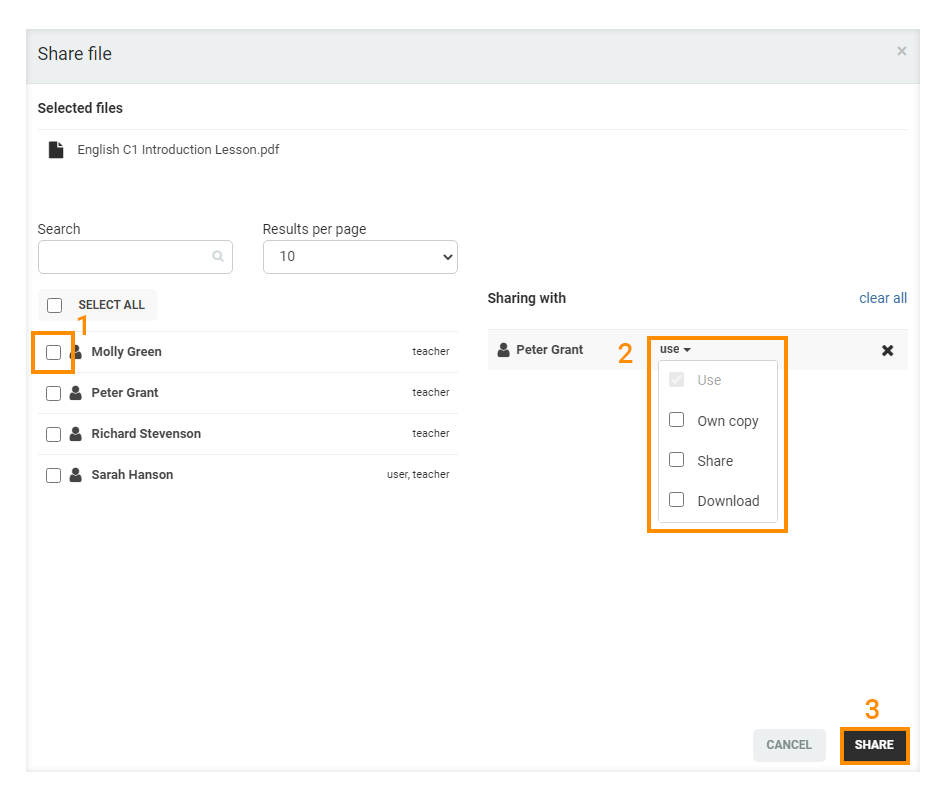
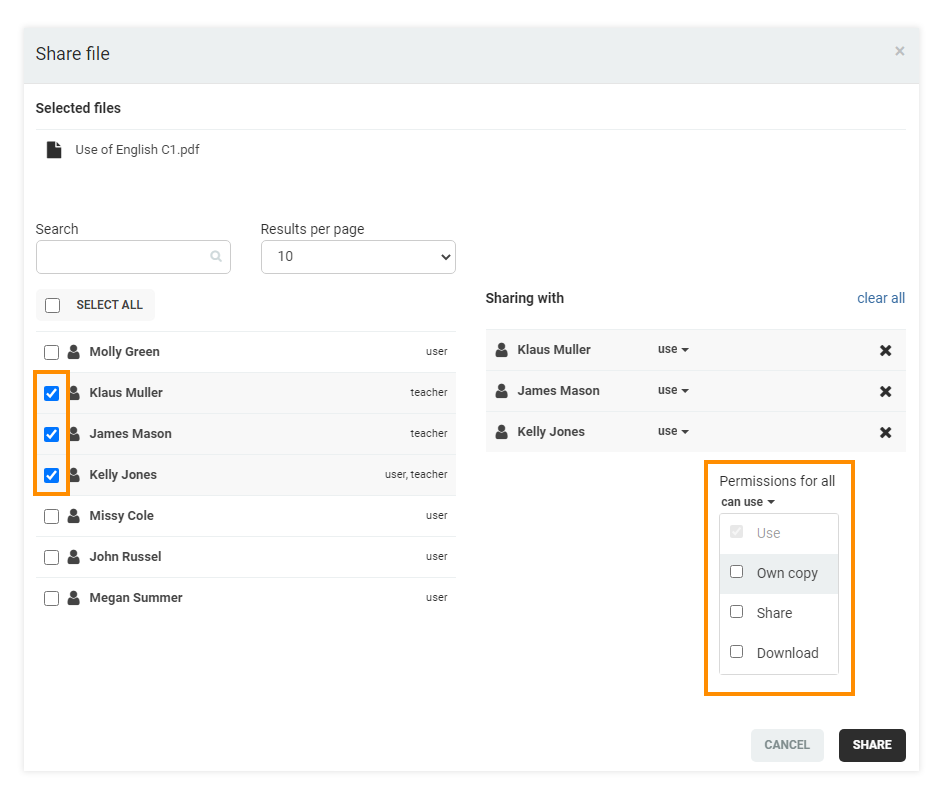
When you have selected the file that you want to share, proceed by clicking on the “Share” button. A separate menu will open from where you can locate the user you would like to share the file with. You could either find the account by browsing through the pages, or you could type out their name in the search bar. Before sharing the file, you will have to choose from 3 different types of access.
Own copy – You give the user a copy of the file.
Share – The administrator/teacher can share the file with other users in the LMS.
Download – The user can download the file from the file library and save it on their personal device.
Note: that the rights can work in conjunction with each other, meaning that you can grant an account permission to both share and download the file.
Note: Only files that are shared with “own copy” will occupy storage.
Once you have marked the user, their name will appear on the right. Click on “can use” and adjust the rights as you prefer. After you are done with the setting, click on the “Share” button highlighted in black.
Additionally you can share the file(s) with several users at once. That way you can still set individual rights or select the “Permissions for all” option if everyone has to have the same access to the file(s).
How to Edit/Change file rights for a particular user
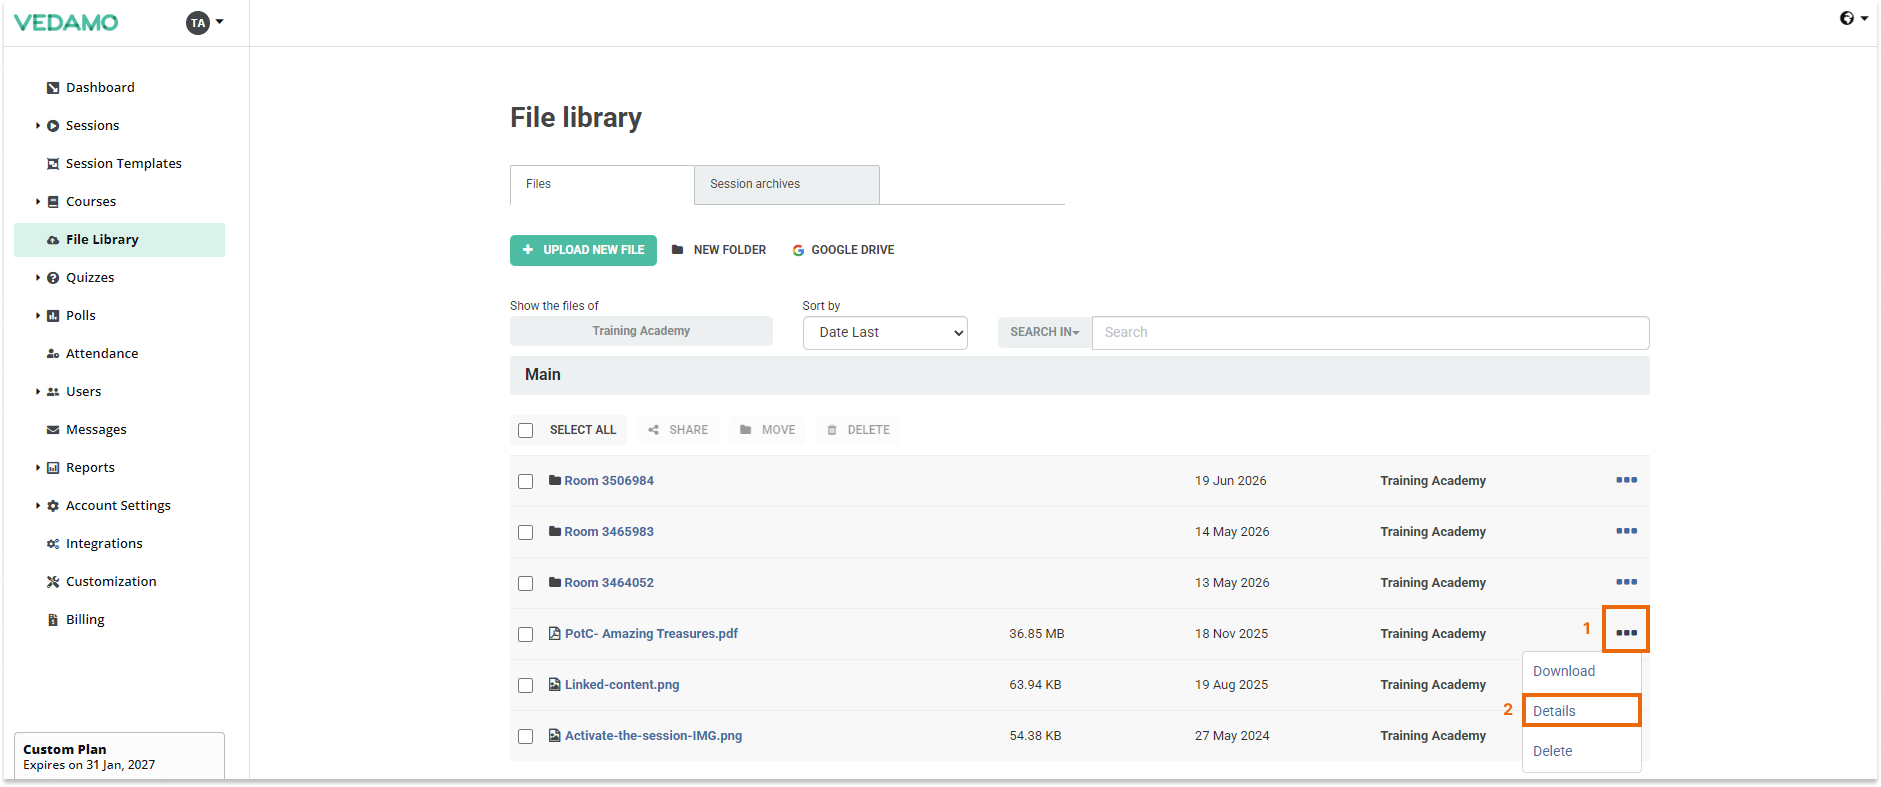
In instances where you no longer want a particular user to have certain permissions to download or share a file, you can edit/change their rights. After you have located the file in the file library, click on the three dot icon located on the far right, and follow up by clicking on “Details” from the dropdown menu.
Type out the user names in the search bar or use “filter by permissions” to locate users that have certain rights to the file. Then, click on “can use” and pick the rights you would like to remove from the users. In case you change your mind, you can grant the same rights to the users from this dropdown menu.
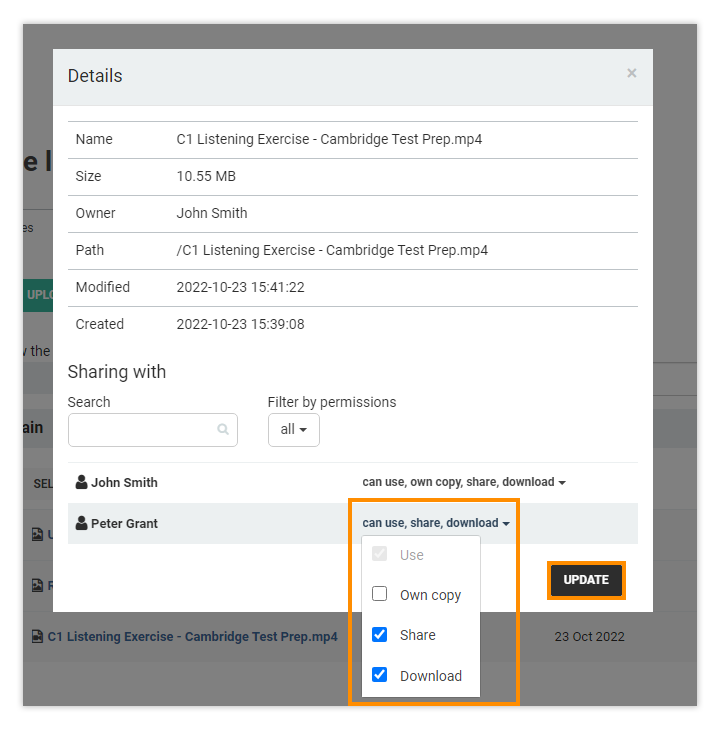
After you are done with granting/removing the rights, click on the “Update” button highlighted in black, to save the changes you have made.
How to remove file rights from a particular user
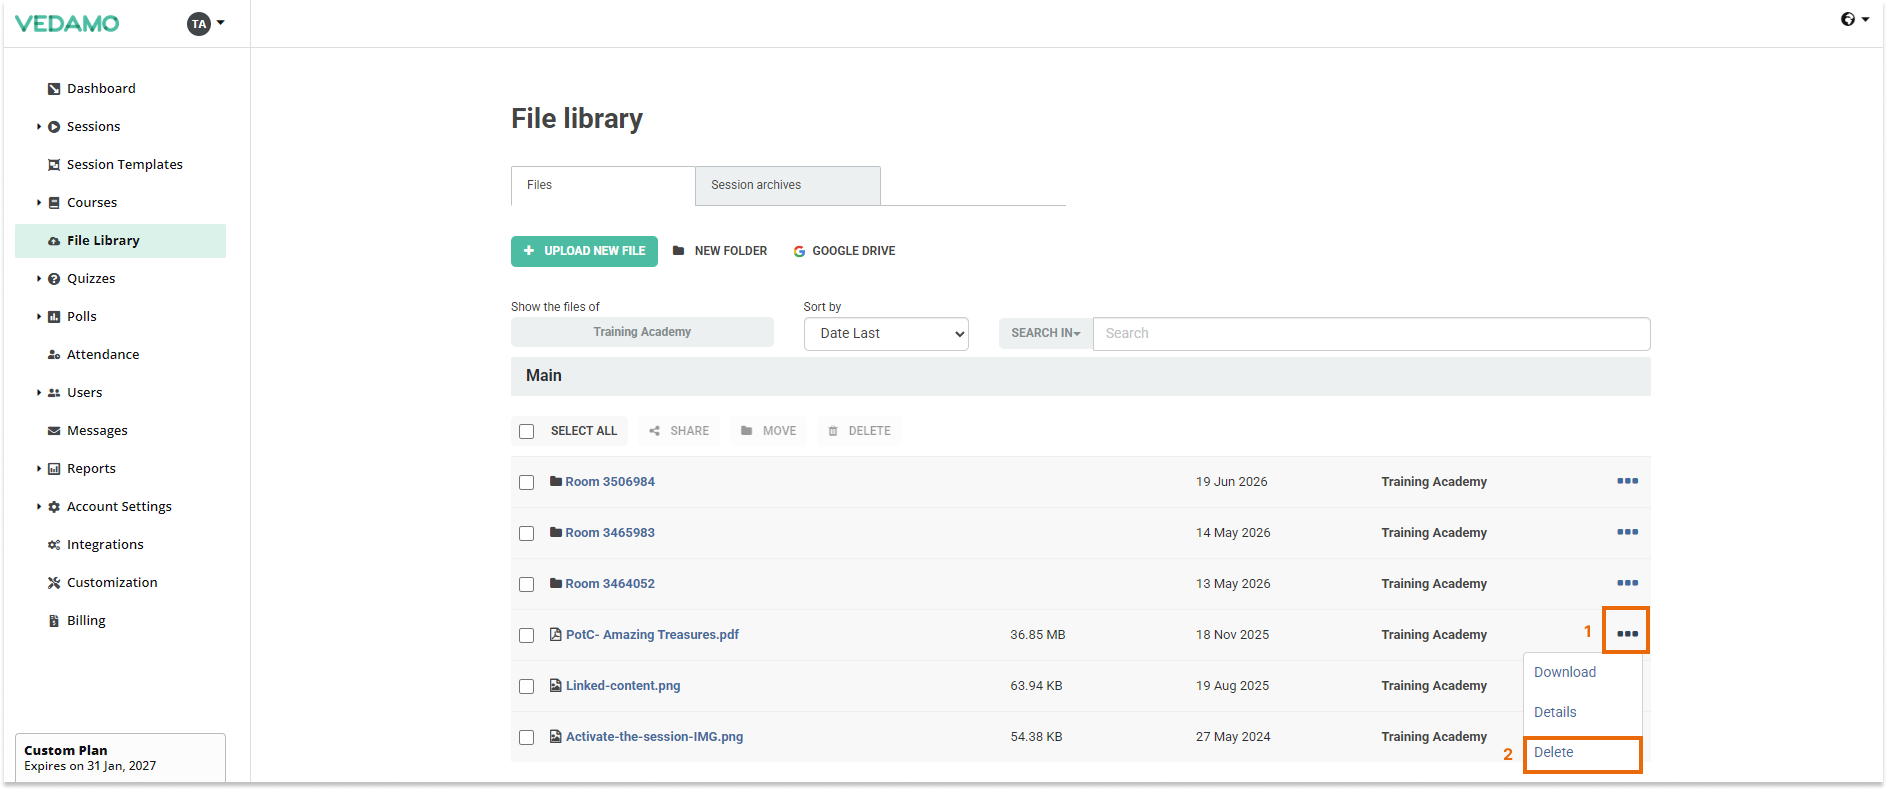
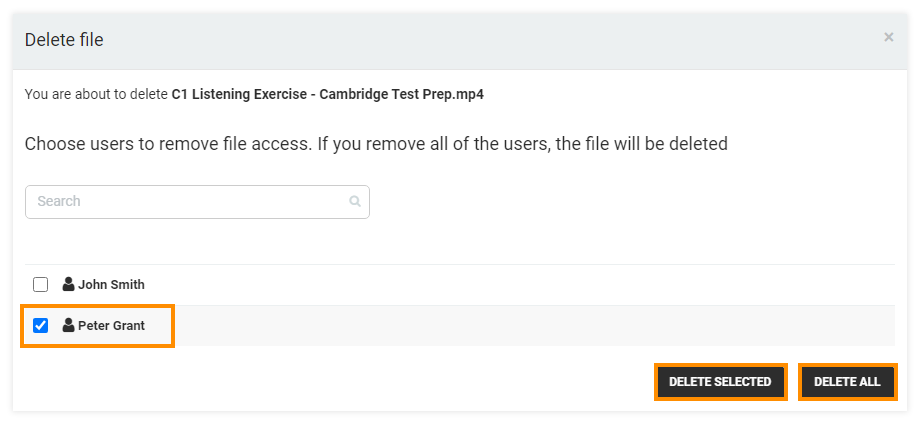
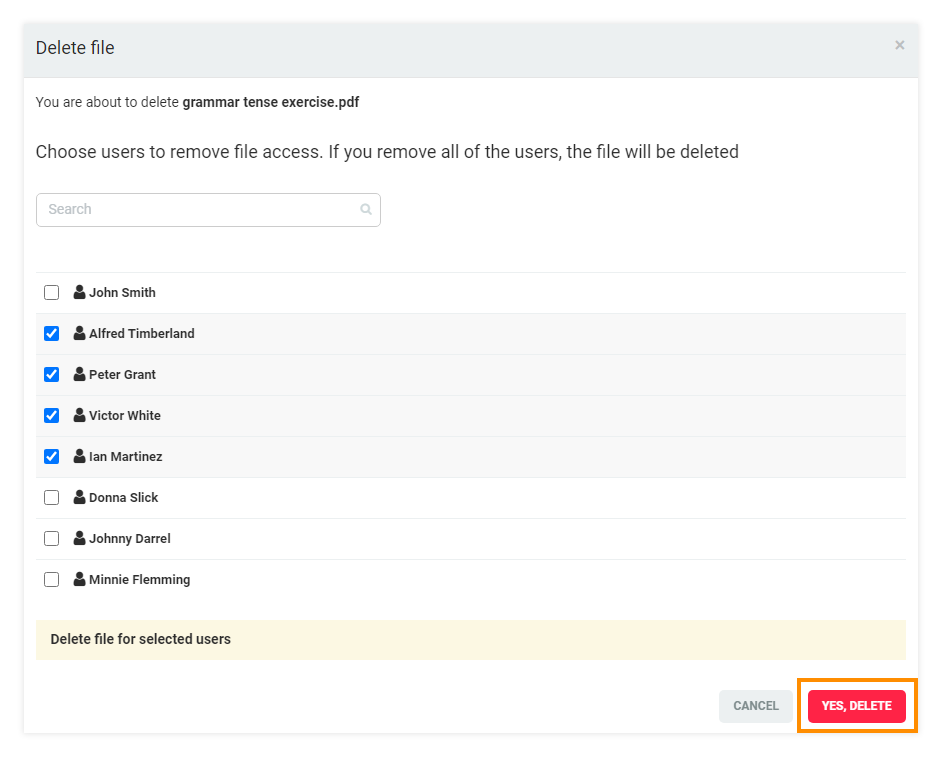
A file that you have shared with a certain user can also be permanently deleted from their file library. To do that, locate the file and click on the three dot icon on the far right. Choose the delete option from the dropdown menu.
A list with all the users with whom you have shared the file will appear. Mark the user as shown and click on “Delete selected” to permanently delete the file only for this particular user. You can mark multiple users to delete the file from. Alternatively, you can click on “Delete all” to delete the file for all users who had the file shared with them at the start.
How to download shared files
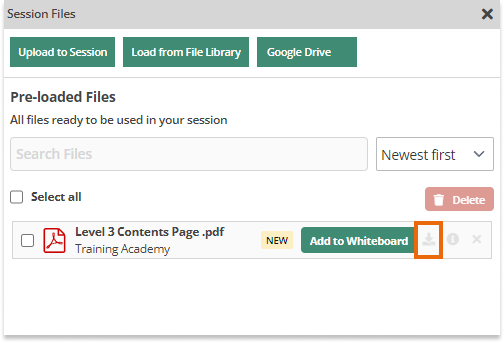
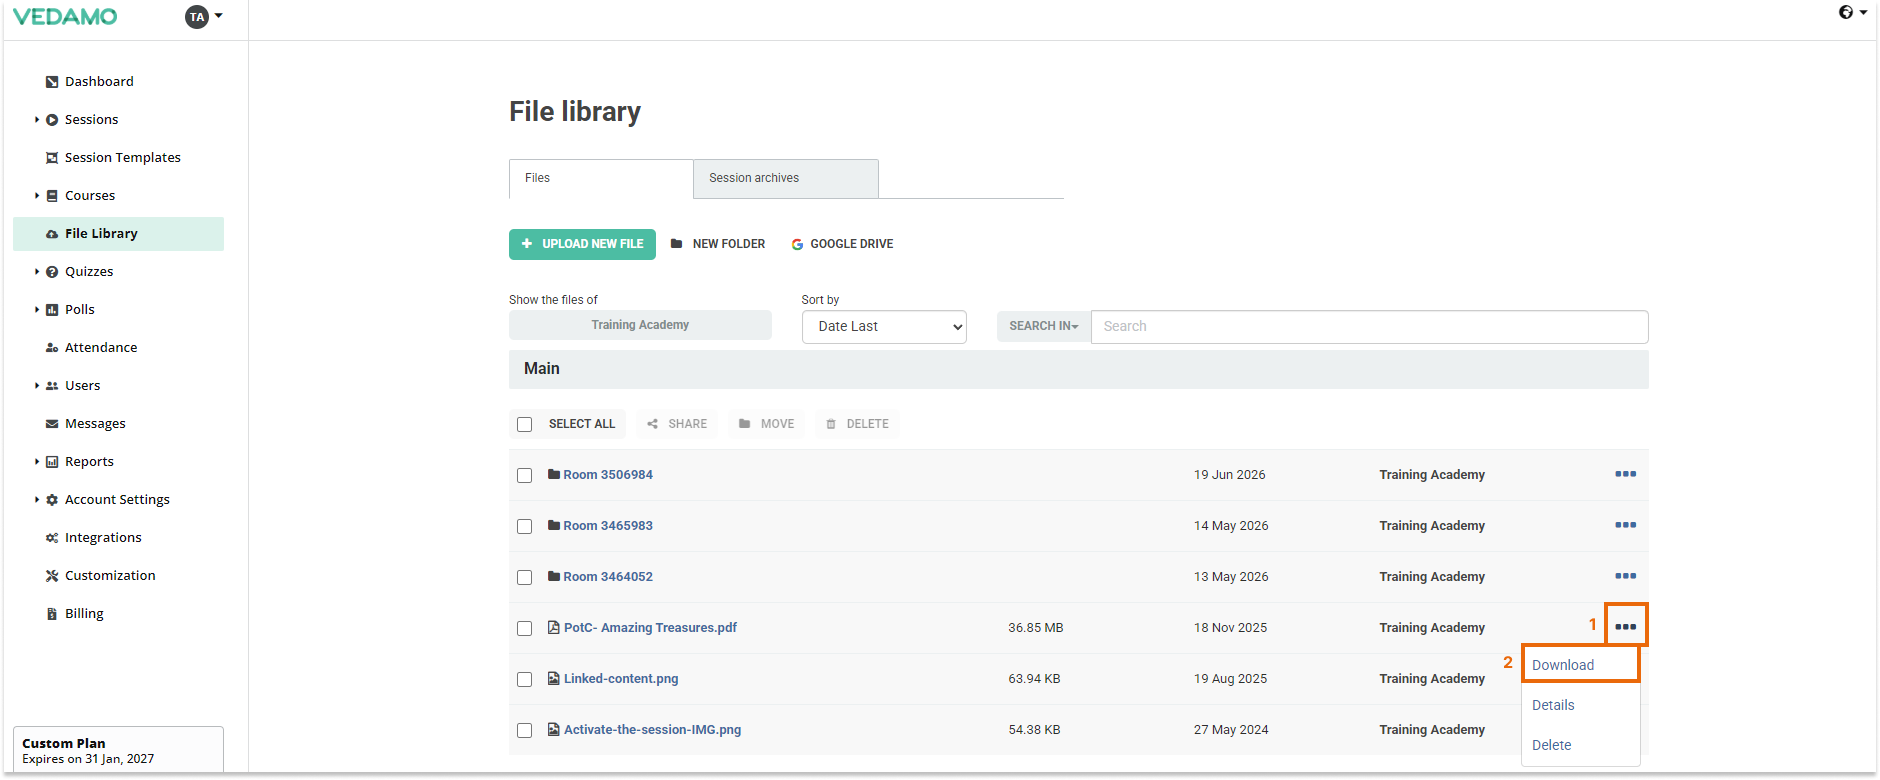
Users with the necessary rights can download files by going into their respective file library tab and locating the file. Once clicking on the three dots icon, the dropdown menu will pop up and the user can download the file.
How to share files within the group
In order to share files with all participants in a certain group, the first step is creating the group.
For a comprehensive guide on how to create the group, it is recommended that you read the LMS Groups article in the help center.
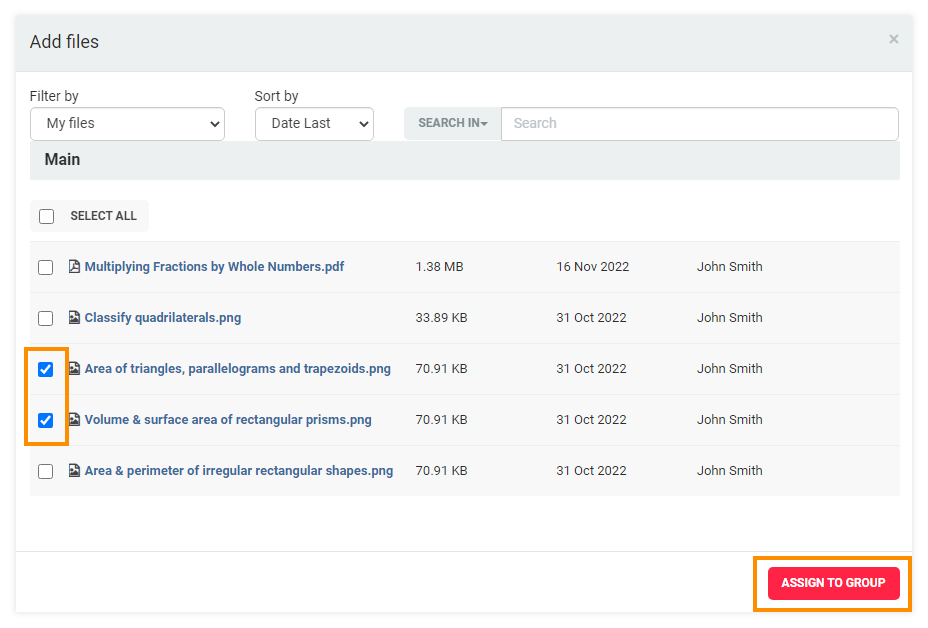
After you click on the name of the particular group you created, go to the “Resources” tab and click on the “+ Add files” button. Locate the file by either searching for its name in the search bar or scrolling through the pages.
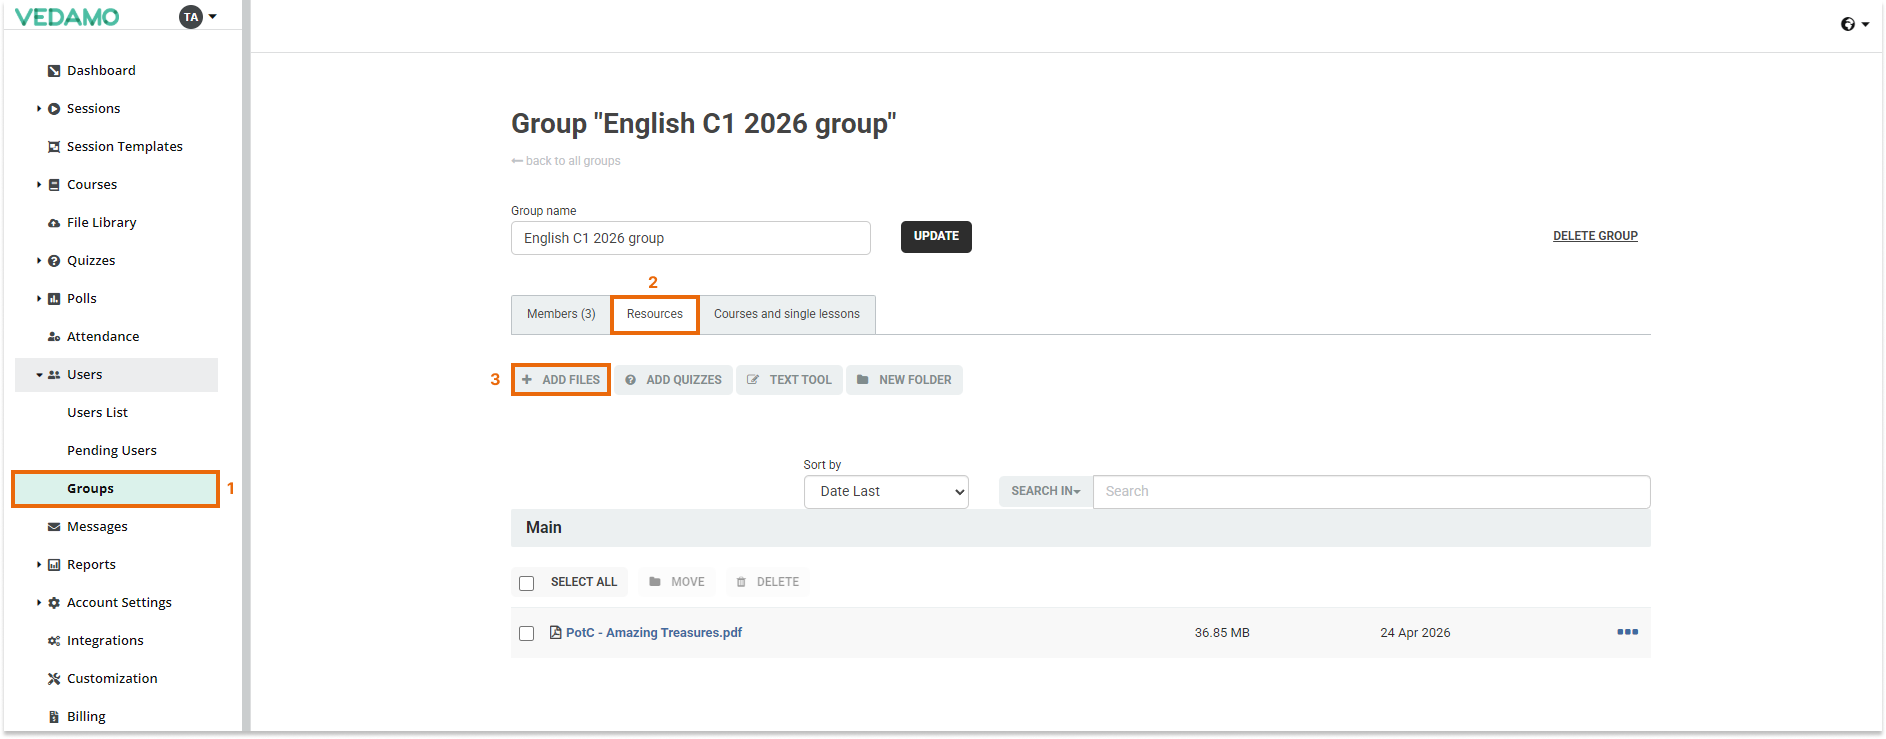
Then, you can mark either one or multiple files and proceed with clicking on the “Assign to group” button highlighted in red.
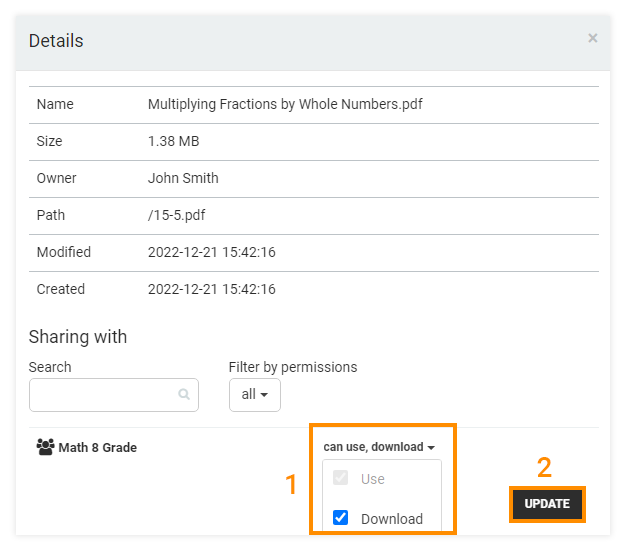
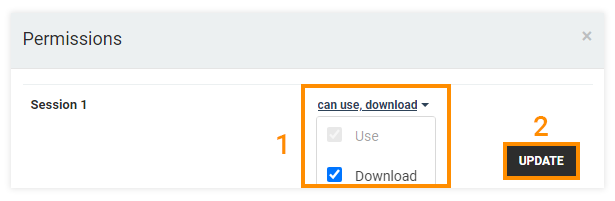
The creator of the group must manually allow download rights by clicking the three dot icon located on the right of the file and choosing “Details” from the dropdown menu. Once the separate window appears, click on “Can use”, mark the Download option and finish it up by clicking on the “Update” button highlighted in black.
If all the steps are adhered to, every member of the group will have rights to download the file.
Note: The creator of the group can upload the file only with rights to download, meaning that the other members in the group can only download it without being able to share it.
How to share files within a section that is part of a course
In order to share files in a section, 2 stipulations need to be met: A course must be created and the file has to be uploaded as part of an existing lesson section within the course.
Creating a course in the Vedamo LMS and adding a section are both thoroughly explained in our help center. You can get familiarized with how to do this by visiting the Course Creation and the Adding teachers, lessons and sections to your course pages.
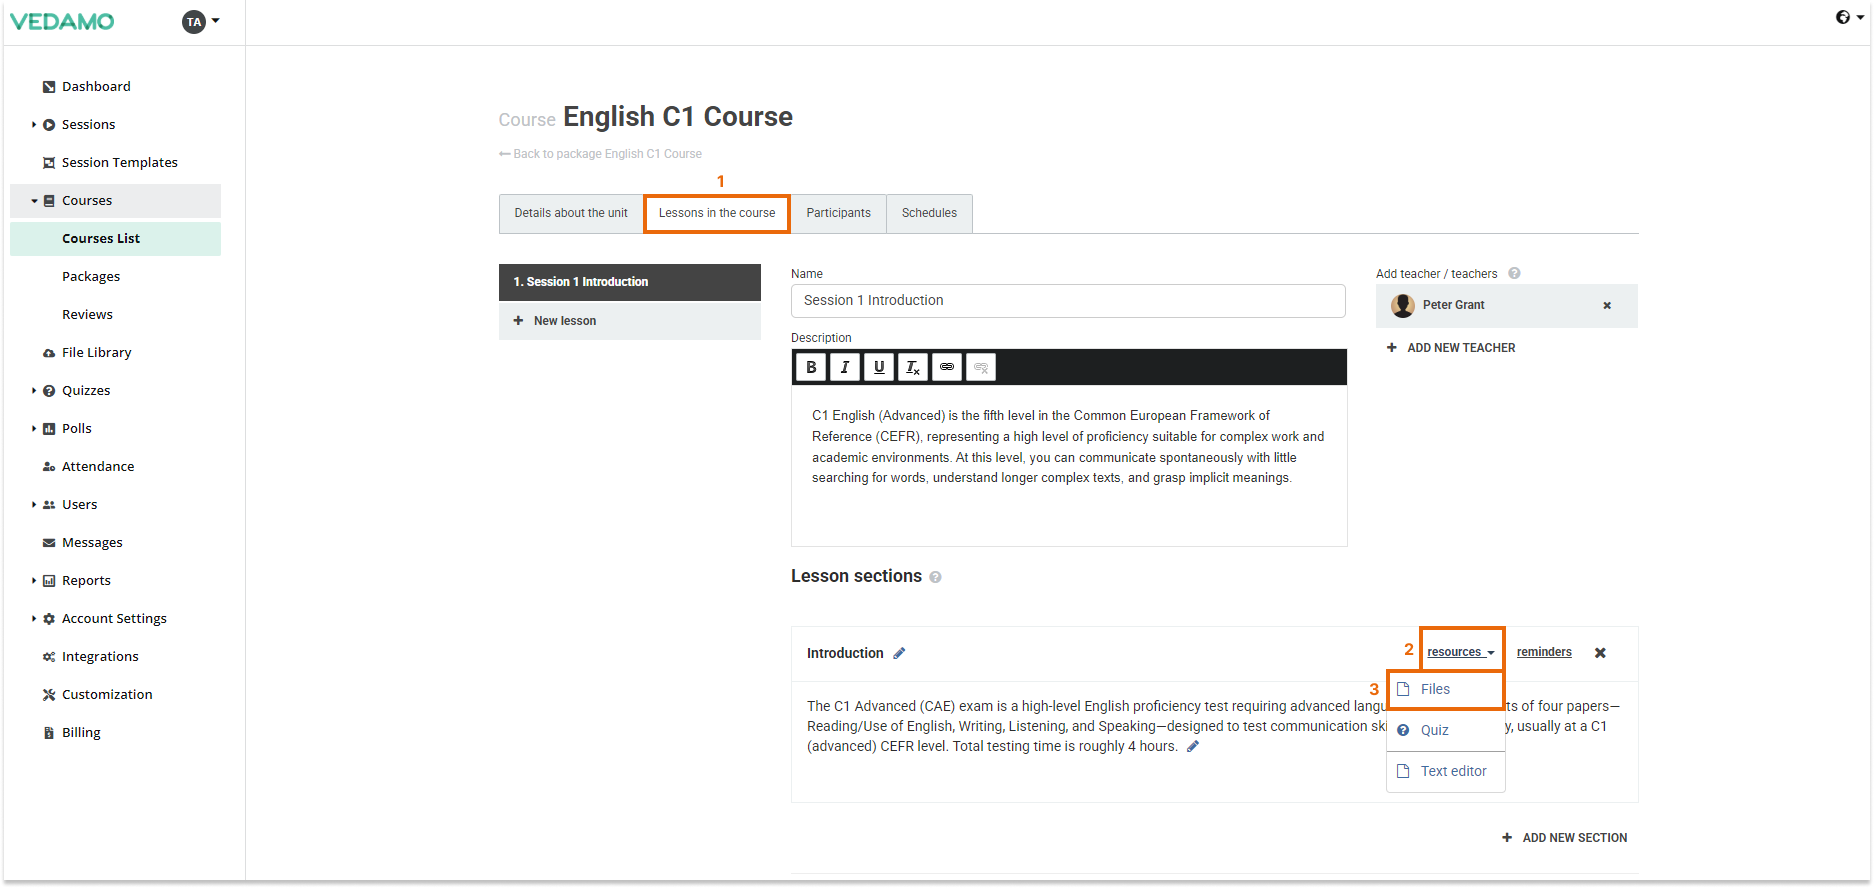
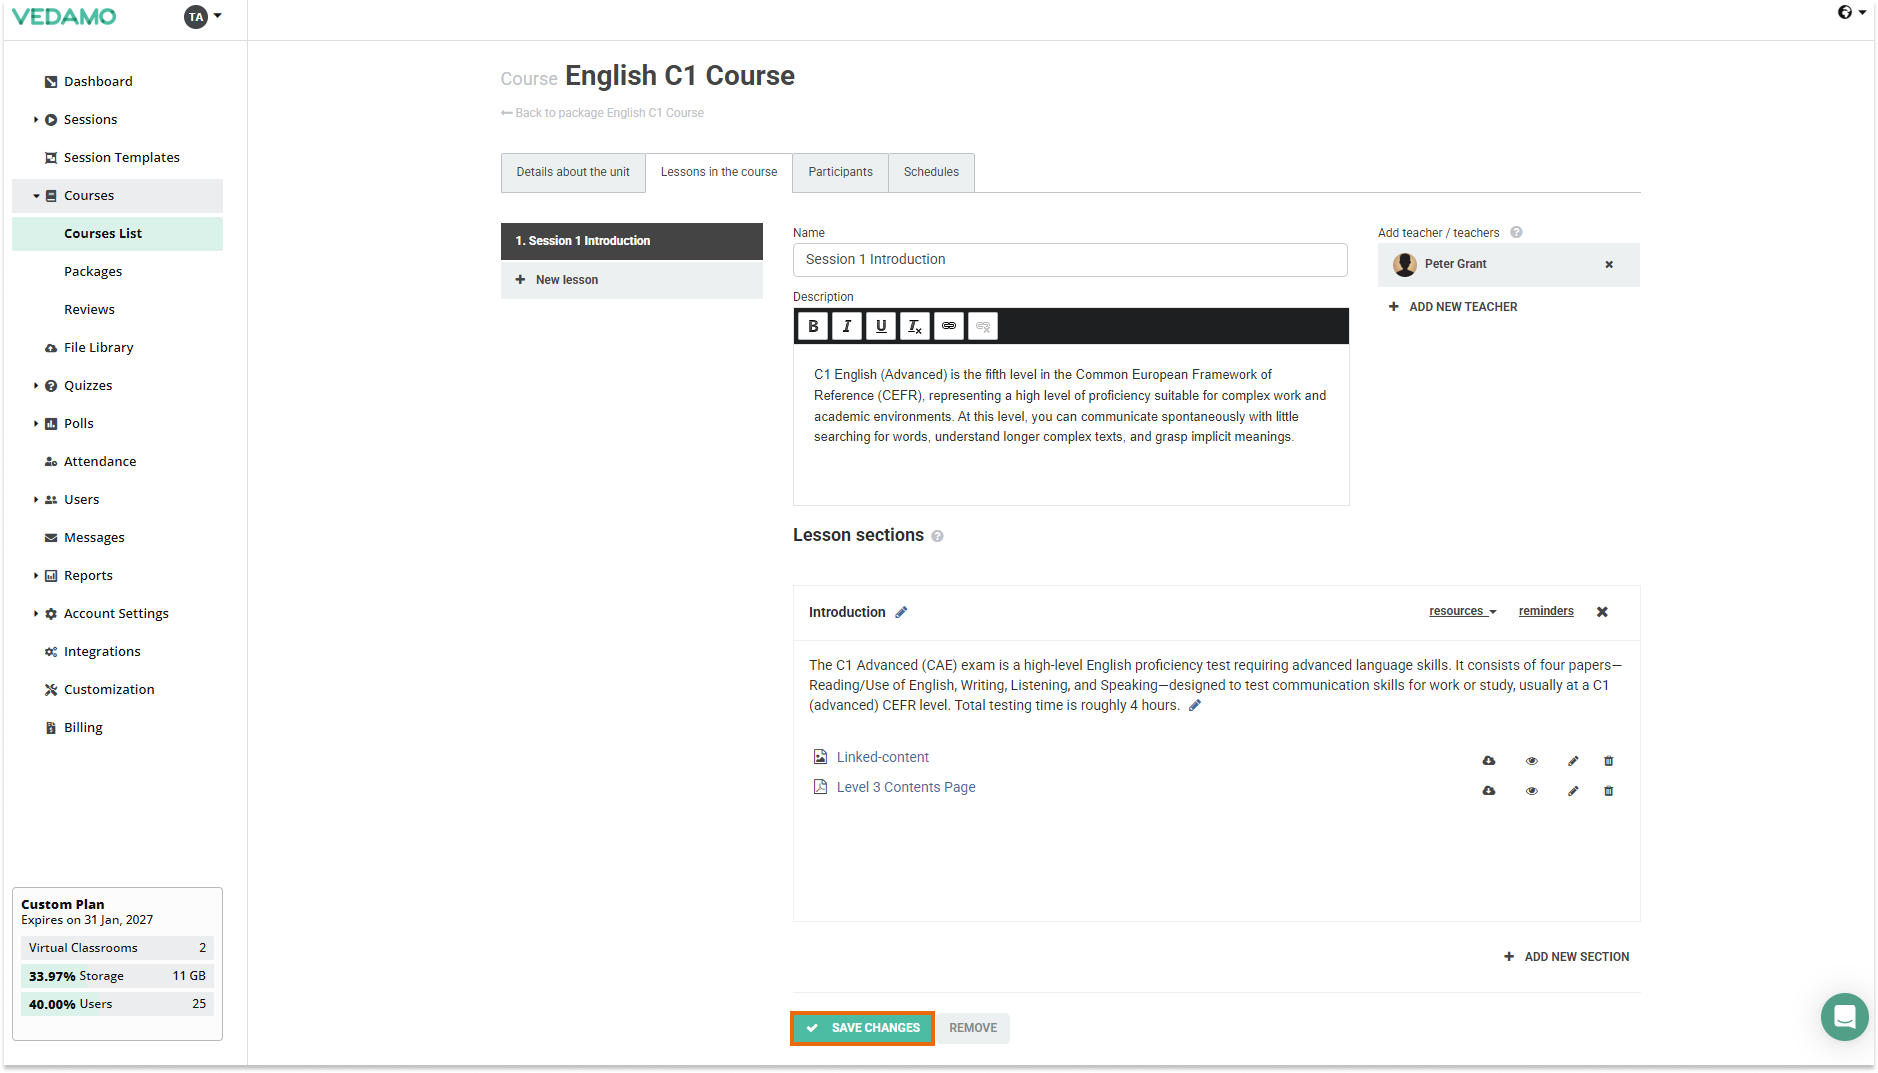
Once the course has been created, go to the “Lessons in the course” tab, and from there you have 2 options. You can either upload the file in the default section, called “Session 1”, or you could click on “+ Add new section”, choose what type of section you would like to include, and then attach the file in that particular section.
Note: In order to upload the file, click on the “Resources” button located next to the name of the section and choose Files from the dropdown menu. Use the search bar to locate the file or scroll through the pages to find it.
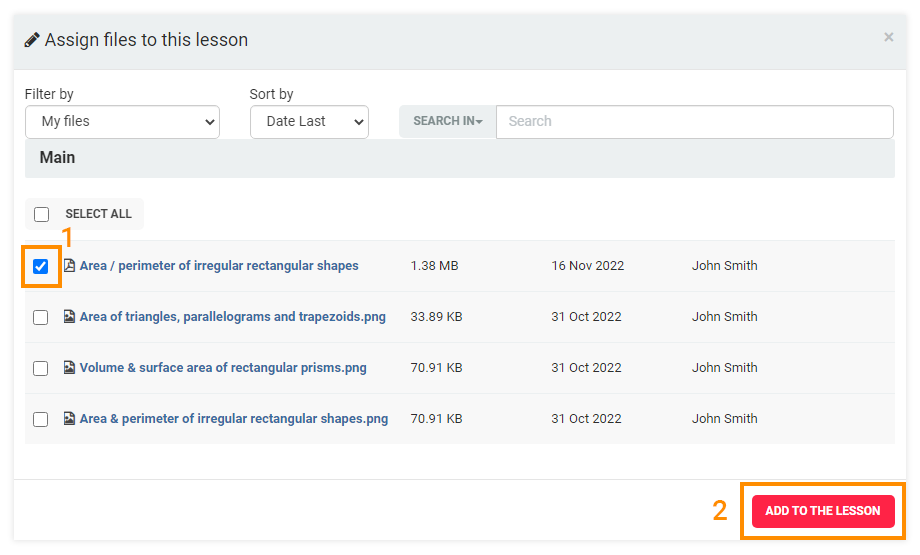
Once you have found the file you wish to upload, mark it as shown and finish it up by clicking on the “Add to the lesson” button highlighted in red.
Once you have clicked on the “Save changes” button highlighted in green, the uploaded file is automatically shared between all users included in the course curriculum.
Given that the resource that has been uploaded in the course is a file, a separate edit button will be displayed in the section. This button allows the creator of the course to choose whether the participants can download the file (by default the download option is ticked).
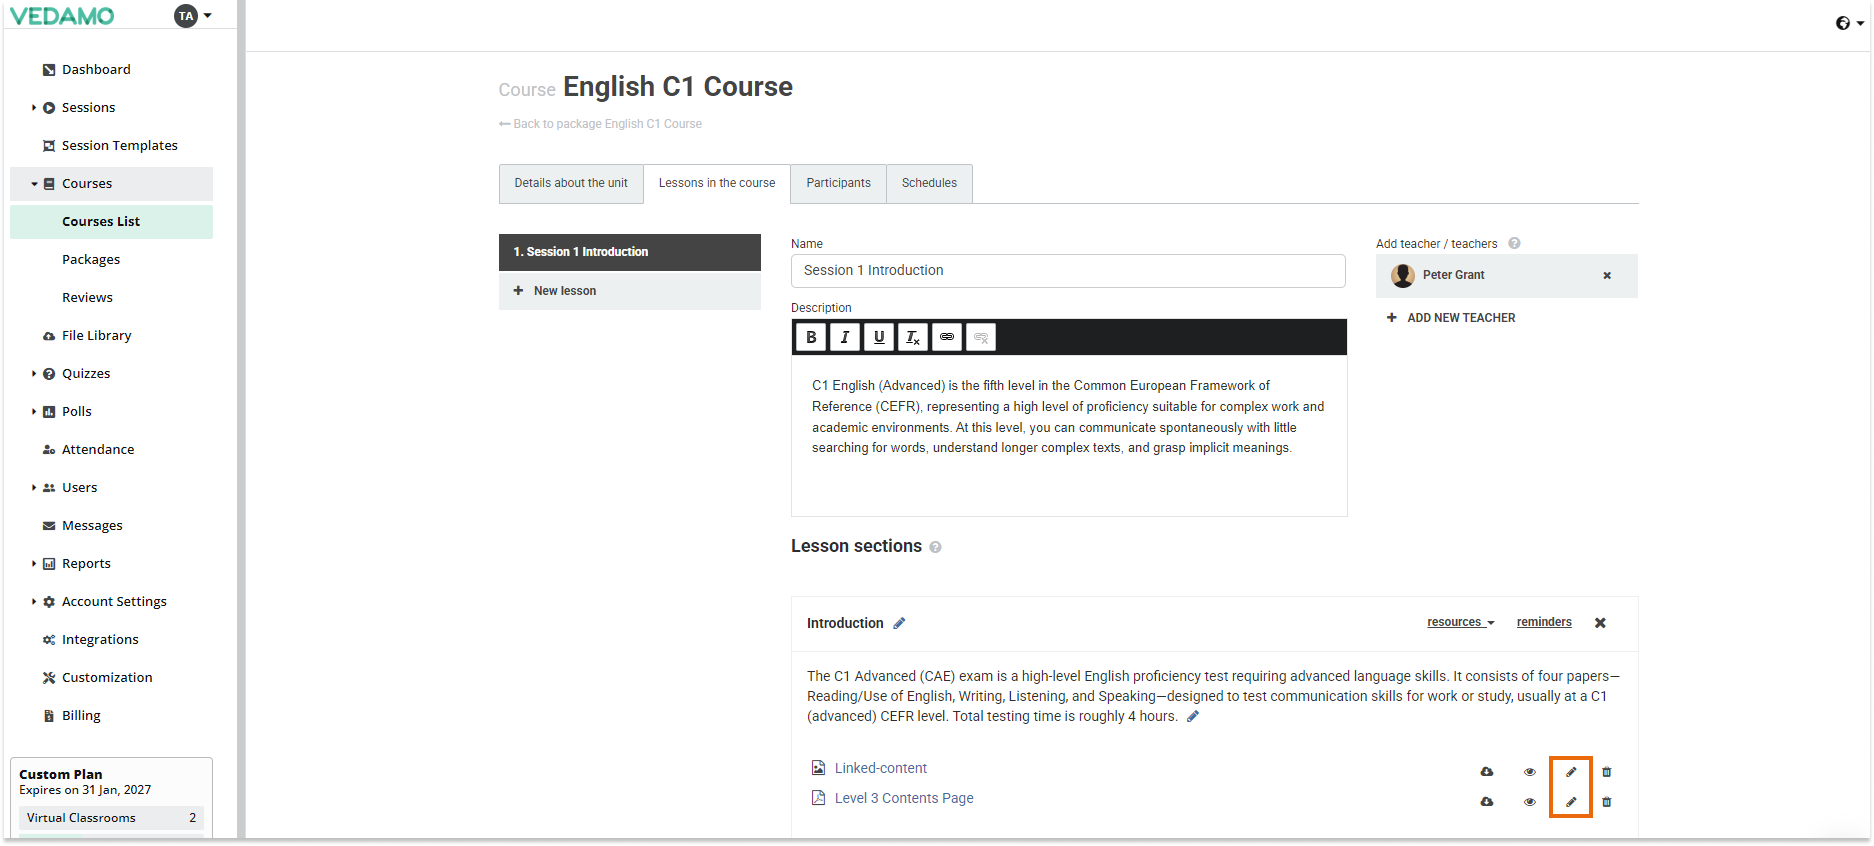
Hover your mouse to the icon resembling a pencil and click on it. From there, you can configure the download rights of the participants in the course. After you have marked the download option, click on “Update” to grant participants in the course download rights.
Shared files that are part of a template
For a detailed breakdown of how to create, save and use templates, please visit the Templates article.
Shared files can also be used in a template. You can simply create a template and include the file that has been shared.
Note: When a teacher/administrator Creates a template with a file that has been shared to them, without the option to download the file. Neither the teacher nor the students will be able to download the file inside the virtual classroom.