The LMS Users administration menu gives Administrators and the Organization account access to the user administration panel for all accounts registered in your subdomain.
Location
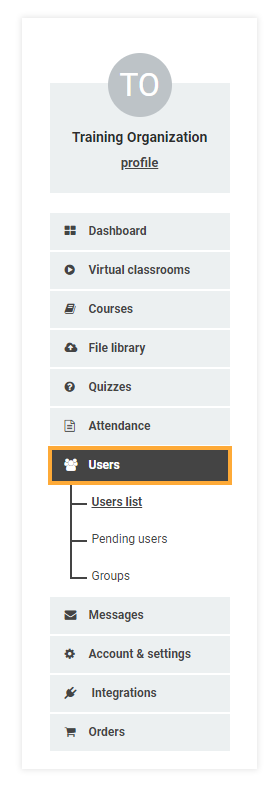
To access the LMS Users administration menu, log into your subdomain using an Organisation account or an Administrator account. The Users menu is accessible through your left side menu.
Create user account
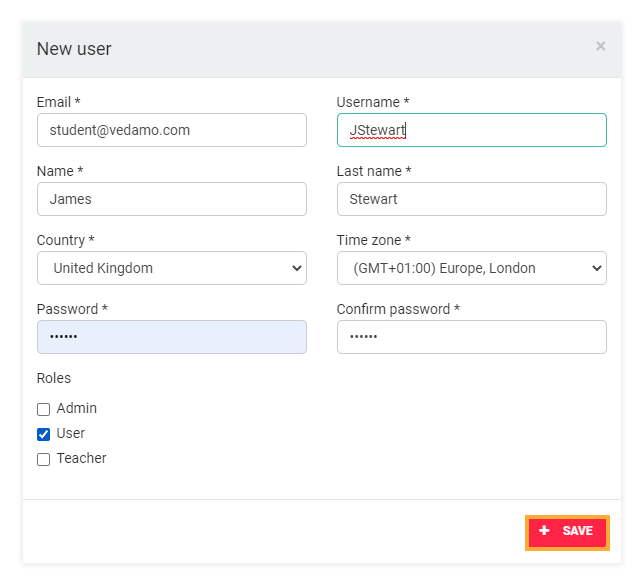
Organizations and Administrators can create users using the green + New user button. There are several fields, all required, that need to be filled in in order to create an account:
- User details: enter an email address, first and last name, country, and time zone;
- Username: the username is required when the user is logging in to their account. Alternatively, they can also use their registered email address if they do not remember their username;
- Password: The password you set up needs to be at least 6 characters long. You also need to repeat the password in the Confirm password field;
- Roles: Choose the appropriate role for the account that you are creating. The available choices are:
- User: This is typically the role you would use when creating a student’s/trainee’s account. Users can participate in courses and virtual classrooms, but do not have access to any system settings and cannot open virtual classrooms;
- Teacher: The teacher role is something you would choose when creating a tutor’s account. You can designate accounts with this role as teachers in courses and lessons. Teachers can assign files and quizzes to groups. Furthermore, in a Learning Management System, a teacher can open virtual classrooms both from their dashboard (when assigned to a course containing virtual classroom sessions) and through the Virtual Classrooms menu;
- Admin: This role should be assigned only to people who will be administering the system. The administrator has full access to the user administration menu. Admins can be additionally assigned as teachers in a course. In the Learning Management System, admins have the option of opening a virtual classroom through the Virtual Classrooms menu, as well as the courses menu. They also have full account/settings access like the organizational account except for the “Billing and upgrade” section and the “Integrations” menu.
Once done, click the + Save button to save the account.
Confirmation email
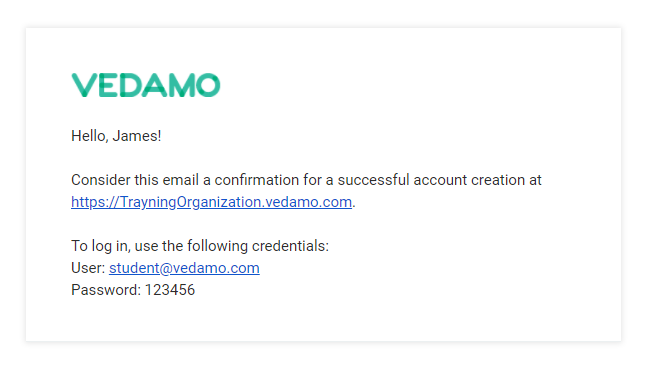
An automated email will be sent to the customer containing his username (email address) and password after the account is created:
NOTE: The number of accounts you can create in your subdomain depends on the subscription package that you have purchased. If you try to create an account that goes over the limit, the system will alert you that you have reached the limit. You can upgrade your LMS plan if you would like to increase the number of user accounts you can create.
LMS Users administration: locating accounts
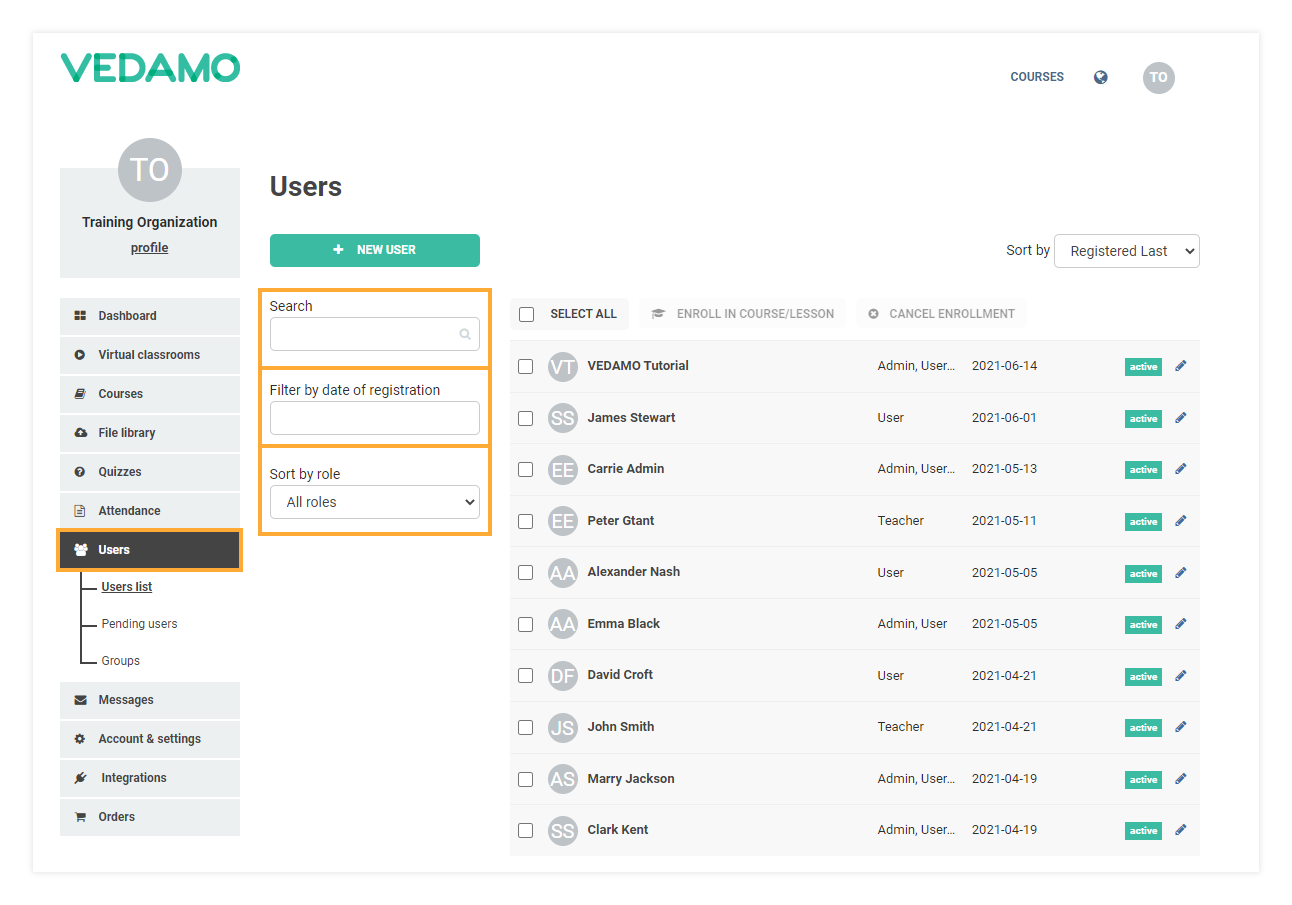
In the user administration menu, you have several sorting options and a search field that can help you locate the account you are looking to edit. For example, you can sort all user accounts by role or type in the user’s name or email address in the search box in order to find their account quickly. You also have the Select All option to help you quickly select all of the accounts displayed on the page.
LMS Users administration: Edit user account
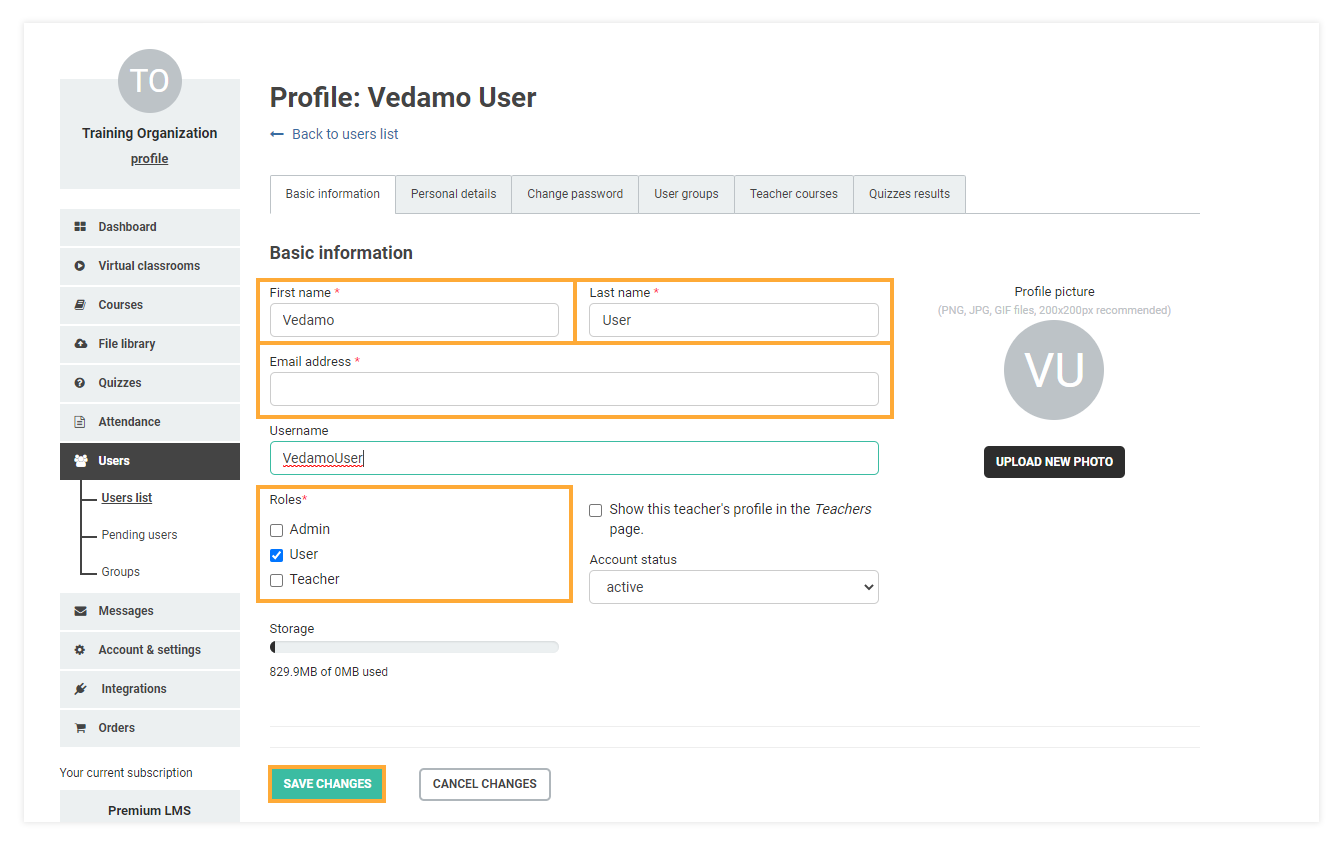
Clicking on the account name will allow you to edit the selected account. Editing another user’s profile is very similar to editing your own. However, there are several additional options.
Basic information
There are two noticeable differences in managing accounts through the Users menu:
- The Roles section, allows you to change the customer’s role in the system;
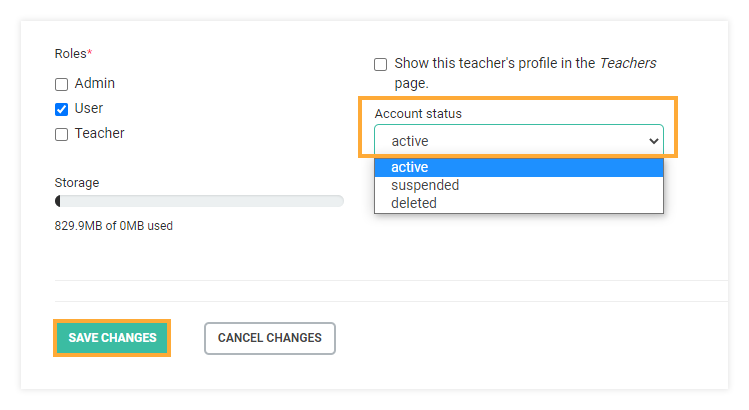
- The Account status section, allows you to select the status of the account. There are three options to choose from:
- Active: The account is fully active and the user can use their username and password to log in;
- Suspended: This option temporarily deactivates the account. Choosing this option means that the customer will not be able to log in to their account. However, their account remains in the system and you can set it back to active at any point;
- Deleted: Choosing this option will completely delete the account. It will no longer appear in user lists and cannot be recovered.
NOTE: Setting an account to status suspended or deleted will reduce the count of active accounts in the system. This is useful if you have already reached the limit of the maximum accounts based on your subscription. For example, your subscription package supports up to 50 active accounts. There are currently 49 active accounts in your LMS and you need to add two new student accounts. You notice that one of the students currently registered has not participated in any courses for a year. Setting this account to suspended will let you create one additional account in your academy.
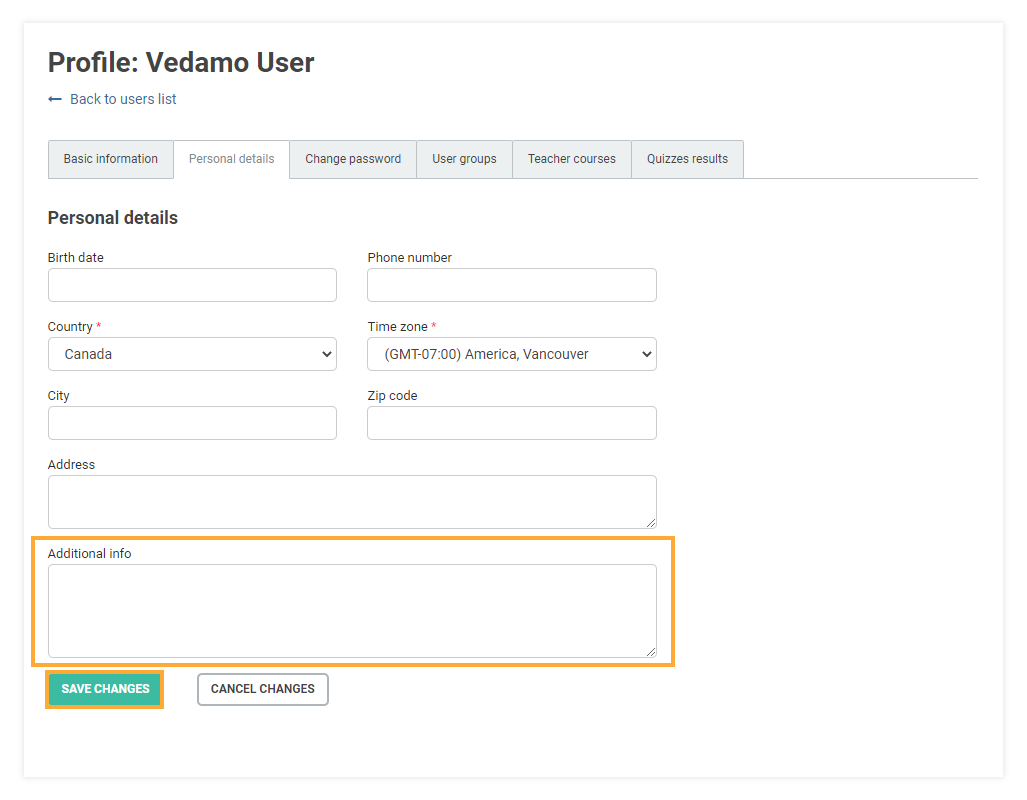
Personal details
This section of the profile allows you to provide additional information on the account. Typically, this includes the following:
NOTE: There is an additional info field available in tutor accounts, allowing you to add the tutor’s subject, courses, experience, education and certification.
If you submit any changes here you will need to save them by pressing Save changes. Otherwise, they will not be saved if you navigate away from the account.
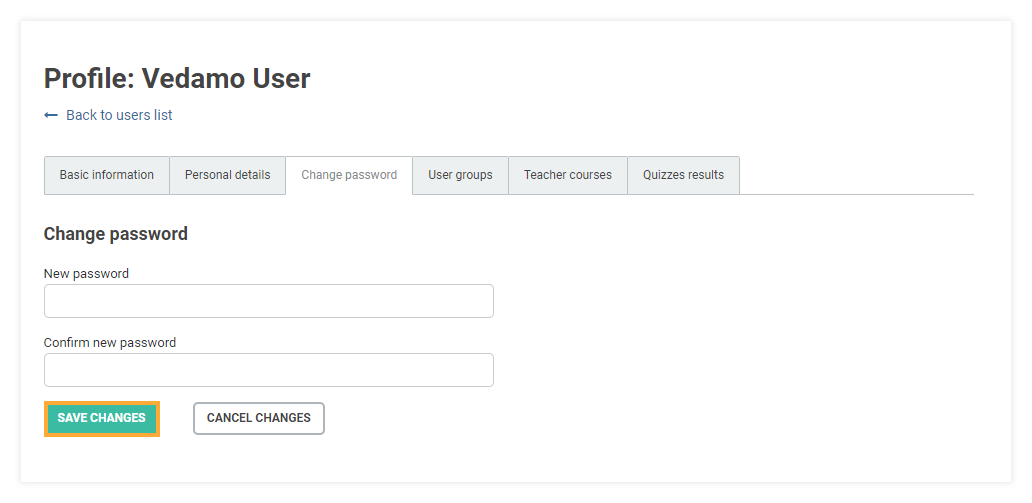
Change password
This tab allows you to create a new password for the customer. This is identical to changing your own password except it does not require you to put in the current password.
User groups
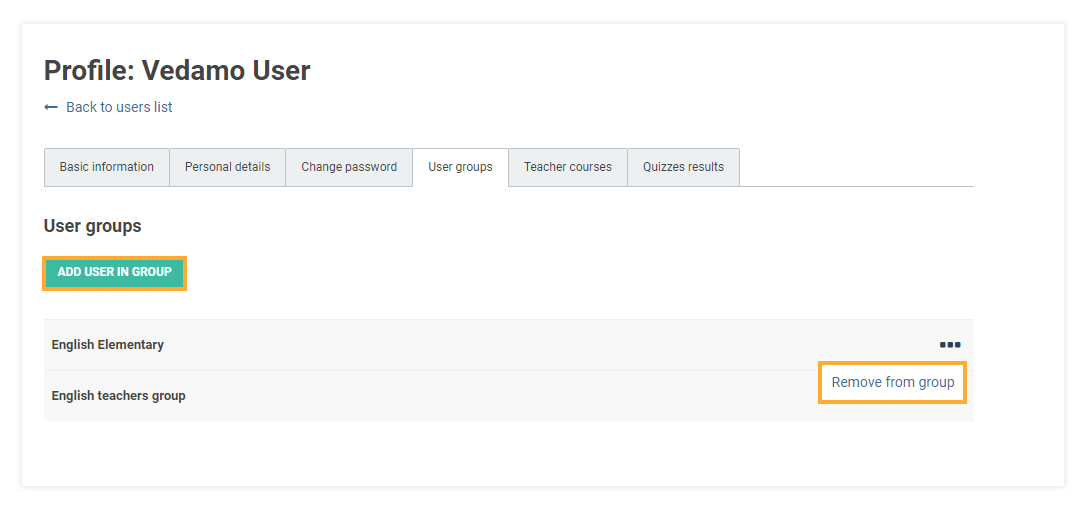
This tab shows the group membership for this account.
Additionally, you can remove a student from a group by clicking the remove from group button from the three dots sign, located on the right side of the screen, or add them to a new group via the green Add user in group button.
NOTE: You may have noticed that the Users option in the left side menu contains two user administration sub-menus: Users and Groups; This article discusses the Users sub-menu. The next article will look further into the Groups sub-menu where you will learn how to create and manage user groups.
User courses/lessons
This tab lists all the course(s) that the account is subscribed to.
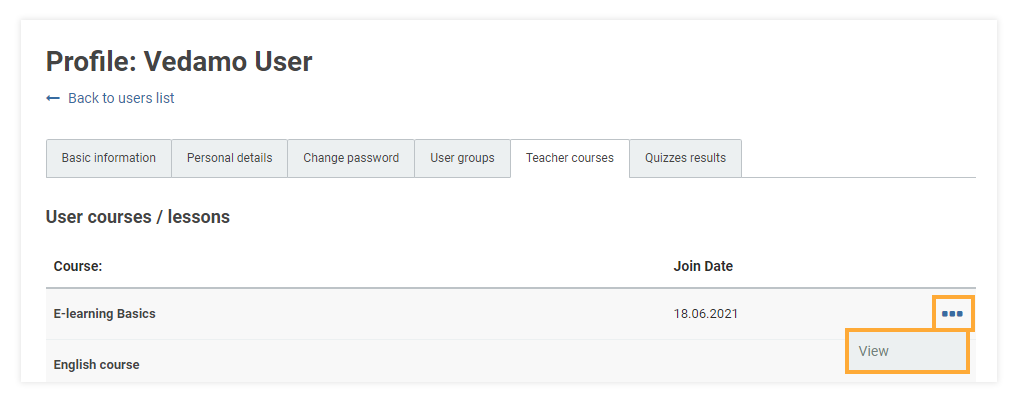
By pressing the three-dot sign and clicking on the View option Admins and Organizations will be transferred to the specific course Edit page.