TABLE OF CONTENTS:
- The individual video and video mosaic
- Synchronizing the participant video windows with the host
- Individual video in groups/breakout rooms
- Screen Share in the Virtual Classroom
- How does the screen share work?
- Screen sharing with audio
- Two Shared Screens at the same time
- Share Screen in groups
- Individual Video Video Mosaic and Screen Share in a separate window
The individual video and video mosaic
VEDAMO Virtual Classroom provides two types of video communication in order to better meet its users’ needs – video-mosaic and individual video:
- The video-mosaic is a combination of participants’ videos in one window.
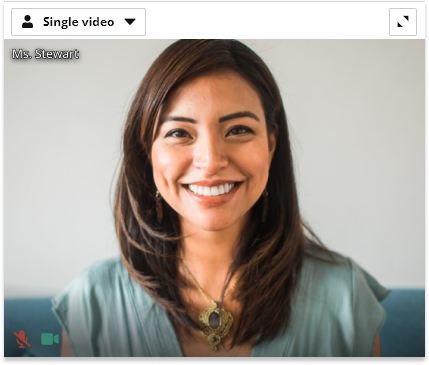
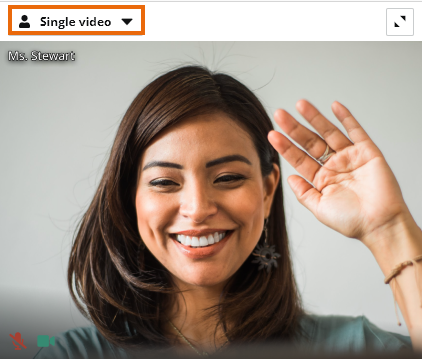
It is the same for all users in a room. - The individual video is a single window, separated from the video-mosaic.
It could show any of the users in the room, which one is the host’s choice. By default, it will show the host’s video.
The host may decide to have one of the participants in an individual video.
The host could choose which participant to be shown in the Individual video from the drop-down menu on the top of the video window.
The individual video can also be turned off.
Note: The individual video also supports HD video (just press the HD button), just make sure that your hardware supports HD video quality.
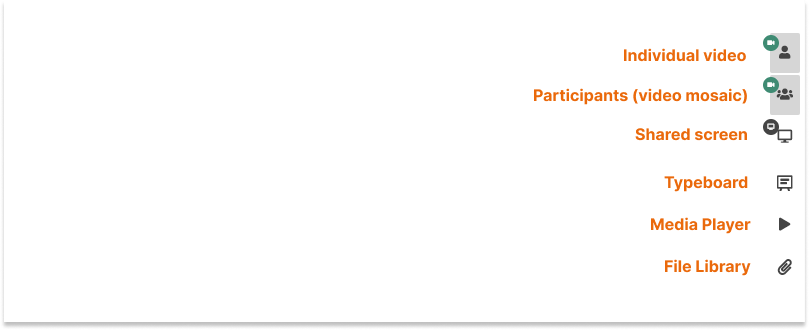
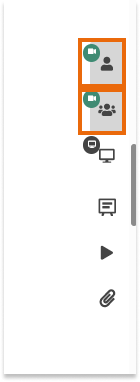
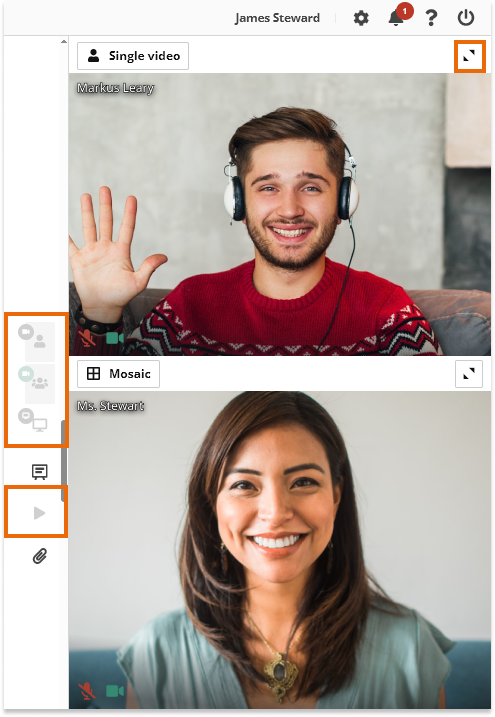
Both the individual video and video-mosaic buttons are located on the right side of the virtual classroom. Each of them can be clicked to expand into a window.
Clicking on the Individual/Participants (video-mosaic) button will either show or hide the video view but it does not turn on/off the camera. When the video connection is active, the little camera icon will become green.
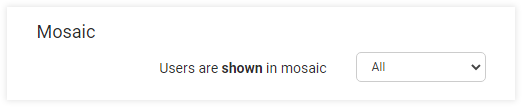
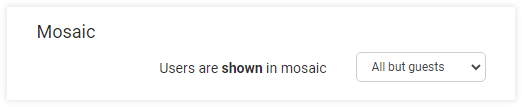
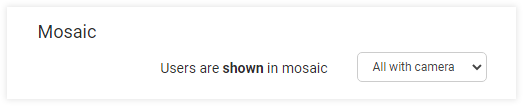
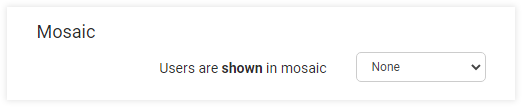
All of the participants who have entered the virtual classroom will be affected by the option set by the host when opening the virtual classroom. When opening a virtual classroom, you will be able to access advanced settings. There you can find the setting for the video mosaic.
All – Everyone will be shown in the video mosaic when they enter the room (except for the host).
All but guests – Only the registered users will be shown in the video mosaic.
All with camera – Only the participants with their cameras turned on will be shown in the video mosaic.
None – No one will be shown in the video mosaic.
If someone does not have a video shown, the reason for that will be explained via a short notice inside their box in the mosaic, right under the name. The status of the camera could be:
- User has no camera
- User turned off camera
- Camera turned off by host
- User disconnected
The config functionality allows quick access for the host to control the participant mosaic. When you click the config button you will see a few options to choose from.
Attendance in the Video mosaic:

- All participants – Everyone will be shown in the video mosaic (this is the default setting).
- All participant but guests – Only the registered participants will be shown in the video mosaic.
- All participants with camera – Only the participants with their camera turned on will be shown in the video mosaic.
- No participants – No one will be shown in the video mosaic.
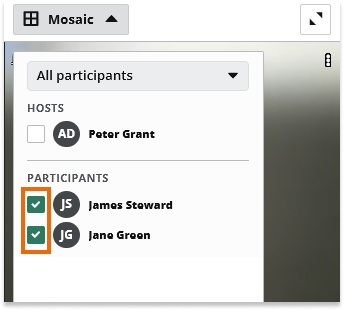
Custom: You will see a list with all the participants in the session and you can choose which participant to be shown in the video mosaic by clicking on them.
When the host hovers over a participant box in the video mosaic he will be able to see the three dots in the top right corner of the box. These three dots will open a menu where the host can quickly control the specific participant.
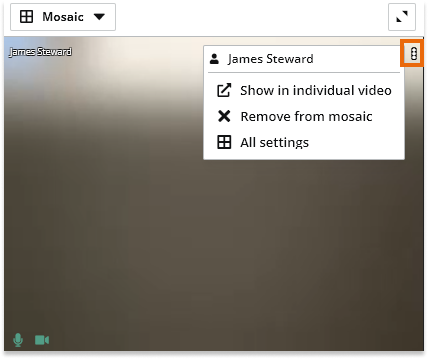
- Show in individual video – Show the specific participant in the individual video.
- Remove from mosaic – Remove the specific participant from the video mosaic.
- All settings – From here you can access the specific participant settings.
Synchronizing the participant video windows with the host
The host can select the option to synchronize the video windows (including the window of the media player and screen sharing) for all participants. This could be done from the menu shown below:
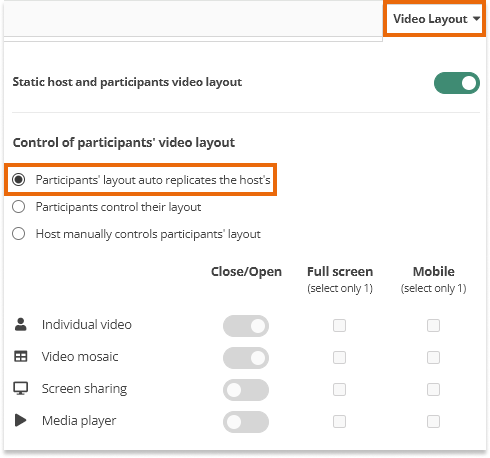
When this setting is selected, the host’s actions will be reproduced on the participants’ screens – when the host opens, chooses a full-screen, or closes the Individual/Participants video window it will open, enter full-screen or close on the participants’ screens.
When the option is turned OFF, the synchronization of the video box stops. Then, the host and the participants control the video boxes independently.
Note: When this option is turned ON, participants will not be able to close the box or enter full-screen mode. The Close and Full-screen buttons, dock/undocked or minimize options on their video box will be unusable.
Also, participants will not be able to use the Open/Close options of the video boxes or use the full screen option by clicking the icon on the right side of the screen.
This video box/es now will be controlled only by the host.
You can find more information about video layout here: Video layout & Control of participants’ video layout in VEDAMO Virtual Classroom
Individual video in groups/breakout rooms
If the participants are divided into groups in breakout rooms, the host could set different individual videos with different people for each group.
But only one individual video is allowed for each group at one and the same time.
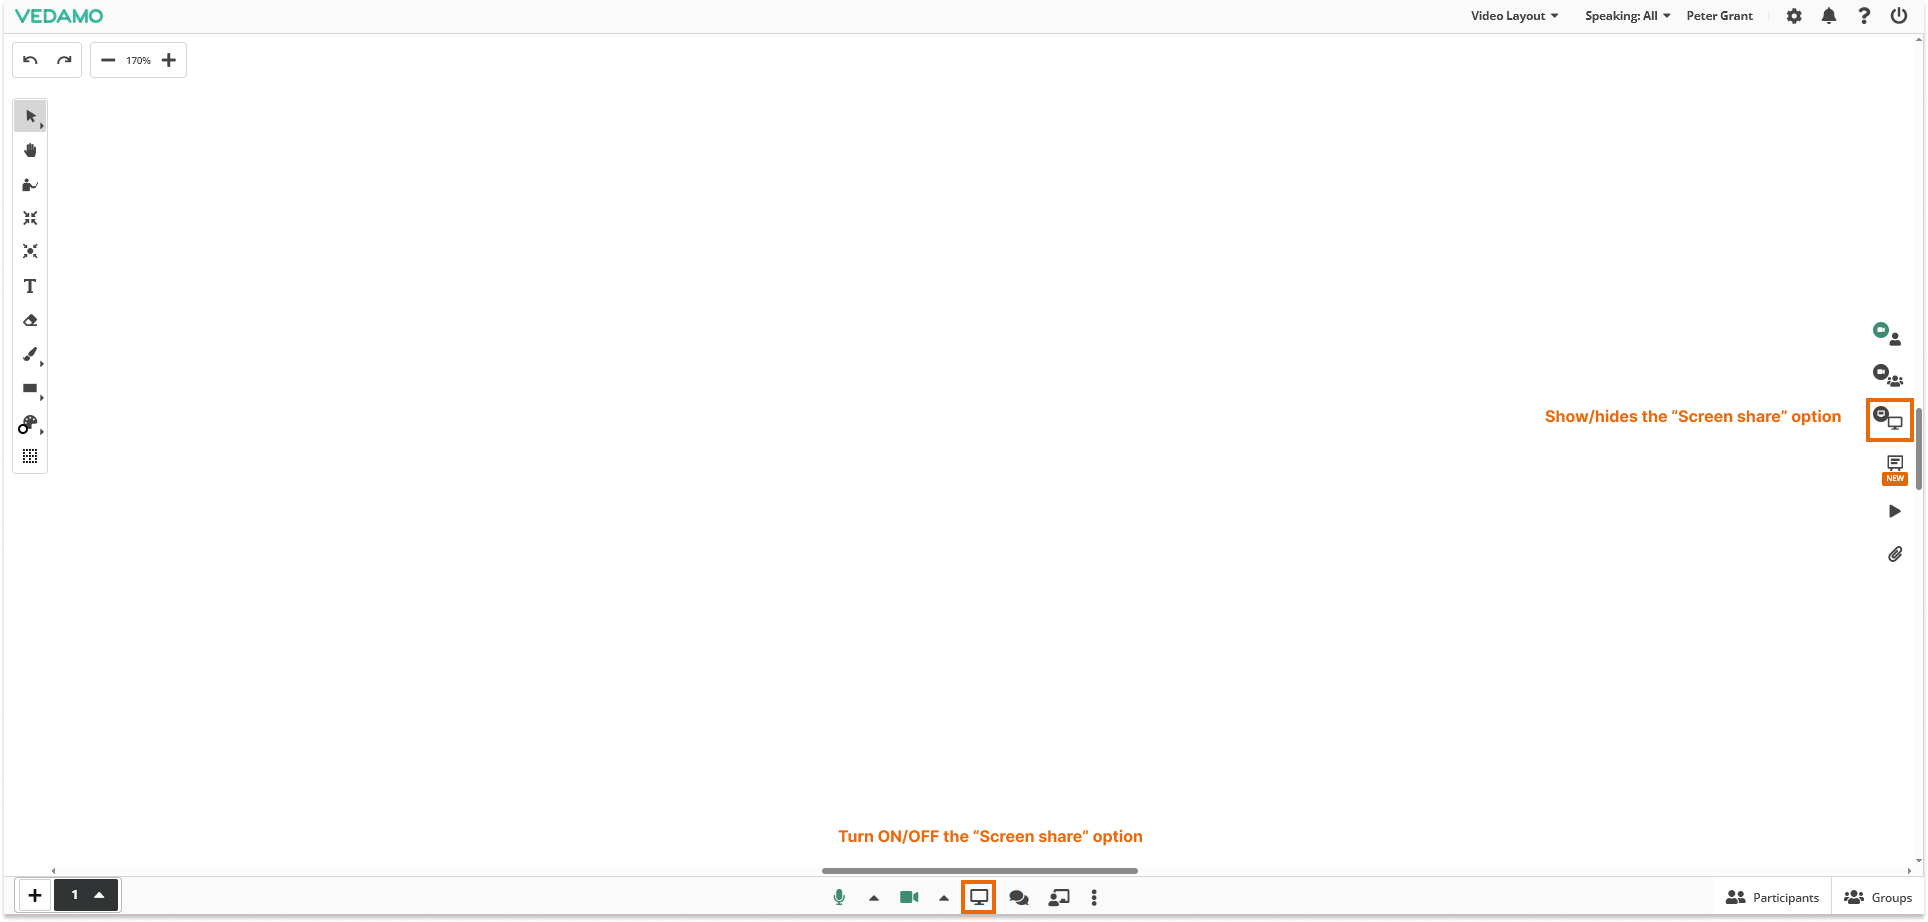
Screen Share in the Virtual Classroom
As it is with the Video Windows controls, participants could show/hide the shared screen from the share-screen button on the right side.
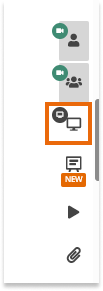
Again, this doesn’t turn on/off the function – this is done by the share-screen button at the bottom of the screen. Here is the difference:
How does the screen share work?
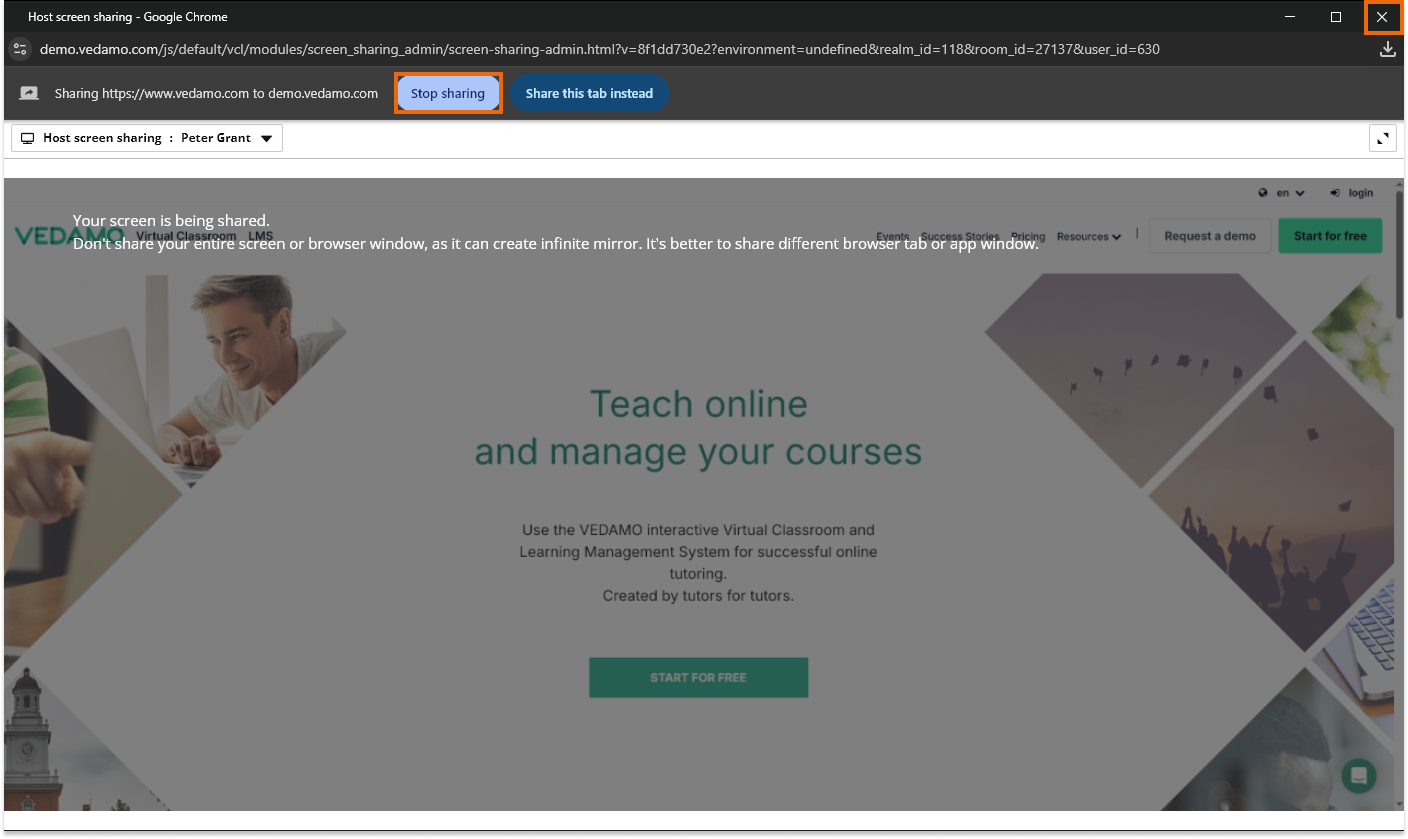
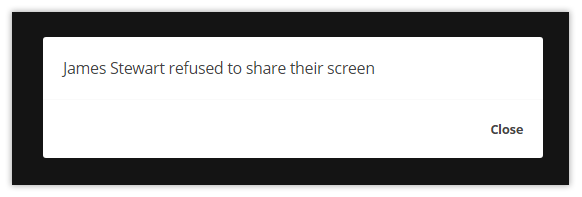
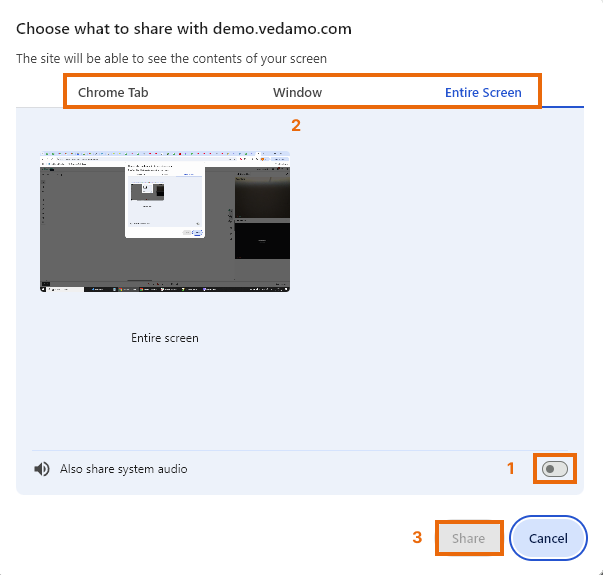
When a participant wants to share their screen by clicking the share-screen button at the bottom, a message will be sent to the host that one particular participant wants to share their screen. The host then could allow or deny it.
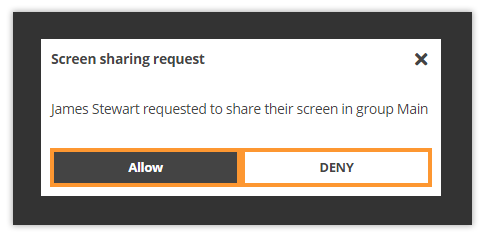
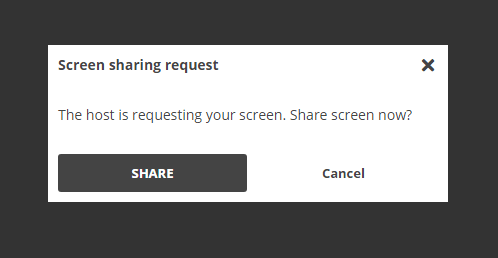
The host could request a participant to share their screen. This can be done from the drop-down menu of the share-screen box.
The participant will receive a message for the request and they could choose whether to share their screen or not.
If the Cancel button is clicked, the host will receive this notification with an option to resend the request.
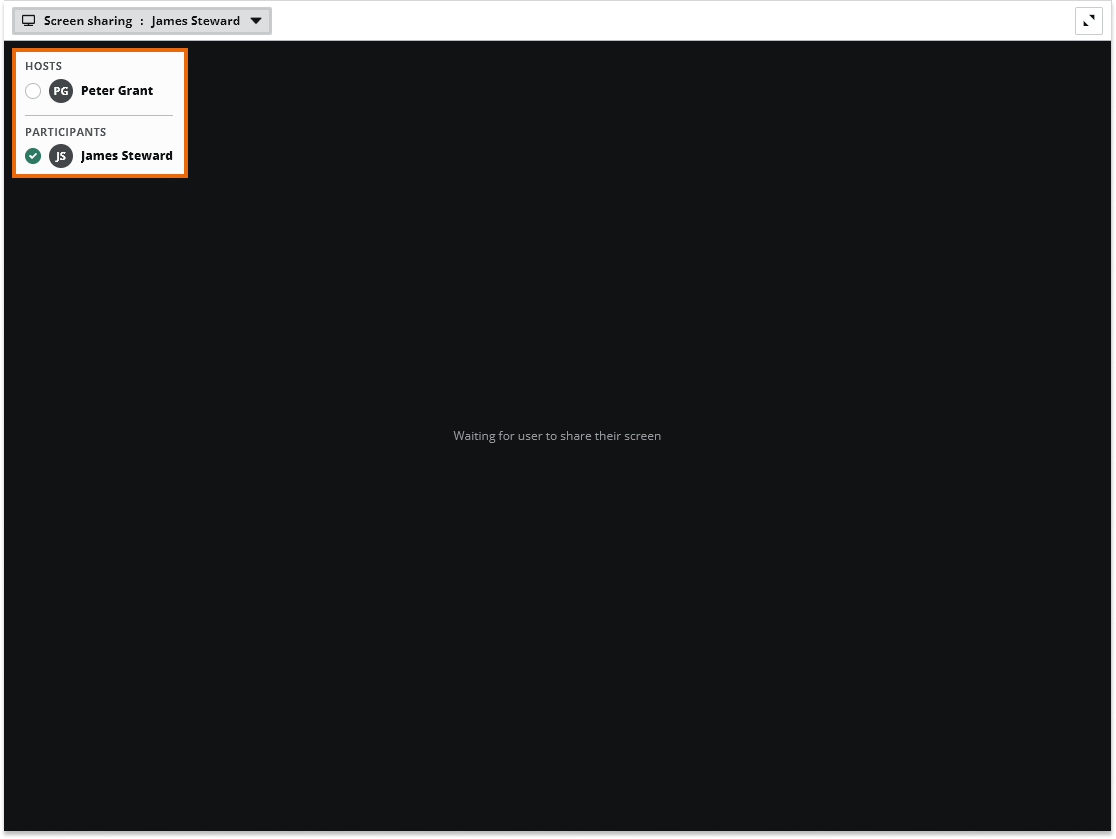
Once a participant has allowed their screen to be shared, it remains shared until the participant decides to stop the sharing, no matter how many times their screen sharing video box is opened and closed.
Screen sharing with audio
The VEDAMO platform also supports screen sharing with audio.
This means that the participants can share the sound coming from their computer (another tab in the same browser) without using a microphone. If they want to participate in the conversation they will have to enable their microphones.
For example, if someone wants to share a YouTube video or an mp3 file played on his/her device outside the virtual classroom, they can do that by sharing their screen with audio.
However, this can be done only in Google Chrome and Edge, since these two browsers only provide this possibility.
Note: Screen share with audio can be used on:
Windows OS: Google Chrome – 74, MS Edge – 86 (or higher)
Mac OS: Google Chrome – 74 (or higher)
At the moment this feature is not compatible with mobile devices.
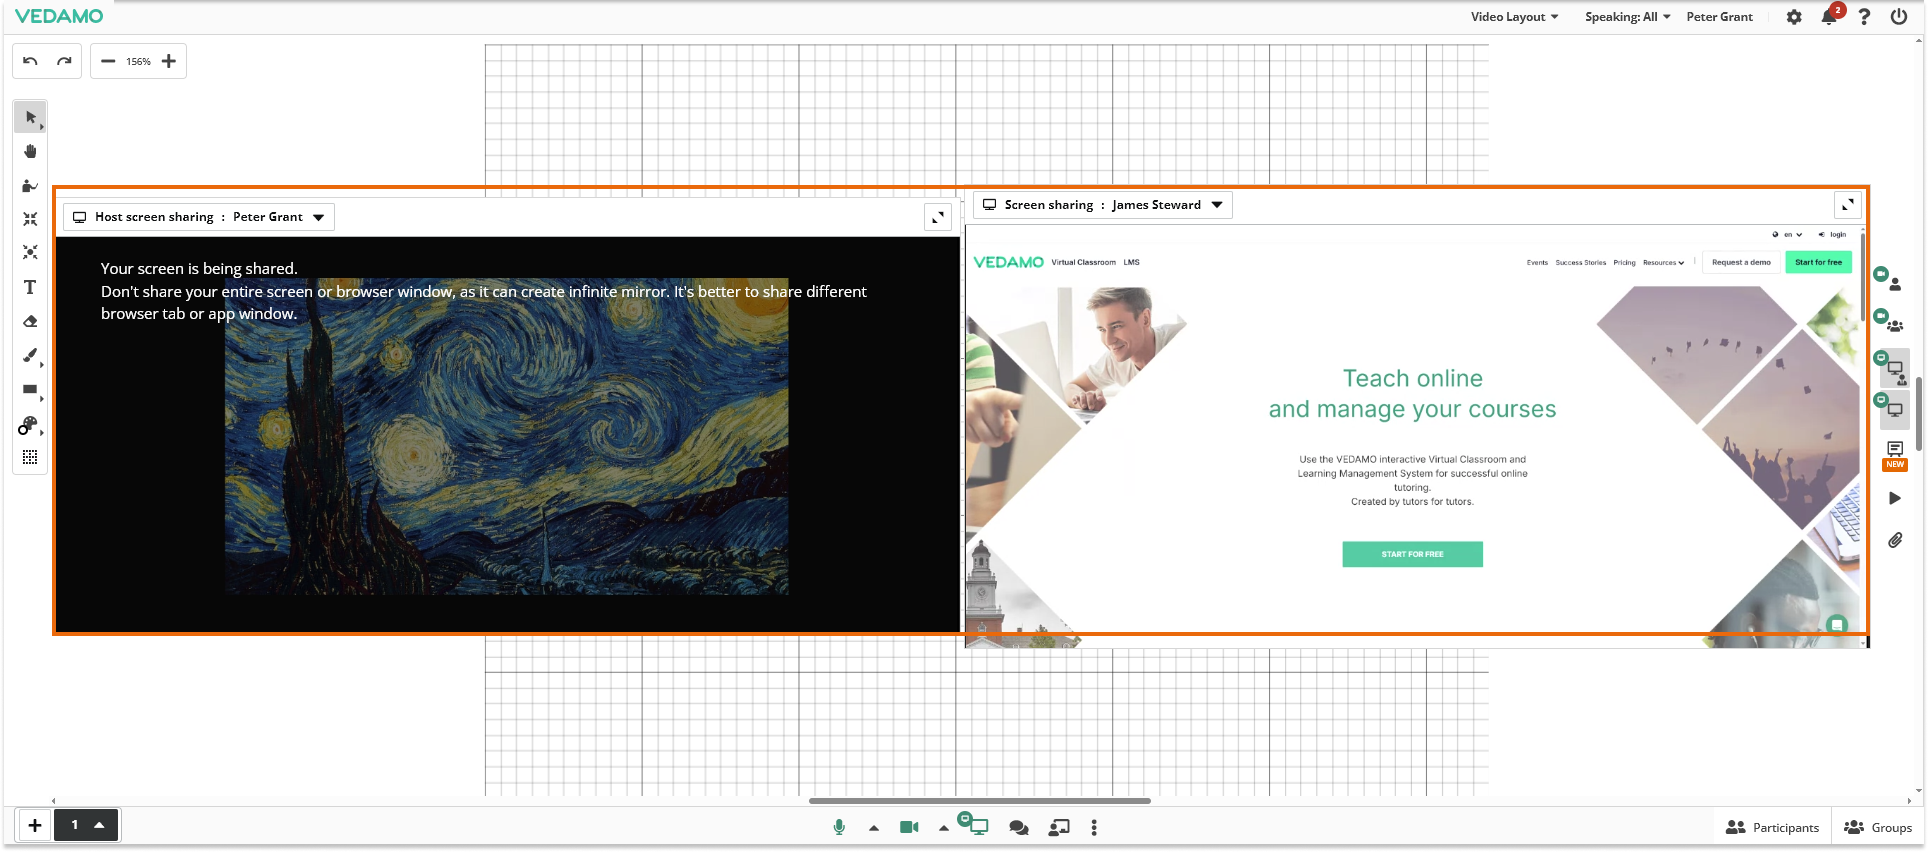
Two Shared Screens at the same time
In the VEDAMO Virtual Classroom, you also have the ability to share two screens at the same time. By default, this option is turned off but you can turn it on by clicking it in the Settings menu.
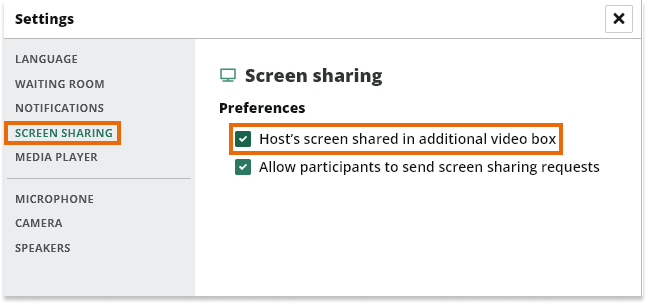
When selected an additional video box will appear on the right side of the screen which is for the host’s screen sharing. This option leaves the other screen-sharing box available for use. This allows the host to share their screen without stopping the participant’s shared screen so that participants can see two shared screens simultaneously – the host’s and one of the participants.
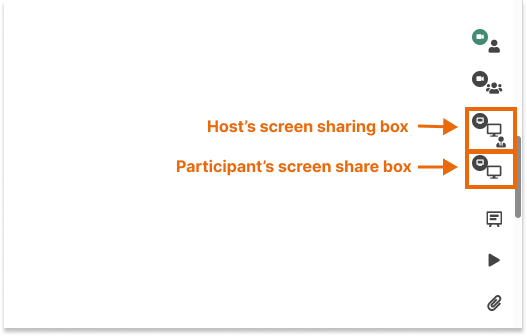
Bear in mind that the same user’s screen cannot be shared in both of the screen-sharing boxes simultaneously. This means that if the host is sharing his/her screen in the first box, once he selects himself/herself in the second box, the stream will automatically stop in the first and will continue in the second.
Share Screen in groups
If the participants are divided into groups in breakout rooms, the host could set a different shared screen for each group.
Only one shared screen is allowed at the same time in each group. For all other functional windows in VEDAMO Virtual classroom, check the full article for Virtual Classroom Functional Windows
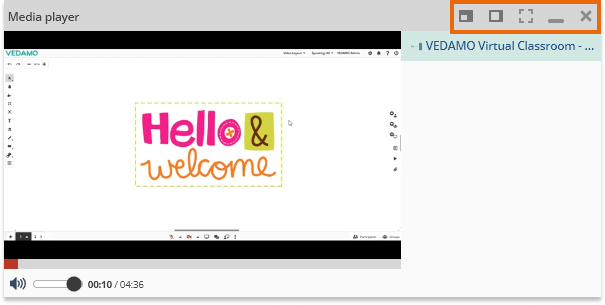
Individual Video Video Mosaic and Screen Share in a separate window
Teachers and admins now have the option to open the screenshare, participant, and individual video mosaic in a new window.
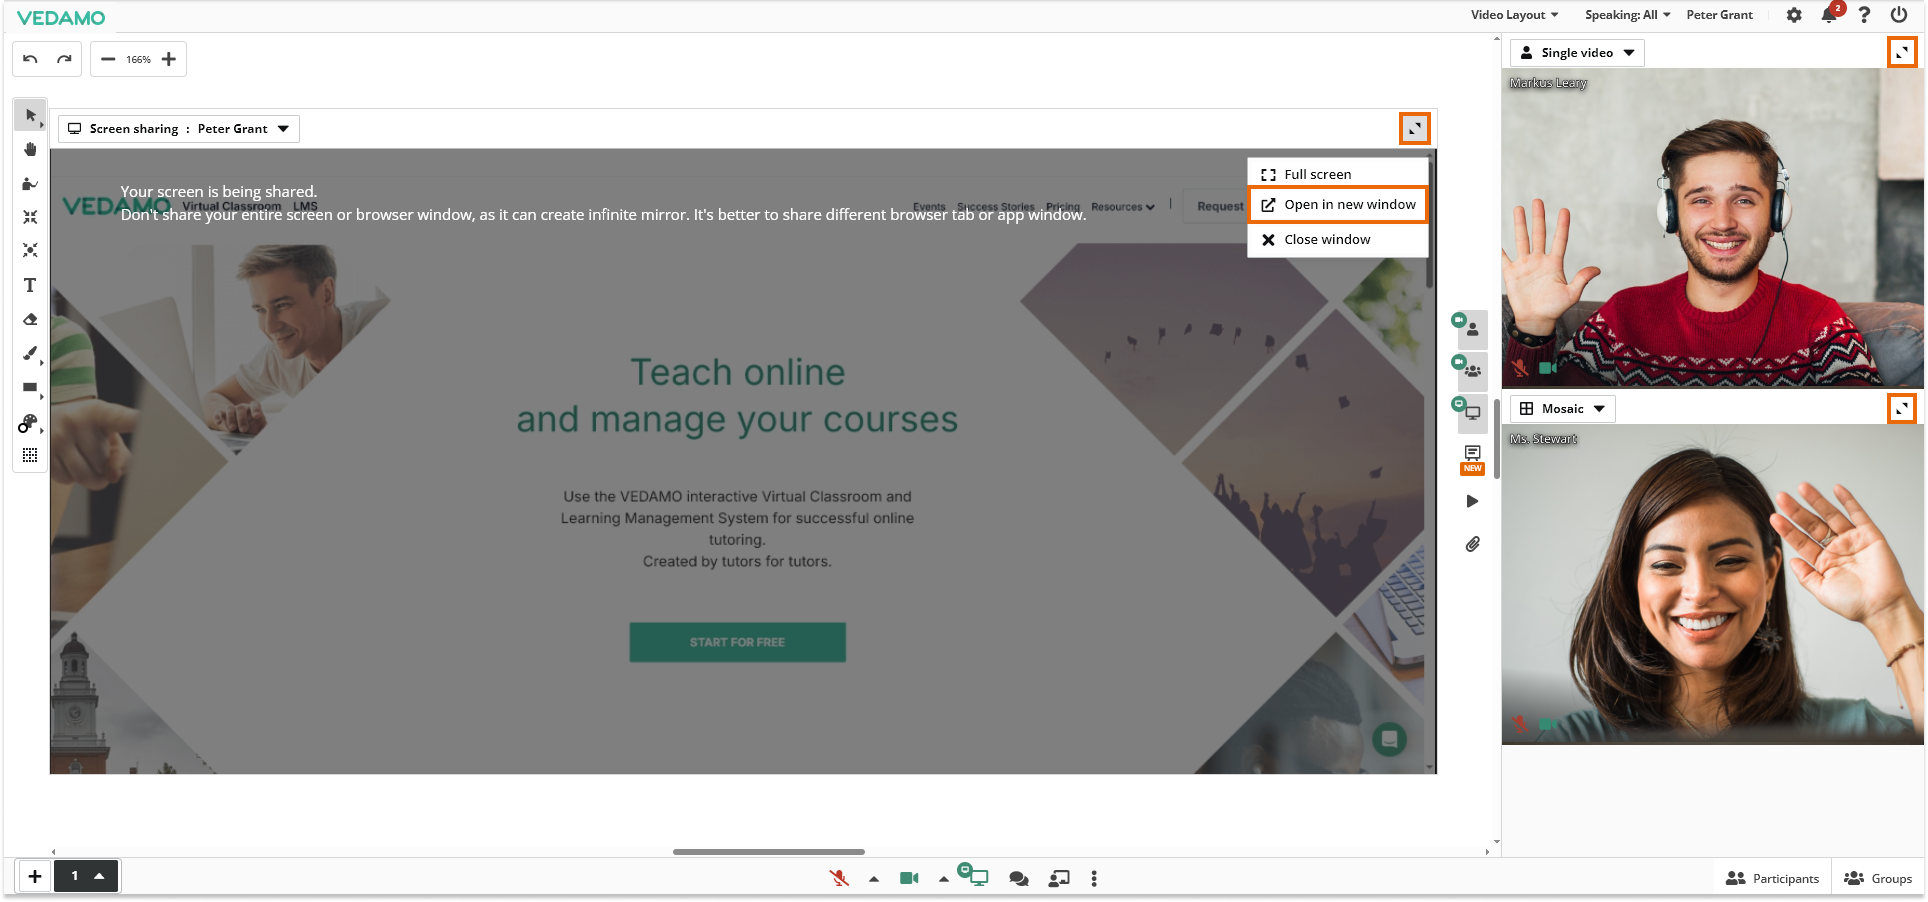
Note: This functionality works only for PC users.
To access this functionality simply click on the button (refer to the screenshot above) located in the top bar of the screenshare, individual, or participants video mosaic.
In the new pop-up window, you will be able to see the participants, teacher, or screenshare depending on which window you have selected.
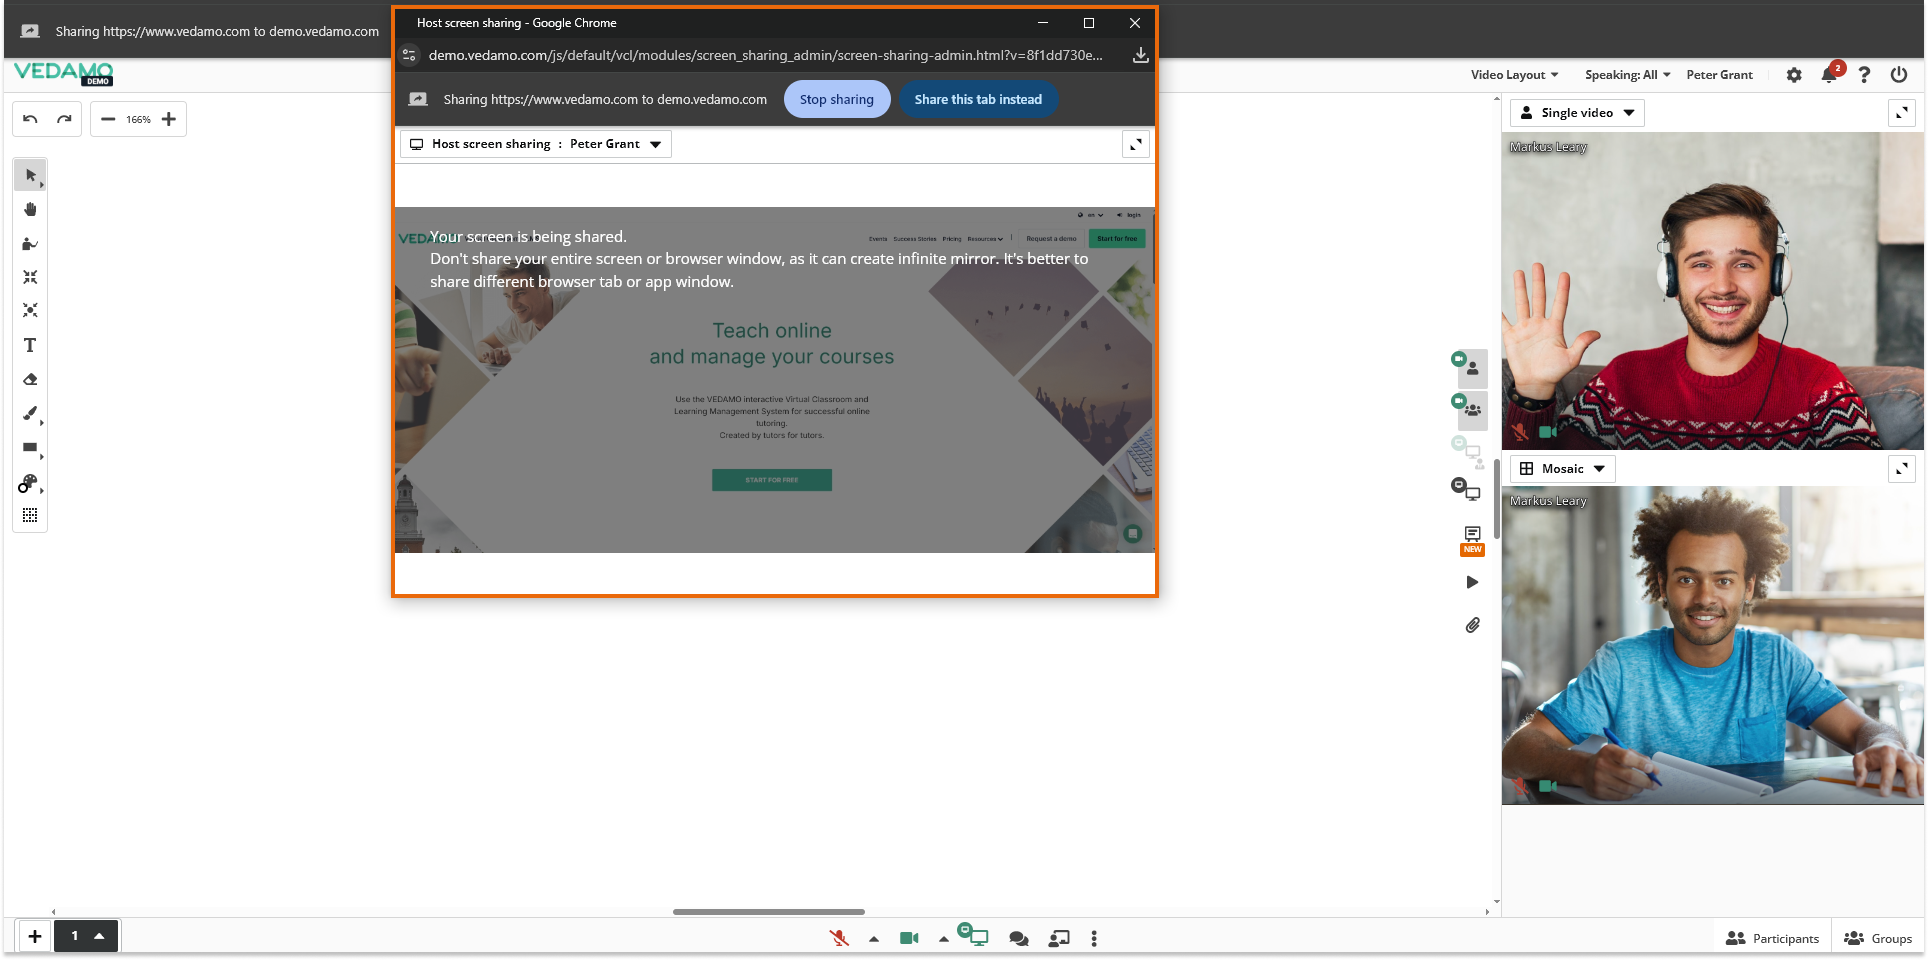
If you want to return the popped window to VEDAMO you can do that by clicking on the x button or from the button located in the top right corner of the window.