Table of content of Virtual Classroom Functional Windows:
1. Virtual Classroom’s Functional Tabs
The Virtual Classroom’s Functional Tabs are located on the right side as well as at the bottom of the screen. The ones on the right side resemble grey boxes, and each of them can be clicked in order to be expanded into a new flying box.
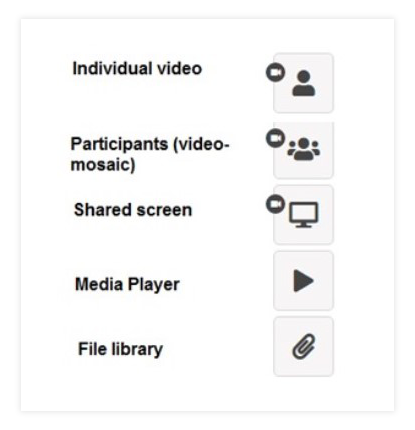
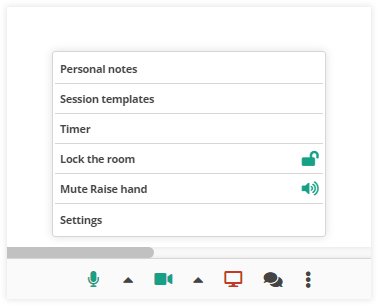
You can maximize or minimize the Functional Tabs, and also resize them if need be by selecting the resize button.
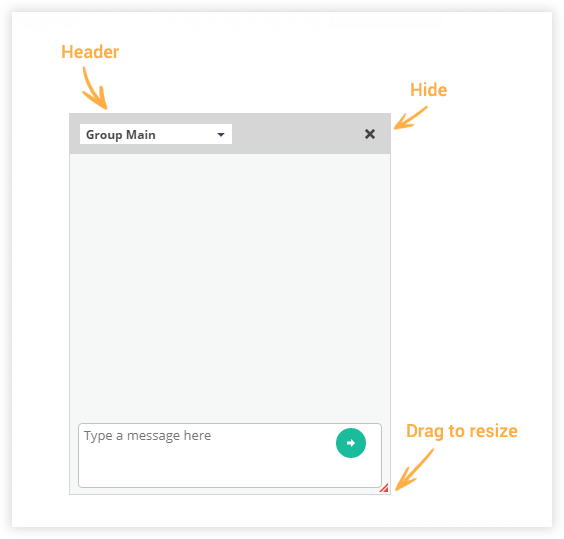
Move the flying boxes by clicking on the grey field at the top and drag them accordingly, enter the full-size view, and use the resize option by clicking on the down-right corner and dragging it.
2. Individual Video
The Individual Video is a single video box, separate from the video mosaic. By default, the host will appear in the Individual Video, but they can also choose any participant to be shown in it from the drop-down menu.
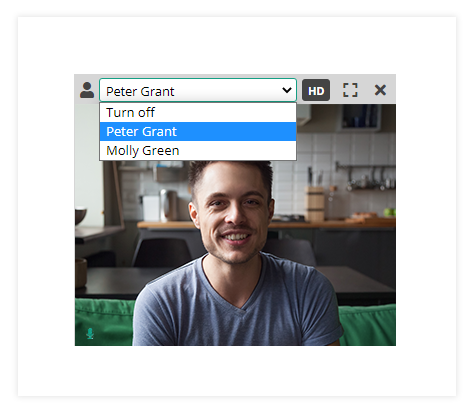
You can find more detailed information on how the Individual Video works by checking Individual video and Screen Share in the Virtual Classroom article.
3. Video Mosaic
In case there are more than two participants in the room, the Video Mosaic starts automatically. By default, it is turned on for everyone, but the host. Also, the host is the only one that can add or remove participants from the Video Mosaic.
You can find more detailed information on how the Video Mosaic works by checking Individual video and Screen Share in the Virtual Classroom article.
4. Screen Share
Any participant can request to share their screen (using the screen share button at the bottom menu), and this will result in a notification sent to the host. On the other hand, the host can request a particular participant to share their screen.
In every breakout room (group) there could be a different screen share set by the host. Also, there is a possibility two screen shares to be active at the same time – the host’s and one of the participants’.
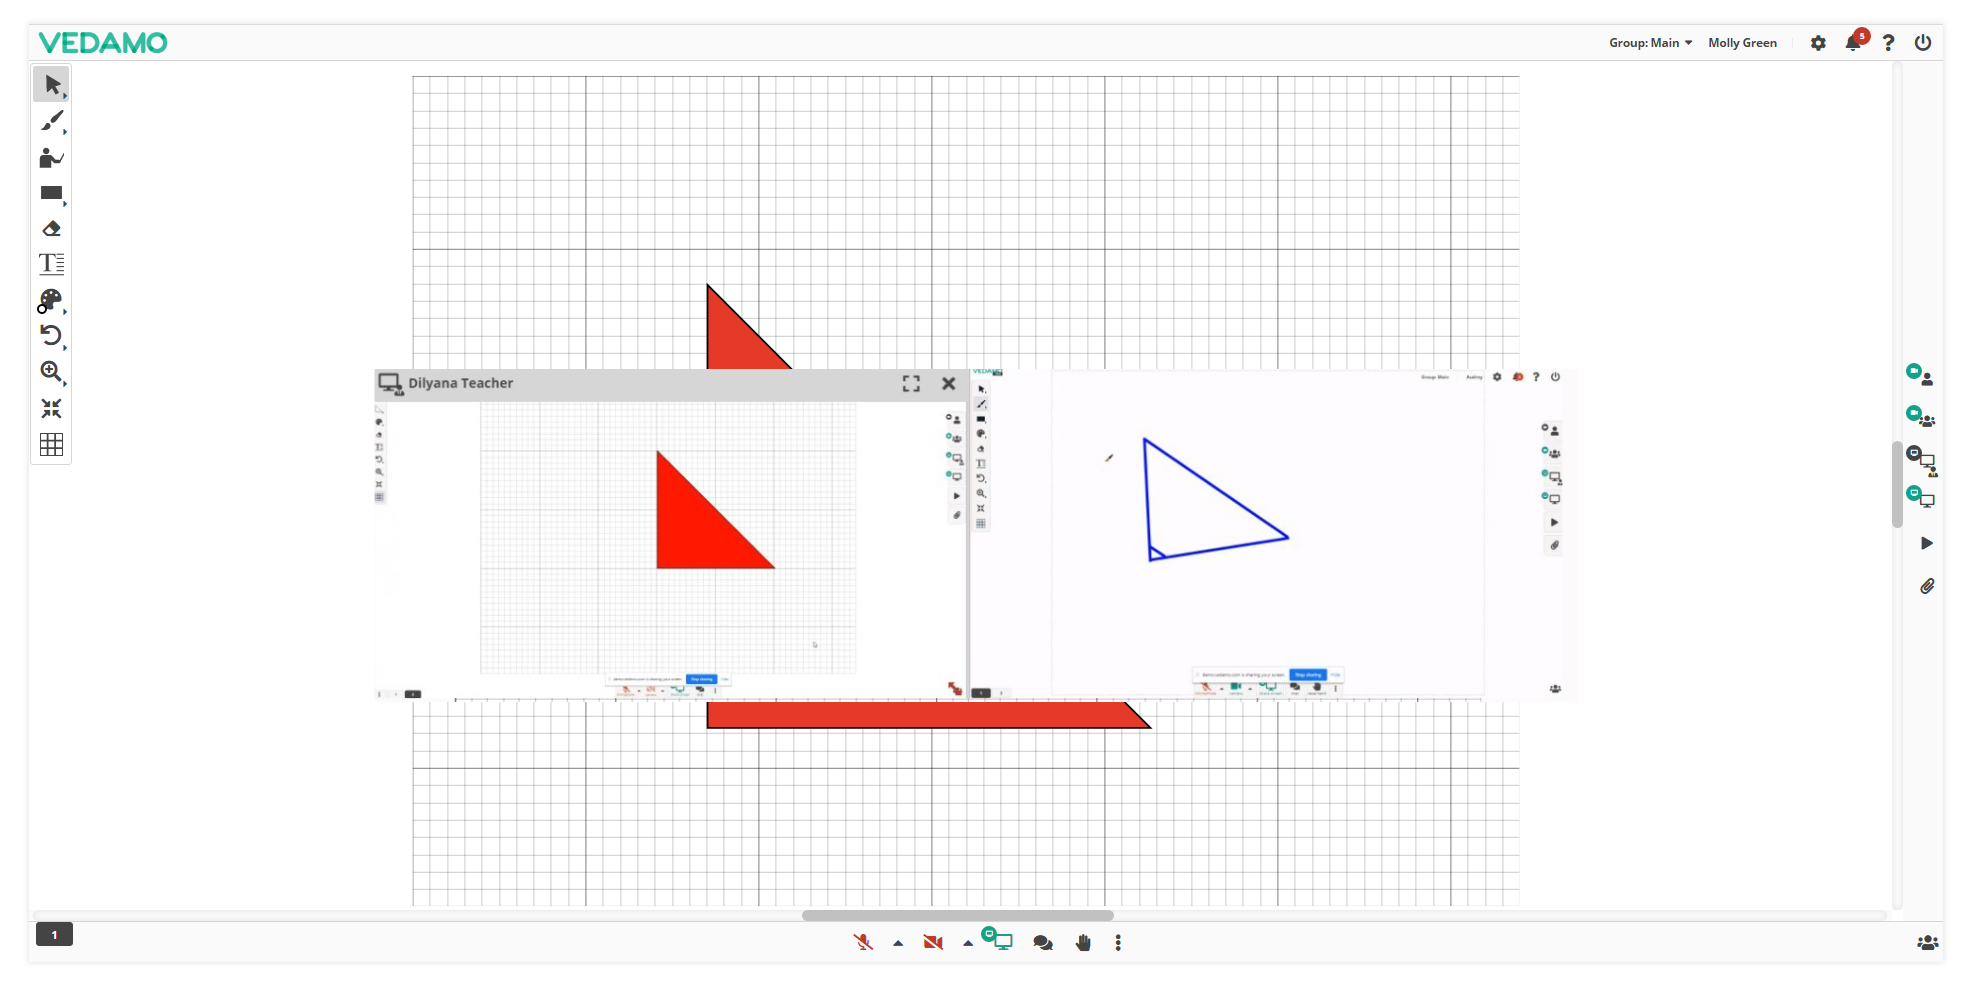
You can find more detailed information about how the Screen Share works by checking Individual video and Screen Share in the Virtual Classroom article.
5. Media Player
Using the Media Player you will be able to share videos from YouTube (YouTube links only), or play any uploaded video and audio files directly from your computer.
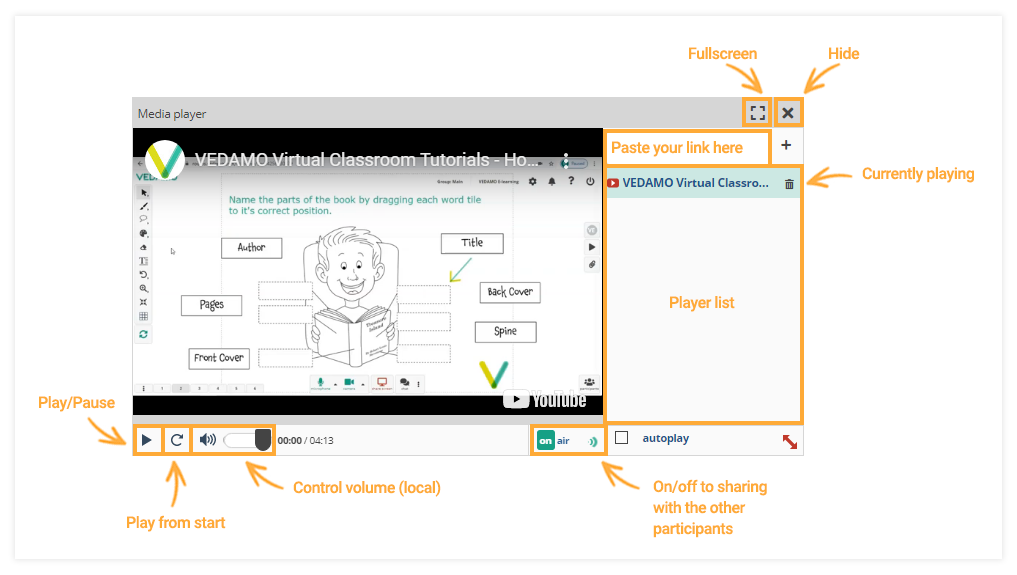
You can find more detailed information about how the Media Player works by checking Media player in the virtual classroom article.
6. File Library
The host of the room can upload files during or before the beginning of the session. This can be done by choosing files directly from your computer, from the File Library (if they were uploaded before the session), or from your Google Drive account.
Once uploaded, the files need to be imported on the whiteboard. To do this or to load them in the Media Player, select the file you wish to import and press the “+”/ “play” button (for video and audio files) in the Uploaded Files box.
You can find more detailed information on how the File Library works by checking Virtual Classroom File Library article.
7. Chat
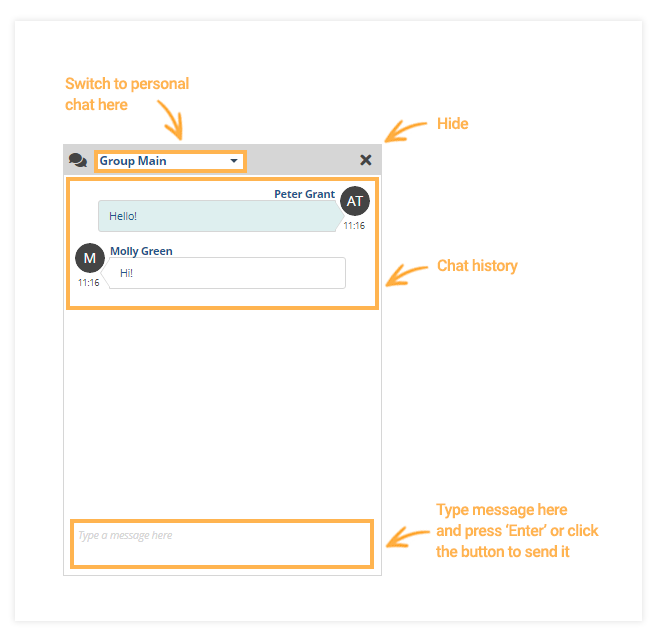
Participants can chat with each other in personal, group, or global (for the virtual room) chat. By default, you are in the Group Main chat. The Administrators will be able to see all chat conversations when they are reviewing the video recordings of the sessions.
Broadcast messages are part of the chat function, they can be used as a fast way to send a message(s) across several users/groups or all participants.
First, you will have to locate the “Chat” button next the “Broadcast messages” interface will be visible at the top of the box.
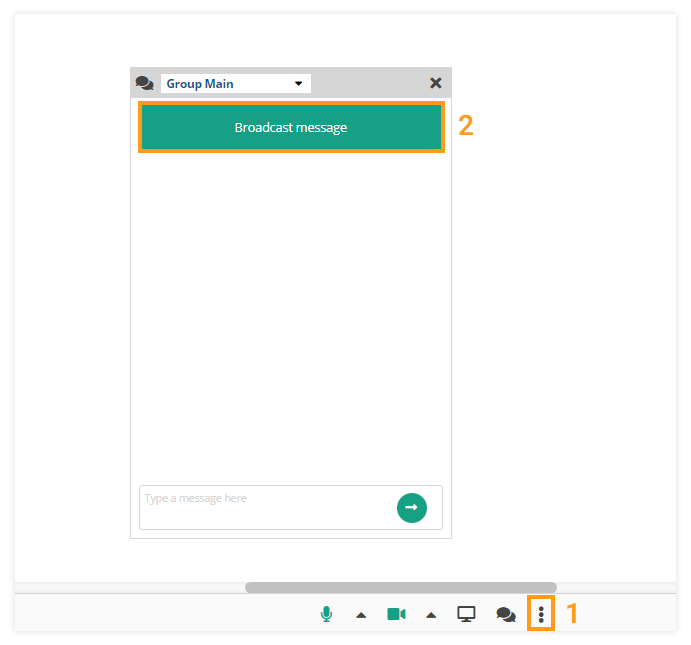
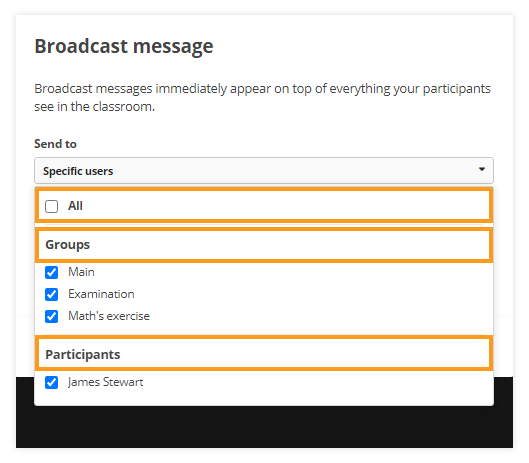
Then you will see a new window, where you can select to whom your message(s) will be delivered, you can select based on the created group(s), individual users, or all participants in the session. Until text is added to your message the “Sent” button will be greyed out, after adding it you can successfully send messages.
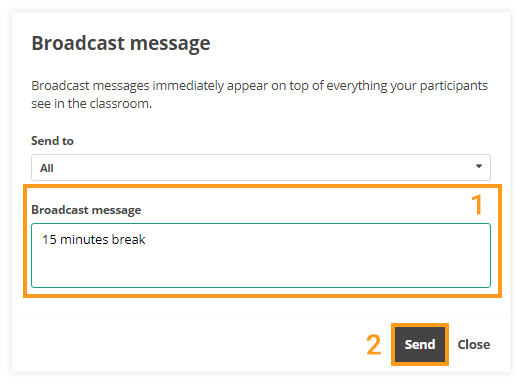
If you want to send messages to groups or individual/all participants that can easily be done via the drop-down menu.
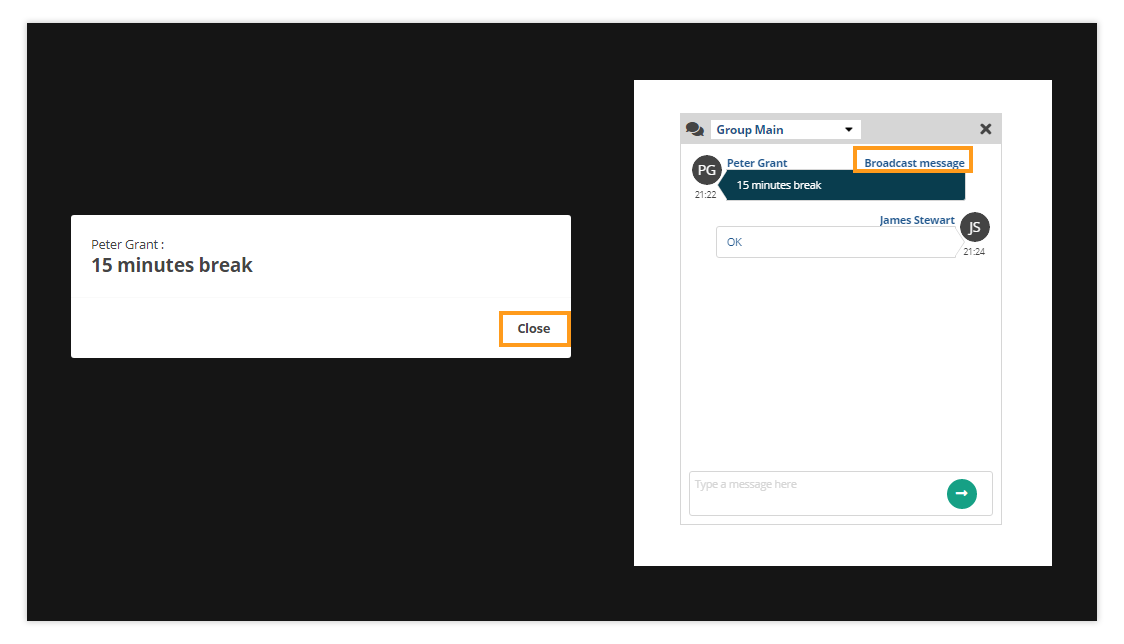
The notification will be displayed on the participant’s screen as a popup message that will have to be closed manually via the “Close” button. Also, the same text will be visible in the chat box.
Note: The “Broadcast messages” are accessible only by the teachers and admin roles.
8. Personal Notes
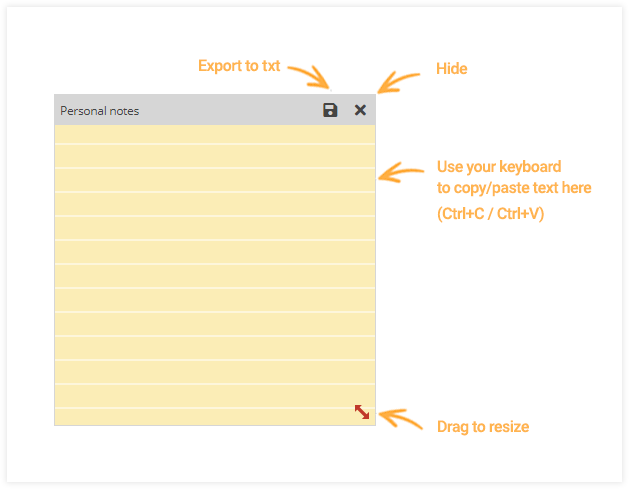
Every participant has a Personal Notes tool where they can take text notes during the session, and later export those notes as a TXT file. No one can read them, except you.
9. Camera Controls
All of the participants can turn on/off their camera by using the button at the bottom of the screen. By clicking the little triangle next to the camera icon, additional changes to camera settings can be set. Read more about Camera Controls in the virtual classroom

10. Sound Controls
All of the participants can turn on/off their microphone by using the button at the bottom of the screen. By clicking the little triangle next to the microphone icon, additional changes to sound settings can be set.
You can find more detailed information regarding the Sound Controls by checking Sound Controls in the virtual classroom article.
