Media player controls
In the Media Player in the Virtual Classroom, you will be able to share videos from YouTube or Vimeo (links only) or play any uploaded video and audio files directly from your computer.

Media player video box position
You can choose from three different positions: “Undocked, Dock, Fullscreen, Minimize and Close”.
Undocked – With this option, you will be able to move around your media player and resize the video box.
Dock – This option locks and centers your media player box on your whiteboard.
Note: You are not able to move/resize your media player box.
Fullscreen – This option puts your media player in Fullscreen.
Minimize – With this option, you can minimize the media player and have the audio play in the background.
Close – With this option, you fully close the media player. Meaning that if you click this button the video/audio that was playing will automatically stop.
Additional media player settings
These settings allow you to have more control over the media player. You can access the additional settings by clicking the three dots located in the button left corner of the media player box.
Turn autoplay ON/OFF – With this option, you can turn on or off the autoplay option.
Note: By default, autoplay is turned OFF
Playback speed – With this option you can decide the speed of the video/audio playing.
Note: This is not a general setting. Meaning if you change the play speed it will only apply for the currently selected video/audio it won’t affect other uploaded files.
Unmute/Mute participants – With this option you can mute/unmute participants’ microphones.
Automatic closure if no content is playing
You can now customize the behavior of the media player when the video is paused or not playing. To do that go to the settings and then select the media player tab. In the new tab you can see the option that allows you to tell the media player what to do when there is no video playing or it is paused.
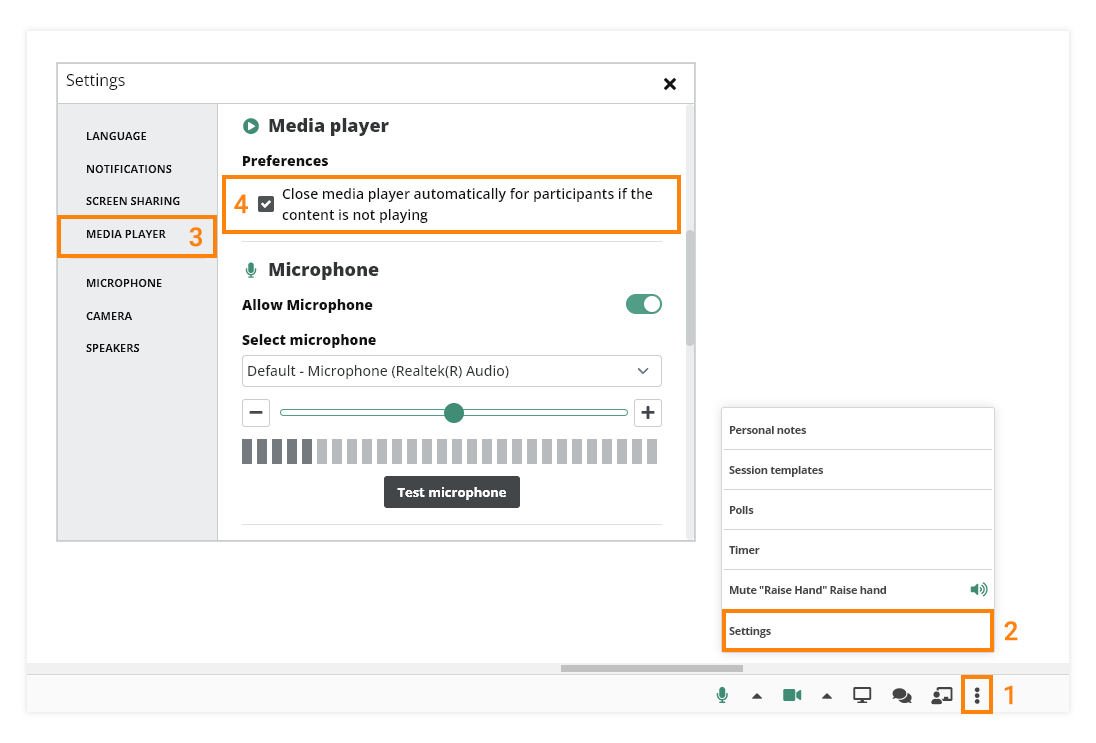
Note: This option works only for PC and tablets/iPad in landscape mode.
If the option is enabled the media player will automatically close for every user using a PC or tablet/iPad.
If the option is disabled the media player will stay open for users using a PC or tablet/iPad when the video is paused.
Adding a YouTube video to the media player
In order to add a video from YouTube to the player, you can either copy the link directly from the video’s address bar

or use the Short link from the YouTube Share option.

Then paste the link into the media player:

Play your uploaded video or audio files
To play media files from your computer you need to upload them first. Put them in the Upload Window click the “Play file in the player” button and they will be automatically added to the Playlist.
Note: Be careful of Copyright issues for the media files you are uploading.
Arrange Media Playlist
When you import a new audio or video file, they are added to the bottom of the Playlist. You can arrange the list by dragging (see the screenshot for the correct place, where you have to position your mouse in order to rearrange the files) the desired item up or down with your mouse.

Delete video/audio from the Media Playlist
Select the video you want to remove from the list and click on the trashcan icon.

Adding a Vimeo video to the media player
In order to add a video from Vimeo to the player, you have to copy the link directly from the video’s address bar.
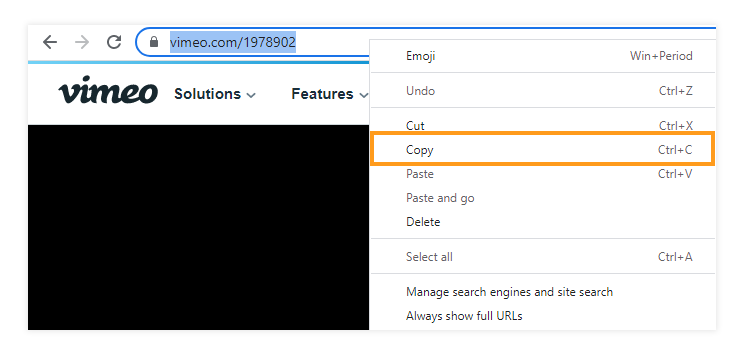
Then paste the link into the media player:

Note: Some Vimeo videos don’t support the option to increase their playback speed. If the Vimeo video doesn’t support increased playback speed the section will be grayed out and you won’t be able to turn it on.